When receiving survey data, you may have the location for pits as a single point with the details as attributes. Using the Service Chamber Many you can quickly create the pits as 3d objects.
With just a Model of points/polygons, and attributes to define the dimensions (width, depth, rotation), multiple chambers can be quickly created. Points and polygons defining different pit types can be in the same Model. The type of chamber created will be determined by the relevant attributes.
BIM=>Trimesh=>Create=>Service Chamber Many
To create a single chamber, visit this post: Service Chamber
The first step is to set the default information used for all chamber types;
- Select the Data to use (Model of points),
- Set the Wall and Floor thickness,
- Enter a prefix for the resulting Trimesh Models.
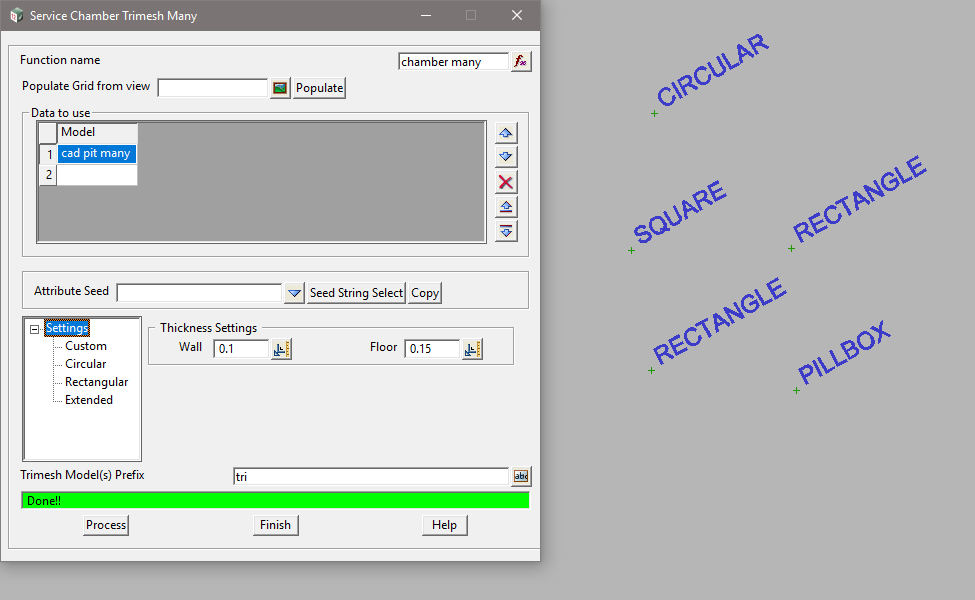
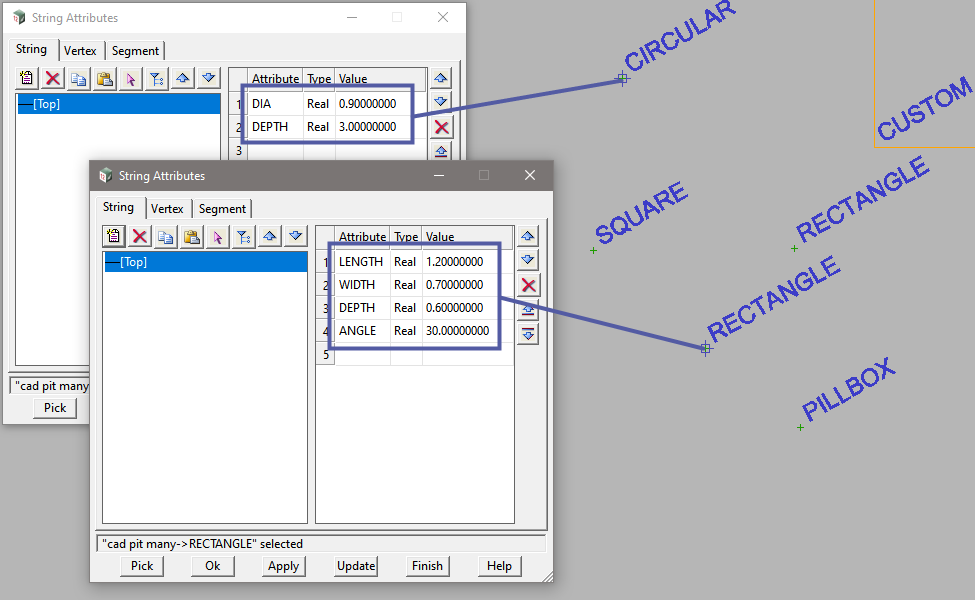
Points defining different pit types can be in the same Model. The type of chamber created will be determined by the relevant attributes.
Common attribute names, such as DEPTH, can be used for all types.
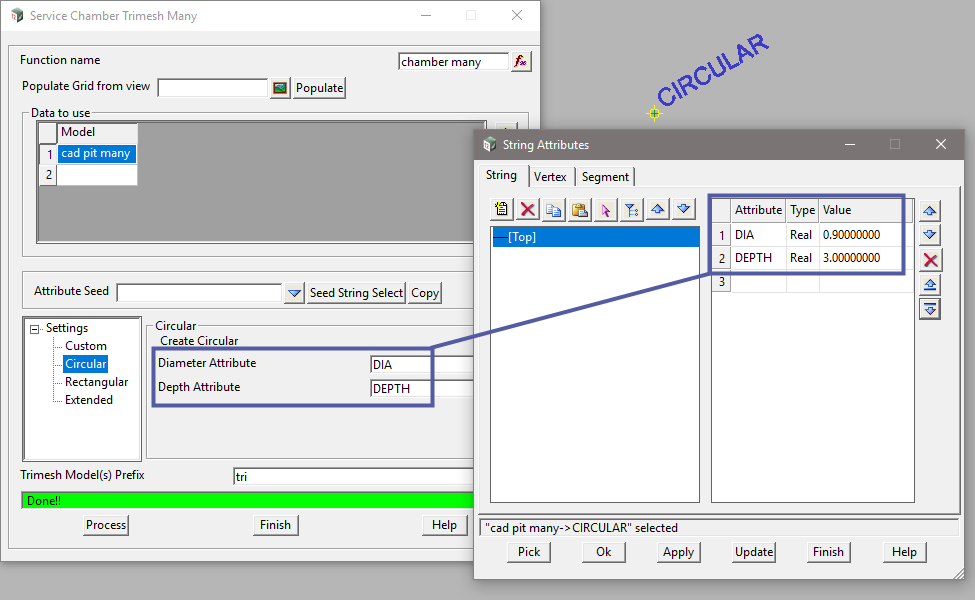
Circular
- Diameter: Internal diameter of chamber
- Depth: Internal depth of chamber
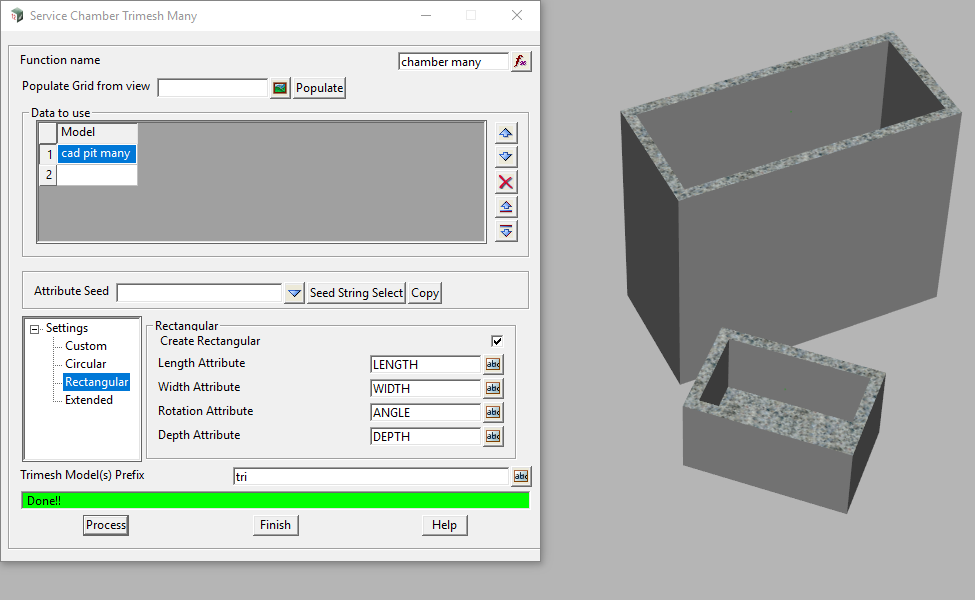
Rectangle
- Length: Internal length of chamber
- Width: Internal width of chamber
- Rotation: Rotation angle for chamber
- Depth: Internal depth of chamber
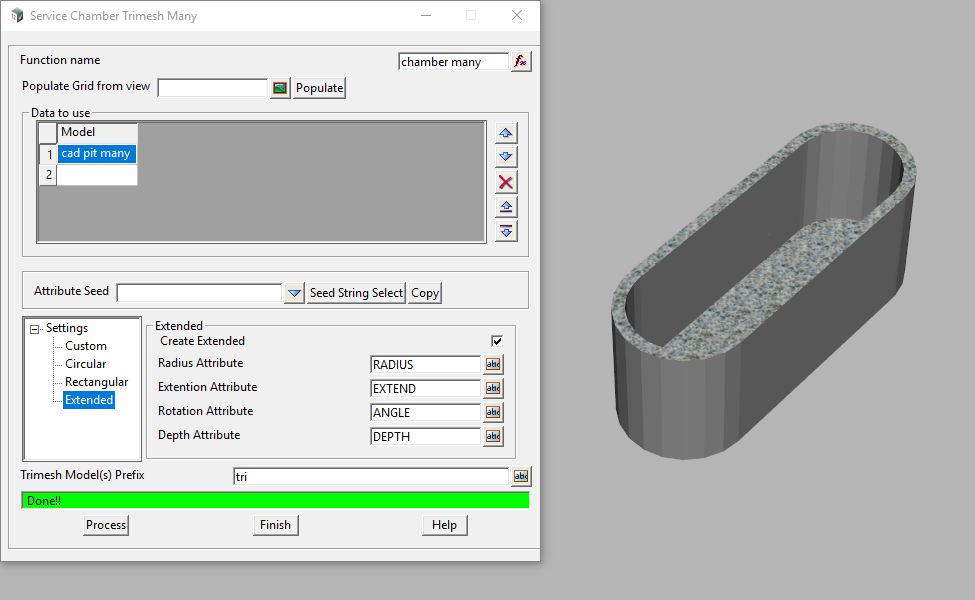
Extended
- Radius: For curved ends
Also defines width of chamber (ie. 2 x Radius = Width) - Extension: Length of tangent between arcs
- Rotation: Rotation angle for chamber
- Depth: Internal depth of chamber
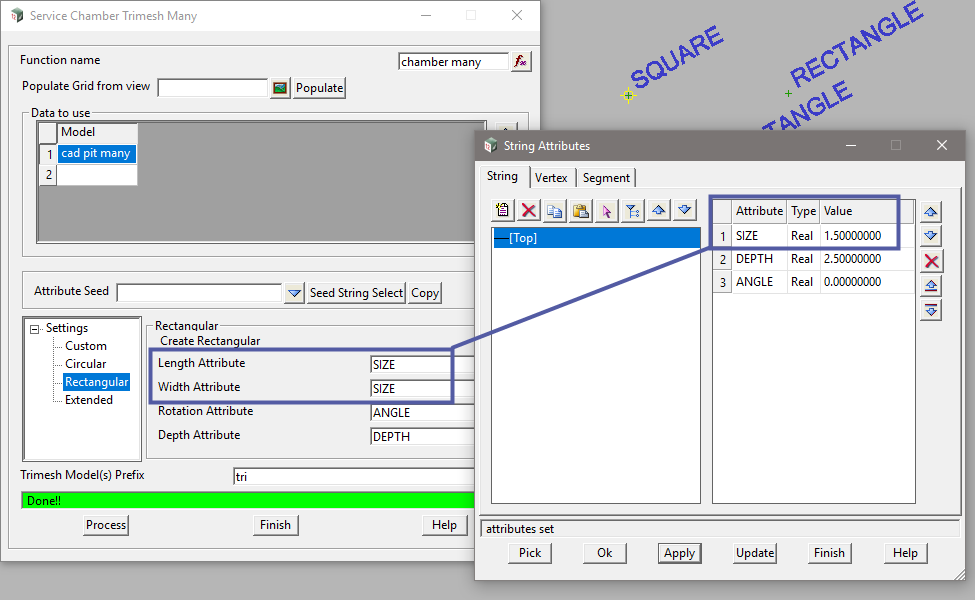
Square
For square pits, the same attribute can be used for the Length and Width values.
Things to remember;
- When defining attributes, consistent naming must be used for all points.
- Trimesh Model Prefix: An asterisk ‘*’ is not required. If used, the model will not be created.