This option is used to add a shared tin from another project, into this project.
Continue down the page to see the Add Shared Tins Panel options.
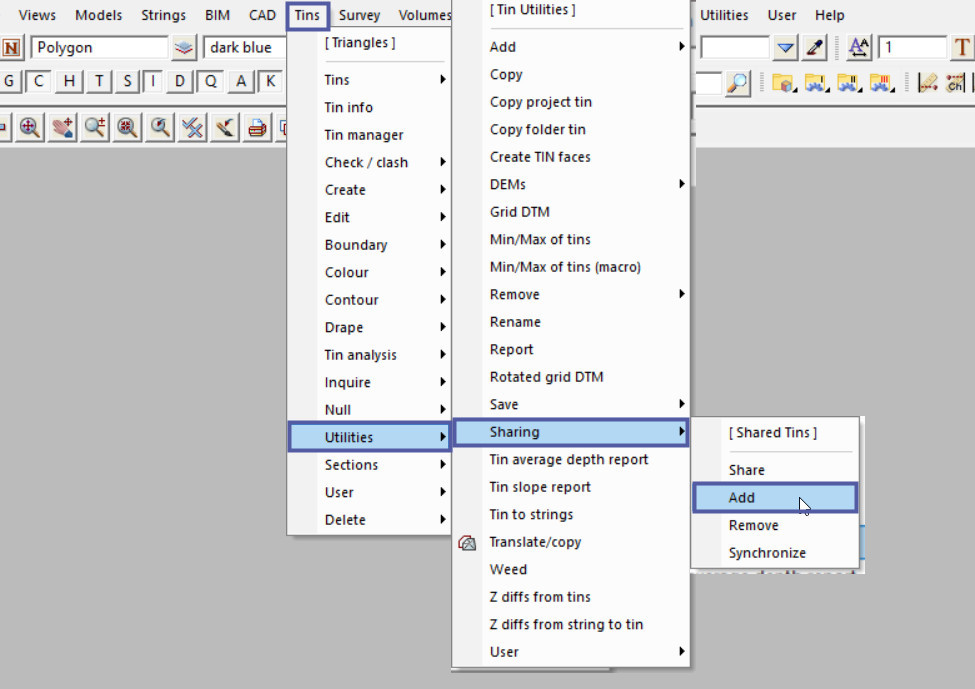
To view the Add Shared Tins Panel, Use: Tins => Utilities => Sharing => Add

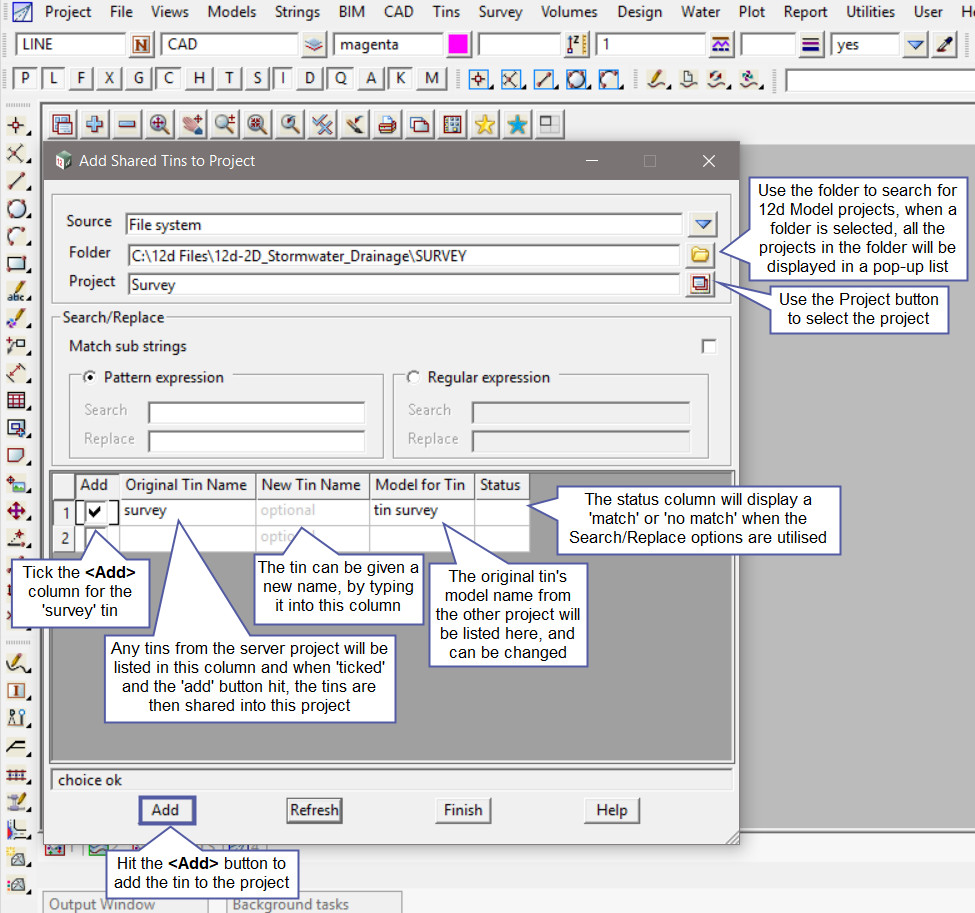
Once the panel is opened, use the folder option to search and find the project required. When a folder is selected all the projects will be displayed in a pop-up list, or double click on the project folder in the explorer panel and it will be added to the panel automatically.
The Search/Replace options are used for renaming tins from the server project to be different (maybe another naming convention is required) in the current project. The ‘Match Sub Strings’ option if ticked the Search expression is used to match against part of each tin name, if not ticked the Search expression is used to match against the whole tin name.
- The Pattern Expression if set on, then the Search and Replace fields are used to modify the tin names. Pattern expressions include the standard wild card * and wild character !.
- The Regular Expression if set on, then the Search and Replace fields are used to modify tin names.
If not using the ‘Search /Replace’ option then any tins in the list can be manually ticked, and a ‘New Tin Name’ or ‘Model for Tin’ added in the column provided. The Status column will display a ‘match’ or ‘no match’ when the Search/Replace options are used.
Hit the <Add> button to add the tin to the project.

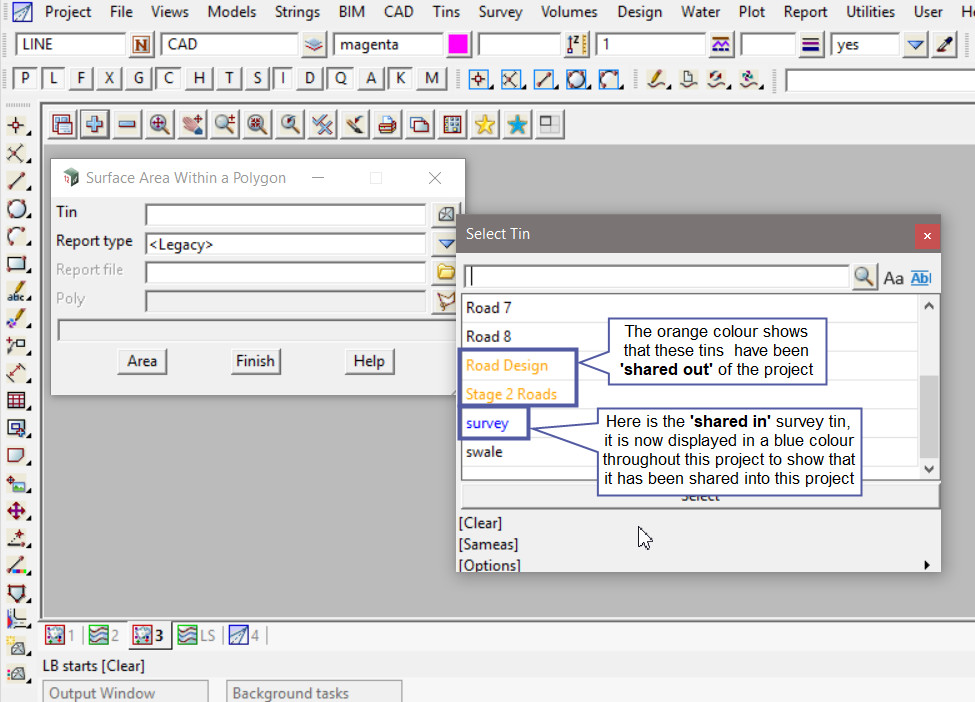
As shown below the ‘survey’ tin will now be displayed as ‘blue’ in colour throughout this project to tell the user/s that it has been shared into the project.
The tin name will be blue when the tin is selected in any tin drop down list panel.
The orange listed tins are the tins that have been shared out of this project. In this example they are the Road Design Tins made available for the Stormwater Engineers.
