This option is used to create a super triangulation, i.e. a Supertin. Using other triangulations and combine them together based on a list order of the Tins selected.
Continue down the page to see the Create Supertin Panel options.
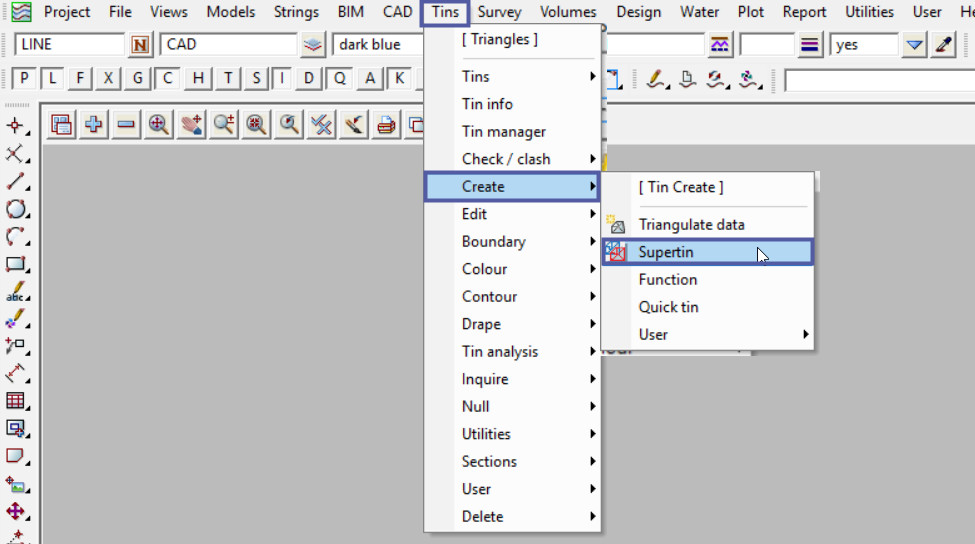
To view the Create Supertin Panel, Use: Tins => Create => Supertin
Definition
A Supertin is designed to combine existing triangulations to form the equivalent of a merged triangulation without having to completely re-build a merged model and triangulating it. This means that there are less steps in creating a Supertin so a lot less time is required and there is less opportunity for errors.
If any of the triangulations that make up the Supertin are modified, then the Supertin is also instantly modified and updated.
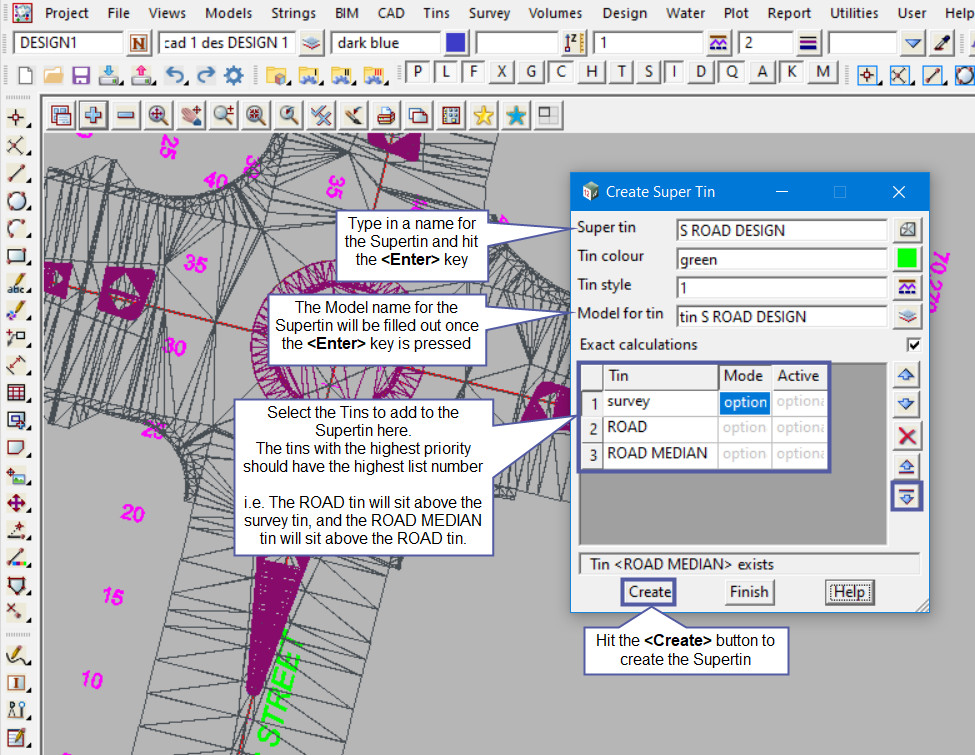
Firstly type in the Super Tin name, this must be unique for the project. Then hit the <Enter> key and the Model name for the Super Tin will be automatically filled out. This is very good house-keeping to ensure that the tin and model names have a naming convention.
The Tin Colour set here is the colour of the Supertin when sectioning through it.
When displayed on the plan view each tin making up the Supertin is drawn in its own colour.
The Tin Style is the linestyle used for drawing sections through the tin on the section view.
The Exact Calculations tick box if ticked when a Supertin is created or a tin in the Supertin is modified, extra calculations are done for the Supertin so that it can be used for Exact Volumes and in Visualisations. If not ticked, no extra calculations are done and the Supertin can only be used for sections, i.e. end area volumes and site lines.
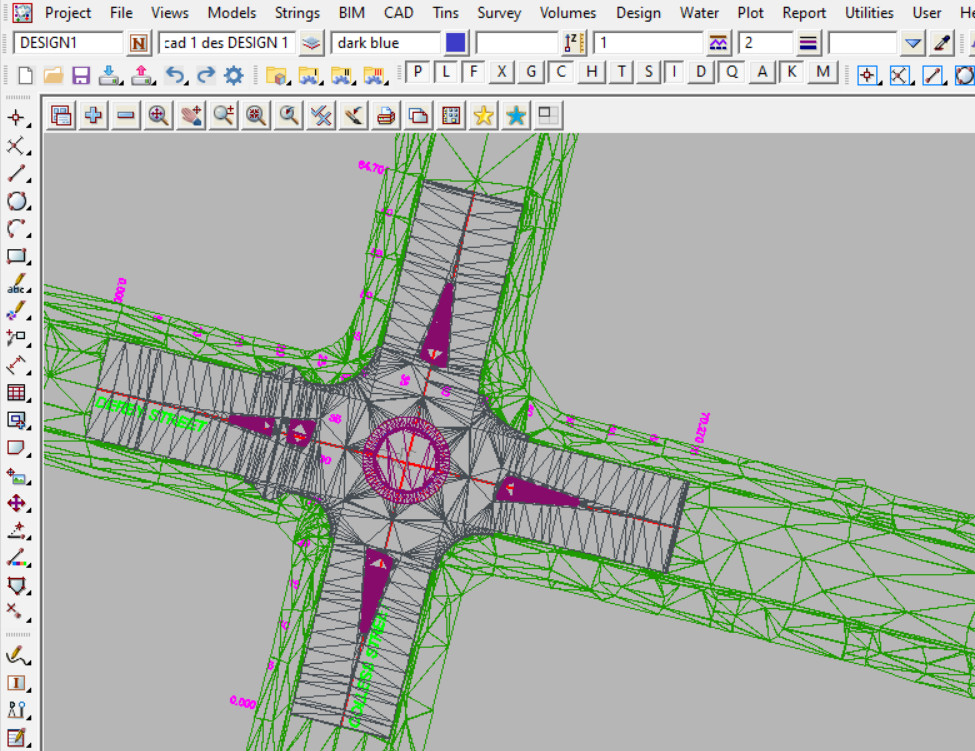
Here the Supertin has been created and as shown the three tins can be clearly seen, but the tins with a higher list number are shown above the other tins.
The Tins are shown:
- The Survey tin (green) is only shown where the other tins do not occur, as it has the lowest priority,
- The ROAD tin (dark grey) is shown everywhere but for where the ROAD MEDIAN tin (purple) is, as it has the highest priority.
Tin Grid
Where the list of Tins are selected, there are also options available for each tin.
The Mode option, has two choices:
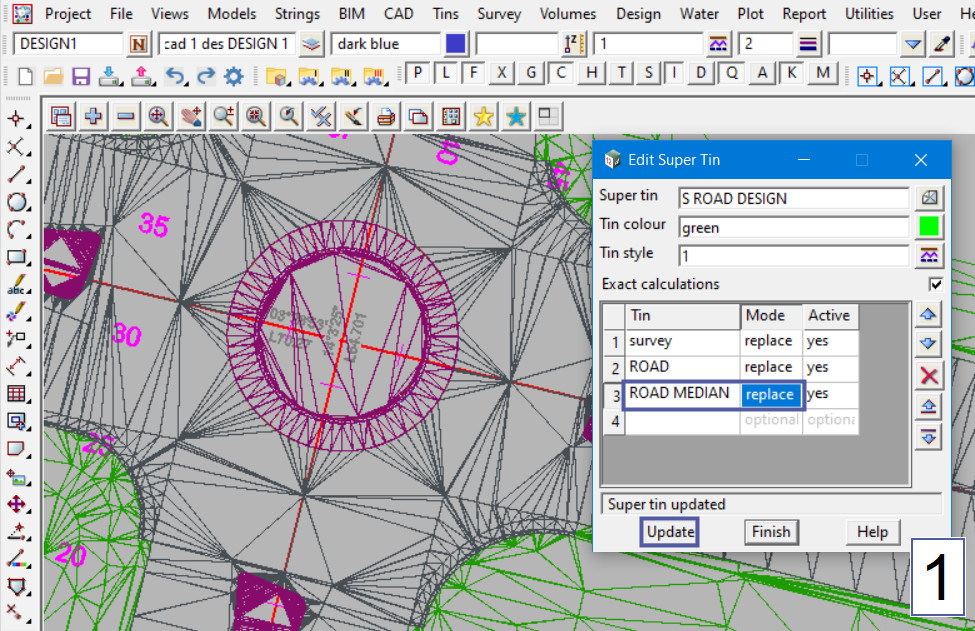
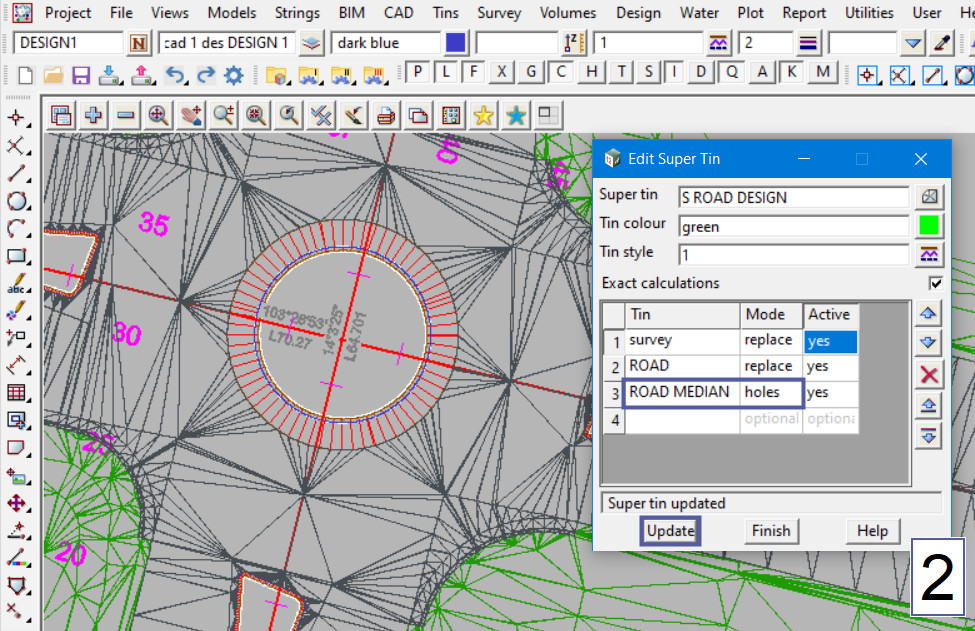
- Replace – wherever this tin exists, use it instead of any tins of a lower number in the Tin column. This is the default option.
- Holes – wherever this tin exists, all parts of the tins of a lower number in the Tin column, are removed, so wherever this tin exists it will create holes in all the tins of a lower number in the Tin column.
i.e. An example would be for a tin of many gully pits, holes would be punched in all the tins at those locations. Basically nulling the parts of the triangles from the lower numbered tins.
Note: Remember to hit the <Update> button to update the Supertin.
The Active Mode, has two options:
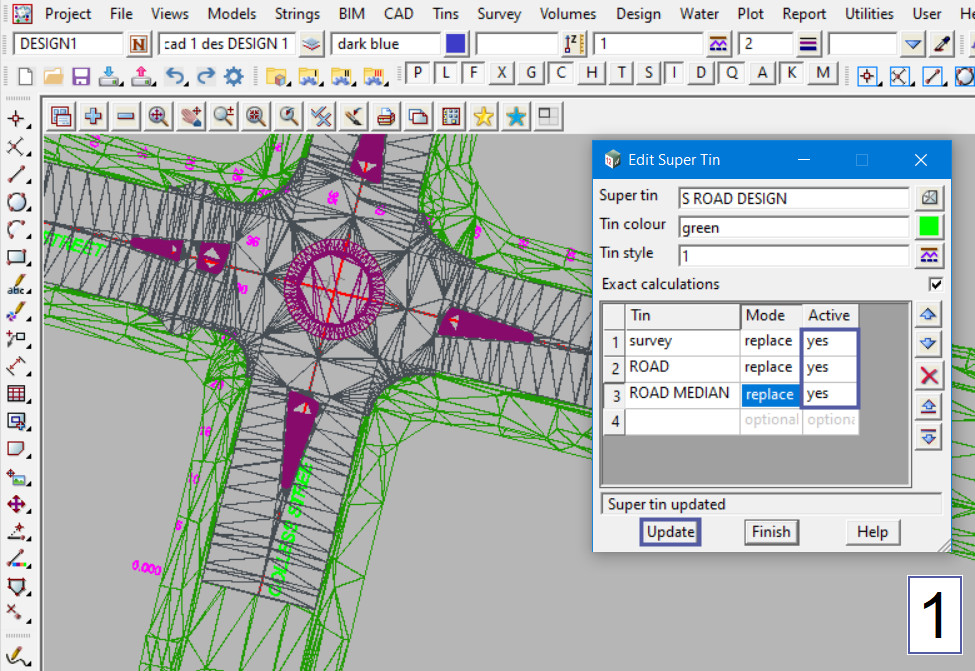
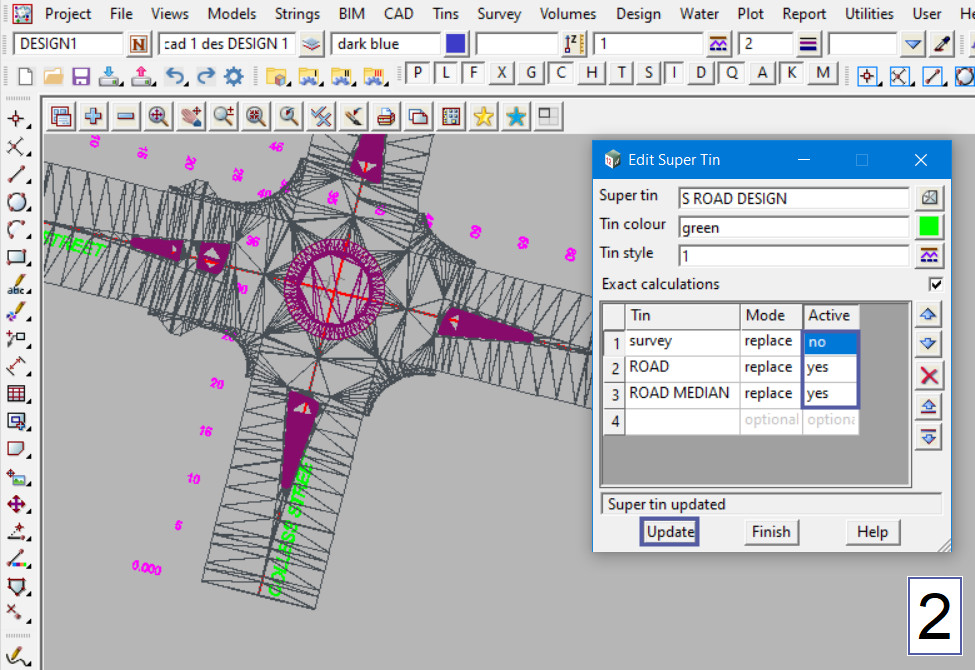
- Yes – if Yes then the tin is included in the Supertin.
- No – if No then the tin is not included in the Supertin. The tins can be turned on and off without having to remove them from the Tin list.
The example below shows that the ‘survey’ tin is active and included in the Supertin in the first image, then it has been made inactive in the second image, and it has disappeared from the Supertin.
Note: Remember to hit the <Update> button to update the Supertin.
If you would like to learn more about the Retriangulate Supertin Panel and how to utilise it,
Visit this post: Retriangulate Supertin
