Nearmap
This post is to outline the method used to import an image from Nearmap into 12d Model.
First step is to log into Nearmap using your account username and password.
Once in Nearmap you will need to locate the area of interest you wish to capture.
To capture this area of interest use the capture (camera) icon on the left hand side toolbar shown below.

This will then pop up the capture panel shown below.
Make sure you select the correct projection for the image, this should match the coordinate system of your data in 12d Model.
An example is GDA94 MGA Zone 56.
Tick on “Include georeference file”. This makes sure a .JGW file is created that stores the correct coordinates of the JPEG image captured. See image below.
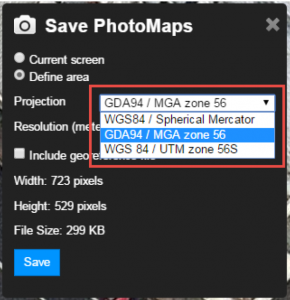

Now select “Save” to save the selections and capture the image. You will need to browse to the Windows Path you wish to save the image (.JPEG) and location file (.JGW).
These file will then be created in a ZIP file. You will need to use your own software to unzip this folder so you can access the .JPEG and .JGW file in 12d Model.
NOTE: Due to the long names produced on the “*.JPEG” & “*.JGW” files from Nearmap. Users have in some instances had difficultly loading/viewing the data into 12d. This is often causes because the Project Directory structure, name of the project, model used for the Raster etc is larger than the 256 characters allowed by Windows. This is a limitation of Windows, so please consider renaming the files to something managable.
12d Model
To import the .JPEG and .JPW files into 12d Model go to Strings => Rasters => Create
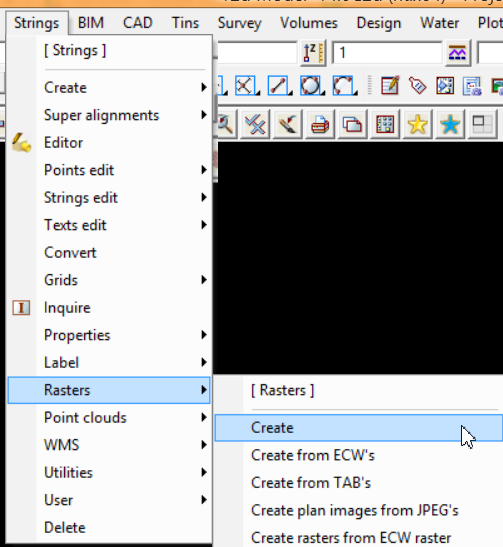
You should see the Create Raster Element panel pop up.
From the Source Image tab select the Image Format drop down menu and select JPEG.
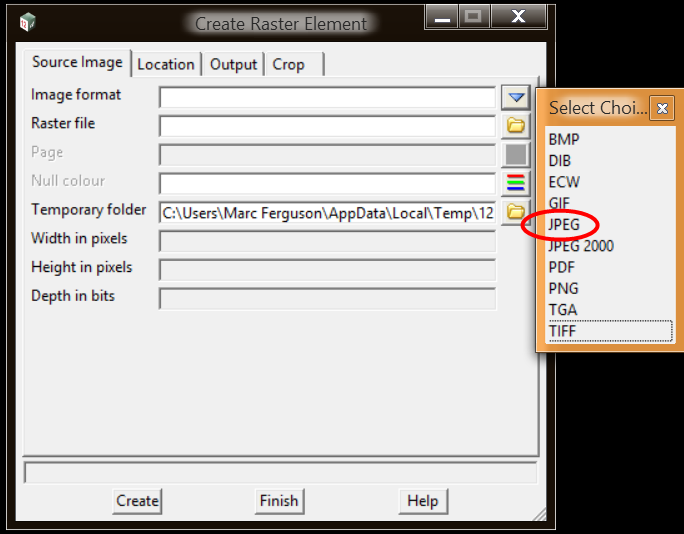
Now go to the Raster File in the panel and click on the folder icon on the right hand side. This allows you to browse to the .JPEG file that you unzipped earlier from Nearmap.

Once the JPEG file is selected you should see the Width in pixels, Height in pixels and Depth in bits populate. If it doesn’t populate and goes red in colour you will need to re-select the JPEG file.

Now comes the Geo-referenced part of the image. Go to the Location tab.
On the Data Format drop down menu select JGW (ESRI World).
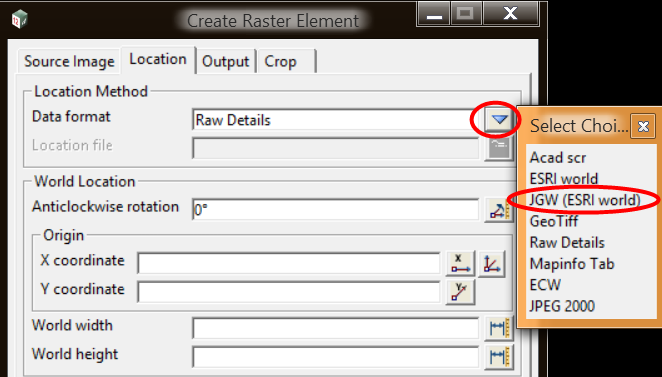
Once the Data Format is selected this allows the folder icon to be active for the Location File. From here you need to select the folder icon and browse to the .JGW file.
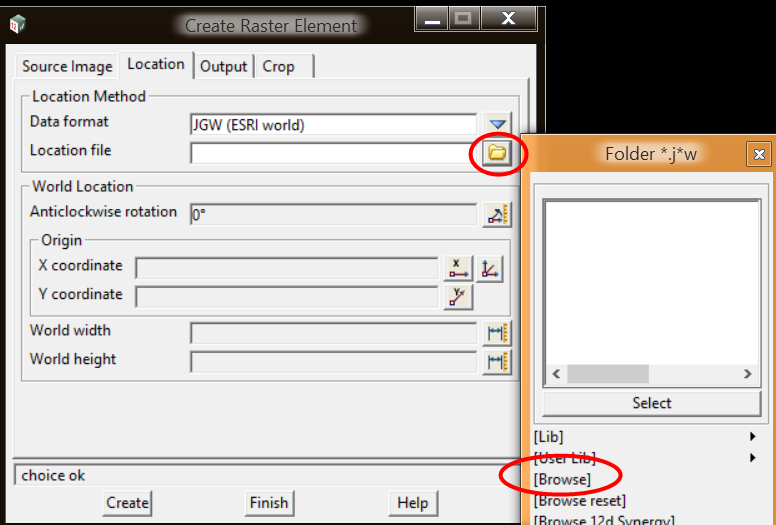
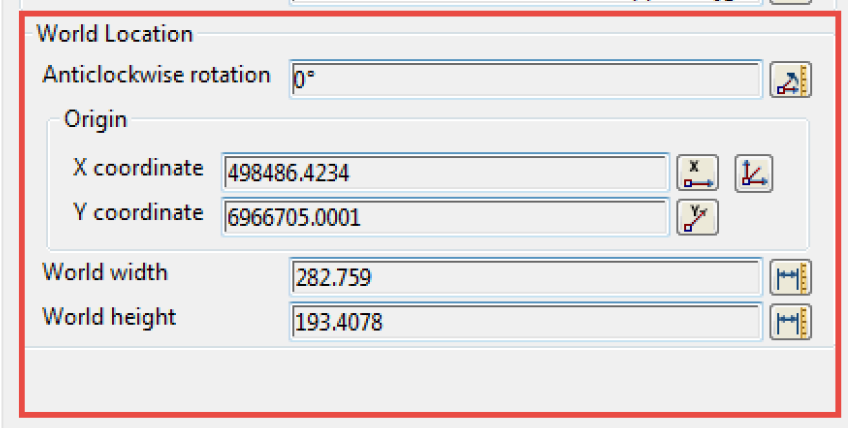
Once the JGW file is selected you should see the World Location parameters auto populate. If you don’t then you will need to re-browse to the location file (JGW) and re-select it again.
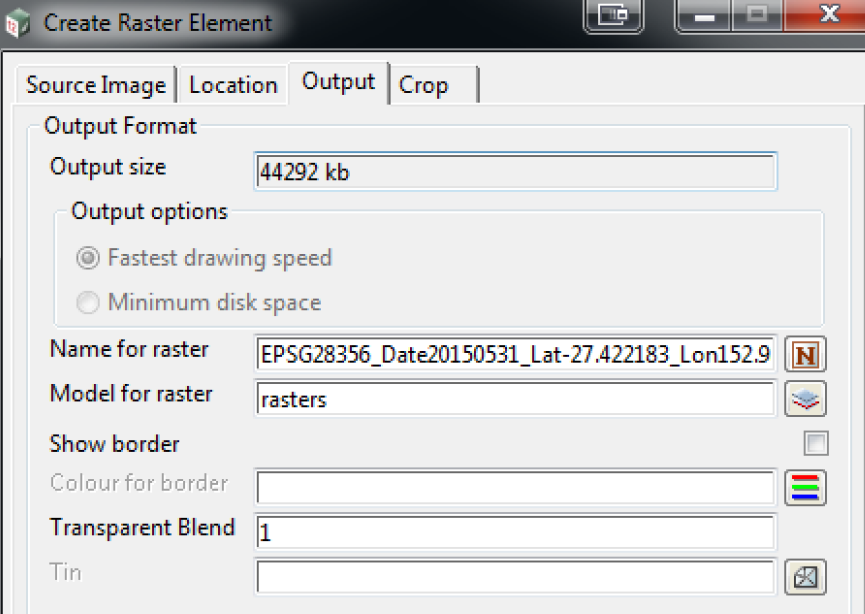
Now go to the Output tab.
From here you can type in a Model for the raster. I’ve used the default of “rasters” shown below.
There is also the option to make the raster transparent using the Transparent Blend. If this is set to 1 (one) then it is NOT transparent. If it is set to 0 (Zero) then you won’t see the raster at all. So a number between 1.5 to 1.7 is usually recommended if you want to make the raster transparent.
You also have the option to drape the raster to a TIN if you have the Visualisation module.
Now select “Create” to complete the inserting of the raster.
Don’t forget to go to the + icon and turn the rasters model on!