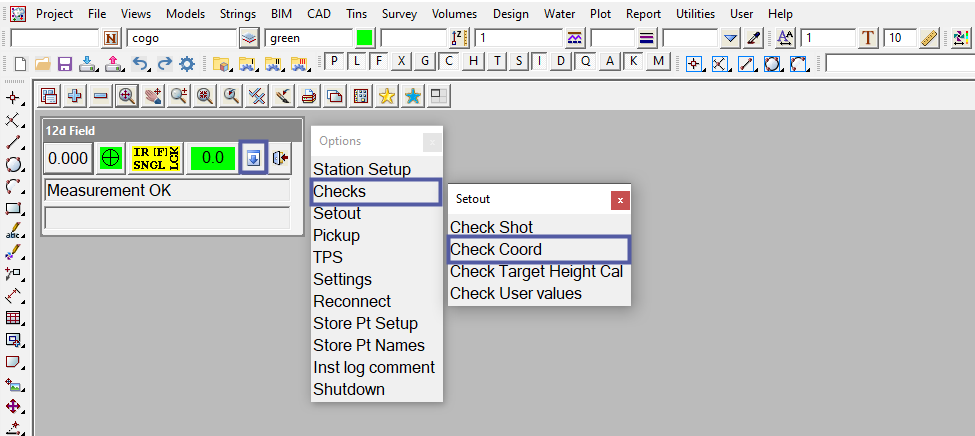
The Check Coord option opens the 12d Field – Check Coord panel. This panel is used to check the integrity of the current station setup by taking a measurement to a known point.
Continue down the page to see the 12d Field – Check Coord panel options.
To view the 12d Field – Check Coord panel, Use: Show Options => Check => Check Coord

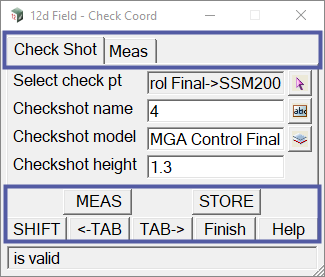
The 12d Field – Check Coord panel consists of 2 tabs titled Check Shot and Meas. The panel also has several buttons that are common across many 12d Field panels.
To learn more about these buttons,
Visit this Post: Common Function Panel Buttons

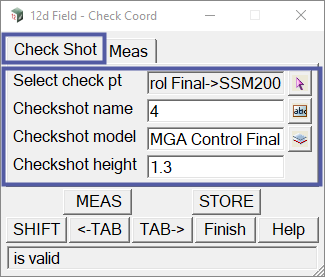
The Check Shot Tab on the 12d Field – Check Coord panel is used to select the point that the user is going to measure too. Once the user has selected the point, the Checkshot name and Checkshot model fields are populated with the Vertex id and Model name of the selected point. The user must also specify the target height in the Checkshot height field.

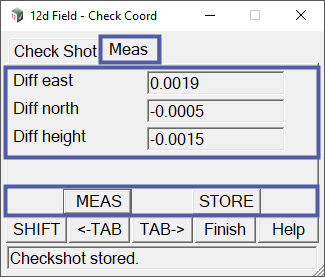
The Meas Tab on the 12d Field – Check Coord panel shows the residual difference between the known point and the measured shot taken. The residuals will appear once the shot has been taken. The shot can be measured and stored using the MEAS and STORE buttons.
MEAS – The <MEAS> button when pressed, will command the instrument to take a measurement using the current selected measurement style(s).
STORE – The <STORE> button when pressed, Stores the check shot measurement to the current field file. This does not store the measurement to a model like the <STORE> button of the Common Function Panel Buttons.

The 12d Field – Check Coord panel will display the residual difference for Easting(E), Northing(N) and Height(Z). If you wish to know your residual horizontal distance and horizontal angle then it is best to use the 12d Field – Check Shot panel.