This option is used to import a Raster Image into the project. The Raster Image may be an aerial photograph, or an image for a textured surface.
Continue down the page to see the Create Raster Element Panel options.
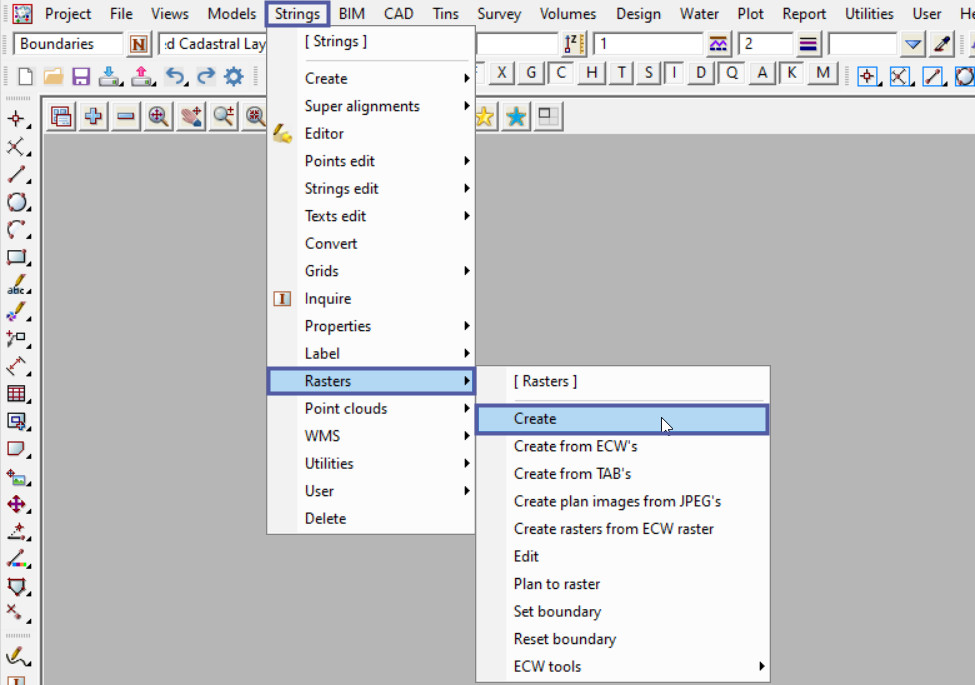
To view the Create Raster Element Panel, Use: Strings => Rasters => Create
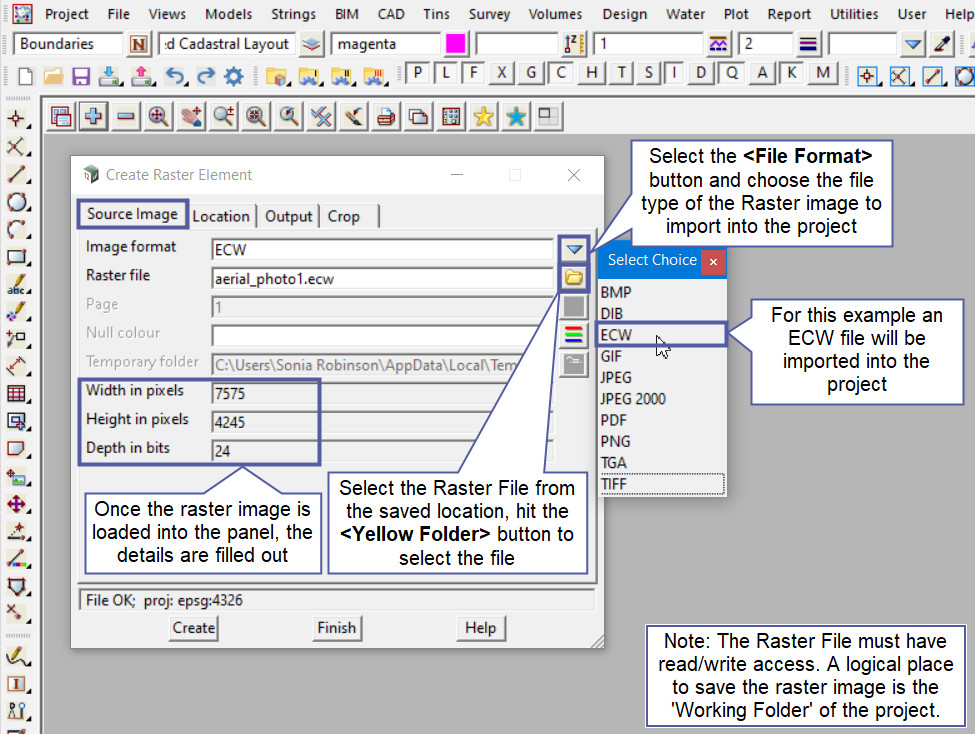
Source Image Tab
Select the <File Format> button and choose the file type of the Raster Image to import into the project. The available options for a Raster Image are:
- BMP, DIB, ECW
- GIF, JPEG, JPEG 2000
- PDF, PNG, TGA, TIFF
For this example the image is an ECW file.
Hit the <Raster File> button and select the ECW file from the location it is saved to. A logical place for the raster file to be saved is the ‘working folder’ for the project.
The Width and Height in pixels and Depth in bits are loaded into the panel after the file is selected.
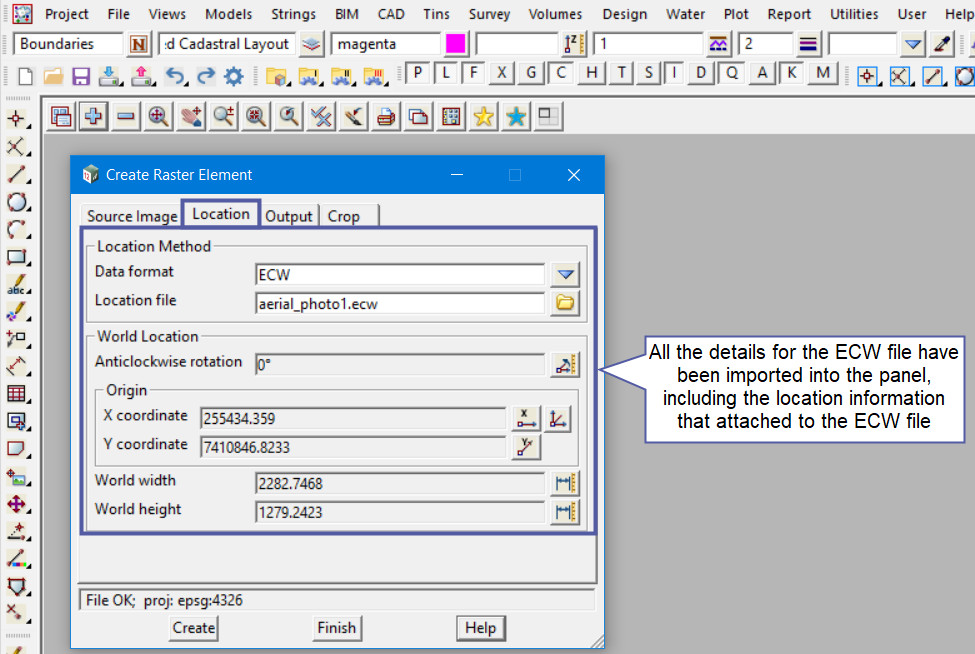
Location Tab
The ECW format used in this example has supplied positioning data (location data) for locating the image in world units, some of the other file formats do not, please see other examples for more information.
Here the Location Method, and World Location details are filled in for the ECW file selected.
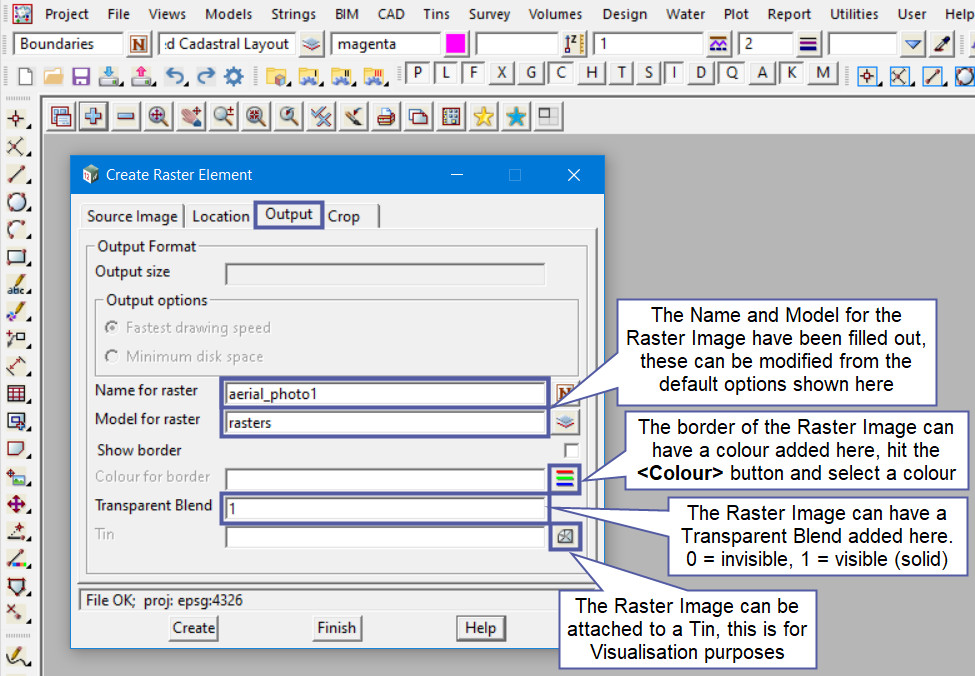
Output Tab
The Output Format is not an available option for an ECW file.
The Name and the Model for the Raster are filled out by default, these can be modified if required. For this example the defaults will be used.
If a border is required for the Raster image, tick the ‘Show border’ option to activate it, and hit the <Colour> button and select a colour from the drop down list.
The Transparent Blend option is where a raster image can be seen other than just in a solid form, i.e. visible. The transparency can range from a a value of 1 = visible (cannot see through) to 0 = invisible (cannot see the raster image).
The value of 0.5 = The raster image will be see through. Try some of the values out, they can be easily edited by using the ‘Edit Raster Element’ panel. If you would like to view the post for the Edit Raster Element panel and how to utilise it,
Visit this post: Edit Raster Element
Select the <Tin> button and choose the Tin to apply the Raster Image to. The raster image will be draped onto the selected tin, this is utilised in Visualisations.
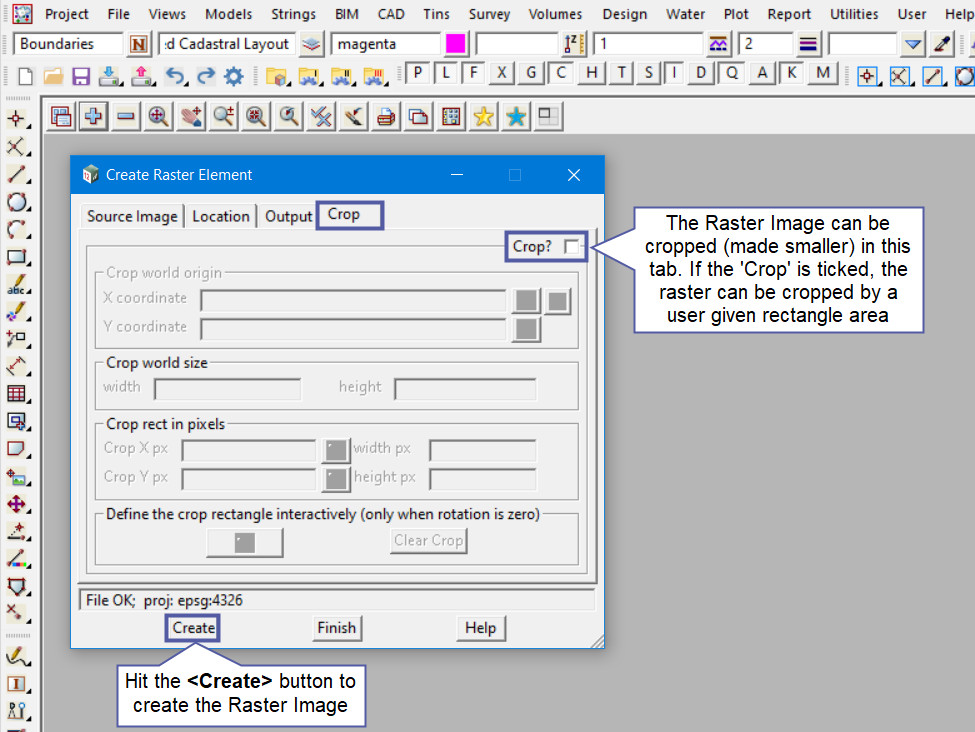
Crop Tab
The Crop Tab will allow details for a rectangular area to be added to the panel, this will make the raster image cropped to this size (smaller than the original size). Basically any part of the raster image that is outside of this nominated area will not be displayed.
For this example the crop option will not be activated.
Select the <Create> button to create the raster image.
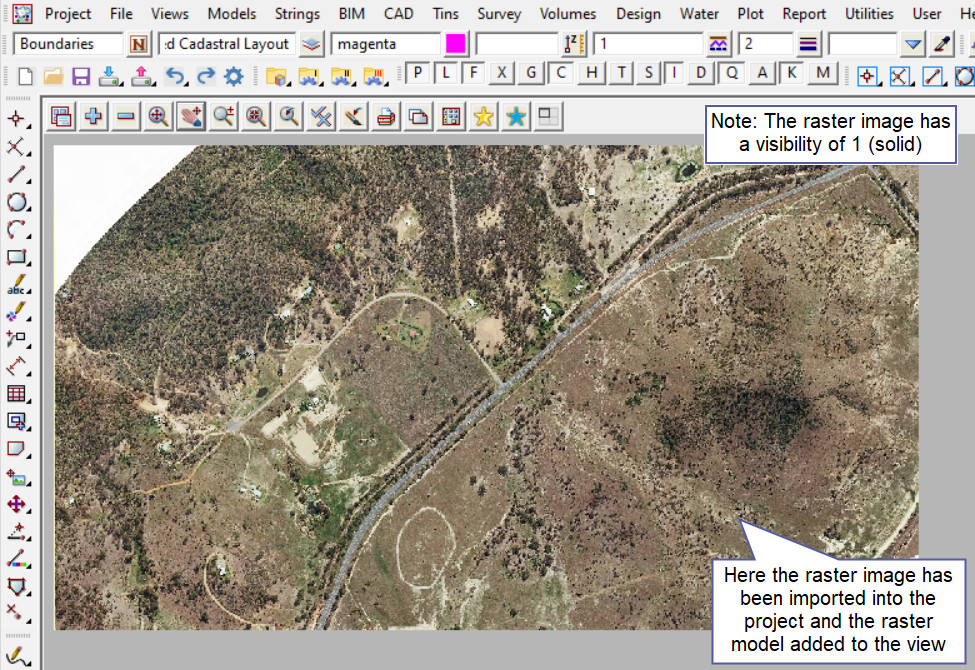
The Raster Image model has been added to the view and the image is now displayed.
The raster image is sitting on top of the other models/data that was already on the view, that data cannot be seen as the raster image is solid, and was added last to the view.
To edit the Raster Image, use: Strings => Rasters => Edit
If you would like to view the post for the Edit Raster Element panel and how to utilise it,
Visit this post: Edit Raster Element