This option is used to copy models from another project into the current project. Including 12d Synergy Projects.
Continue down the page to see the Copy Project Models Panel options.
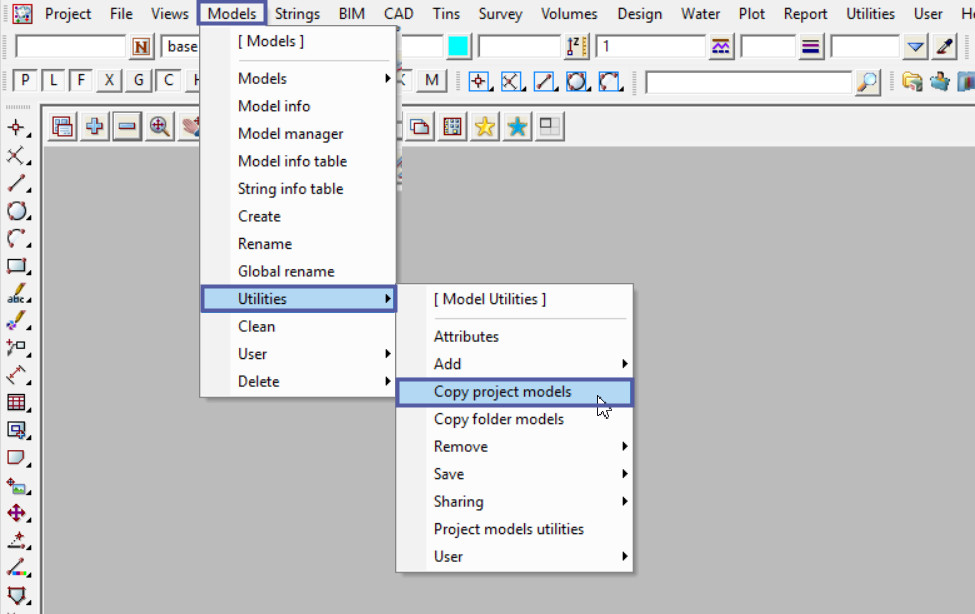
To view the Copy Project Models Panel, Use: Models => Utilities => Copy Project Models
Hit the <Source> button to select one of two options:
- Direct Access on Local or Network Storage
- Access via a 12d Synergy Data Management Server
For this example the <Direct Access on Local or Network Storage> option will be selected.

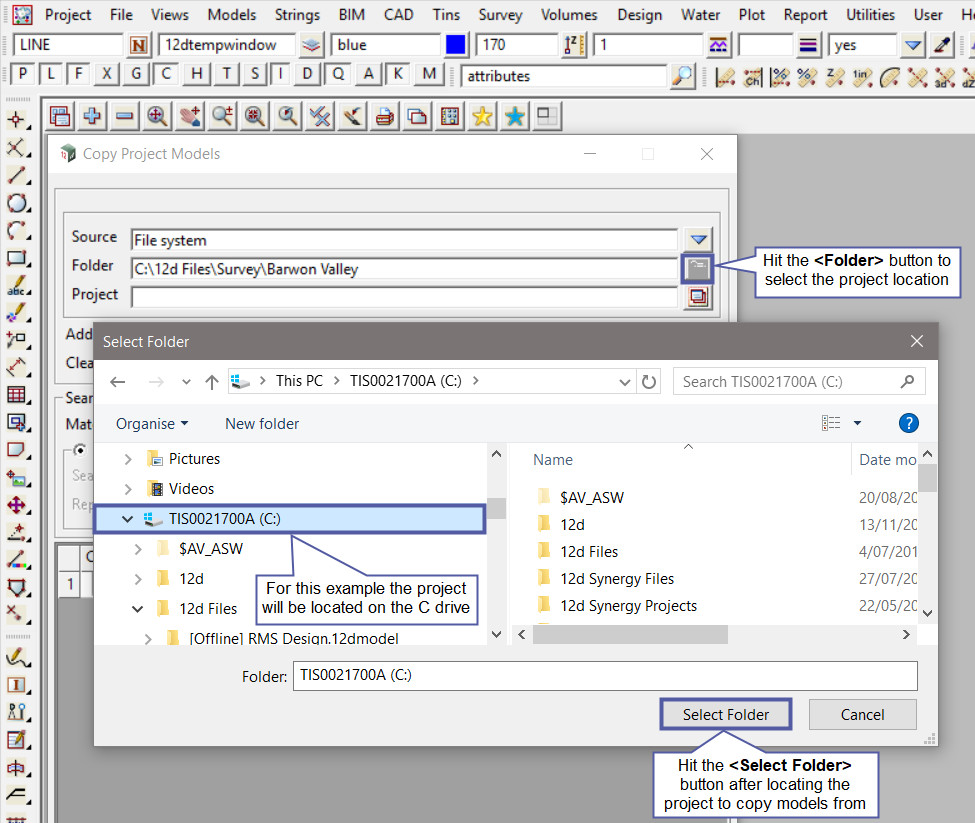
Hit the <Folder> button to select the project location, this will open a windows ‘Select Folder’ panel.
In this example the project to copy the data from is located on the C drive.
Once the project location has been selected, hit the <Select Folder> button to load the project into the panel. The project may have to be selected from a drop down list, however if you select the project folder (the .project folder) in windows the project will be loaded into the panel.
Tick the <Add data to existing models> option for the copied data to be added into the existing models.
Tick the <Clean data in existing models> option and the existing model/s will have their contents deleted before the copied data will be added into the model/s.
For this example the <Search/Replace> option is not utilised.The Search/Replace options on the Copy Project Models panel are explained in more detail on the Search and Replace Post:
Visit: Search and Replace
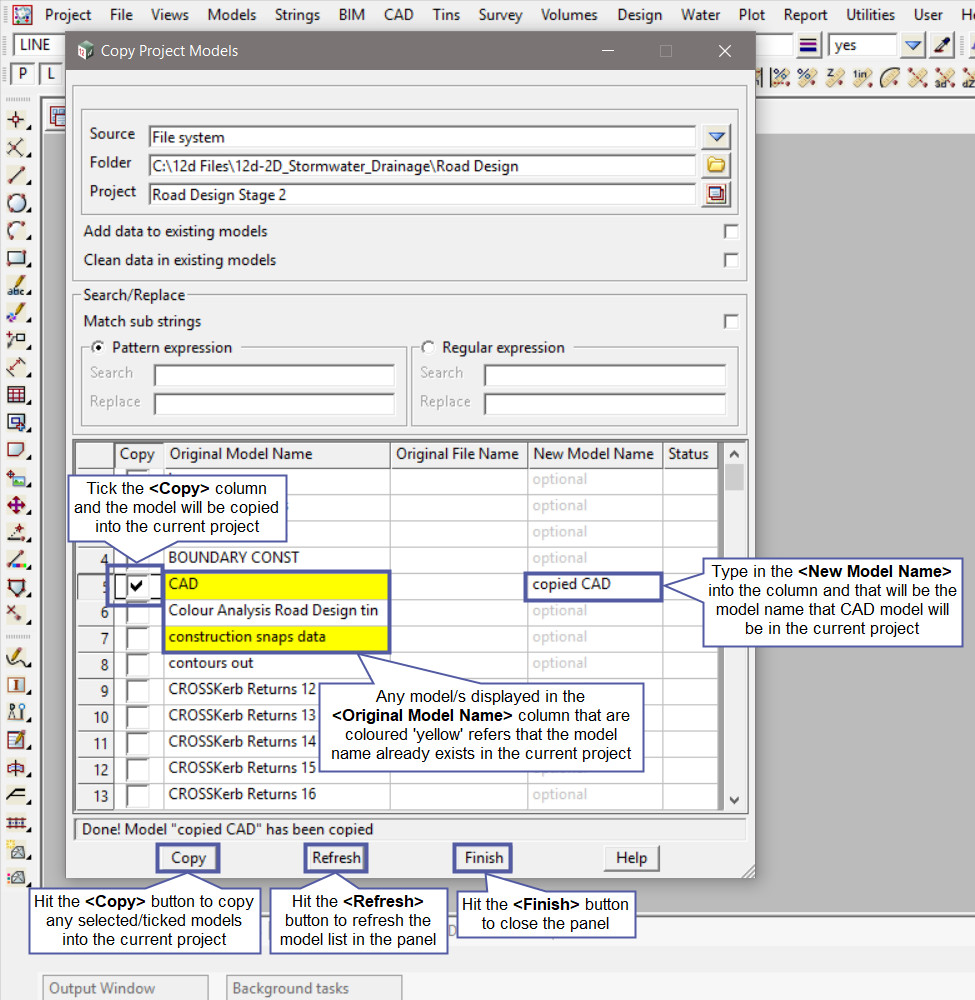
The Models from the selected project have been listed in the <Original Model Name> column in the panel.
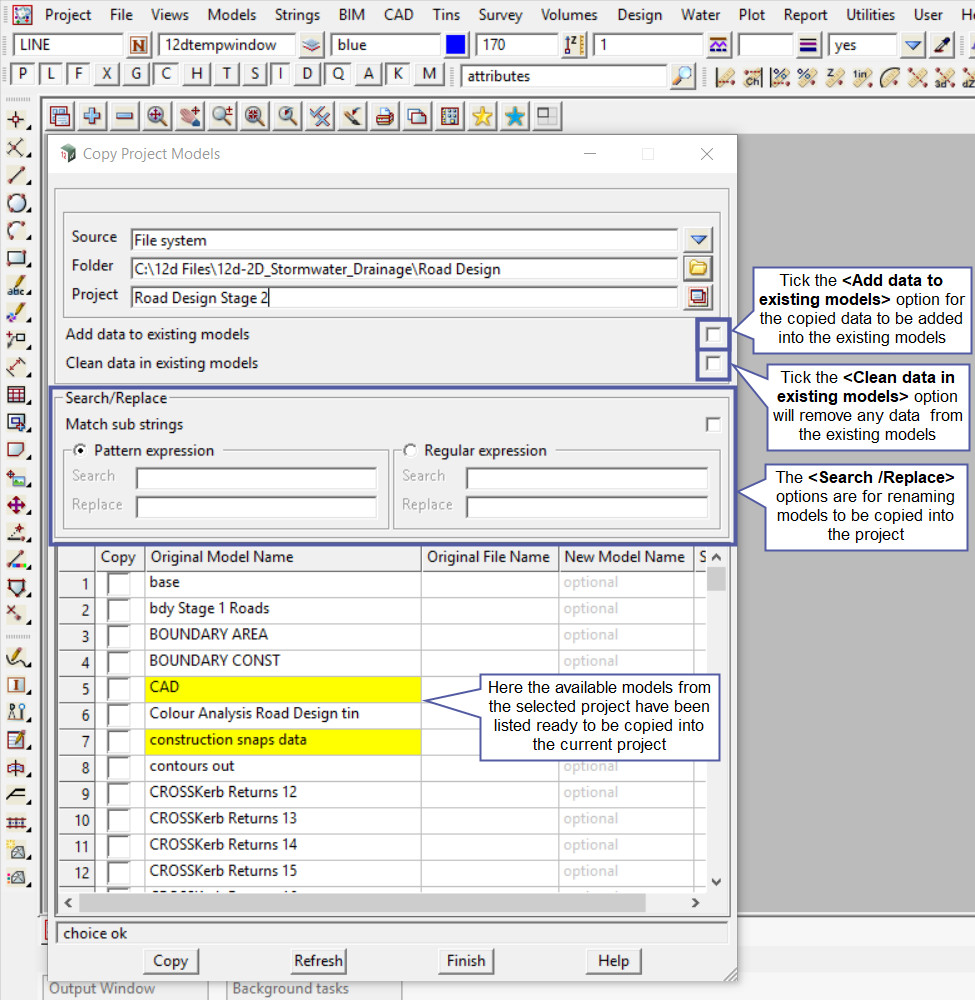
Tick the <Copy> column and the model will be copied into the current project.
Type in the <New Model Name> into the column next to the model to be copied, the copied data will be added into the newly created model/s in the current project.
Note: Any model/s displayed in the <Original Model Name> column that are coloured ‘yellow’ refers that the model name already exists in the current project.
Hit the <Copy> button to copy any selected/ticked models into the current project.
Hit the <Refresh> button to refresh the model list in the panel.
Hit the <Finish> button to close the panel.
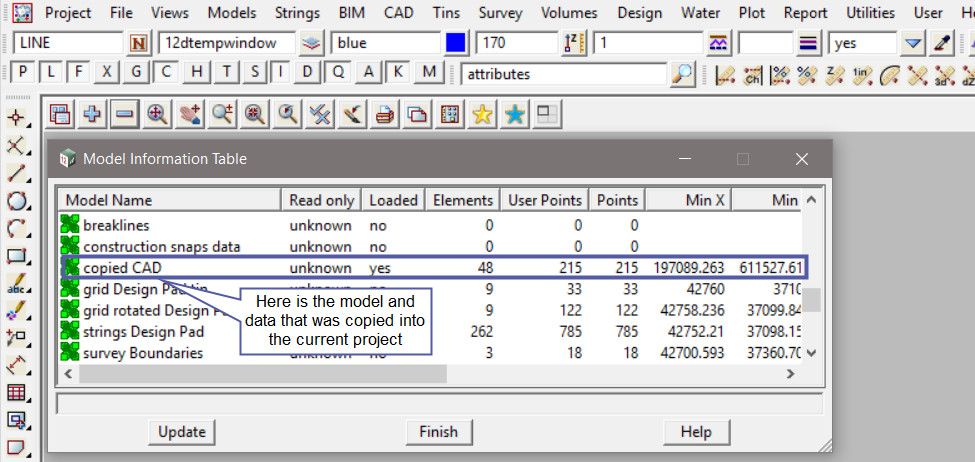
After the model/s are copied into the project, use the ‘Model Information Table’ to check that the model/s are now in the project. Use: Models => Model Information Table
If you would like to learn more about the Model Information Table and the options available,
Visit this post: Model Information Table
