This option is used to copy models from a specified folder into the project, including 12d Synergy Folders.
Continue down the page to see the Copy Folder Models Panel options.
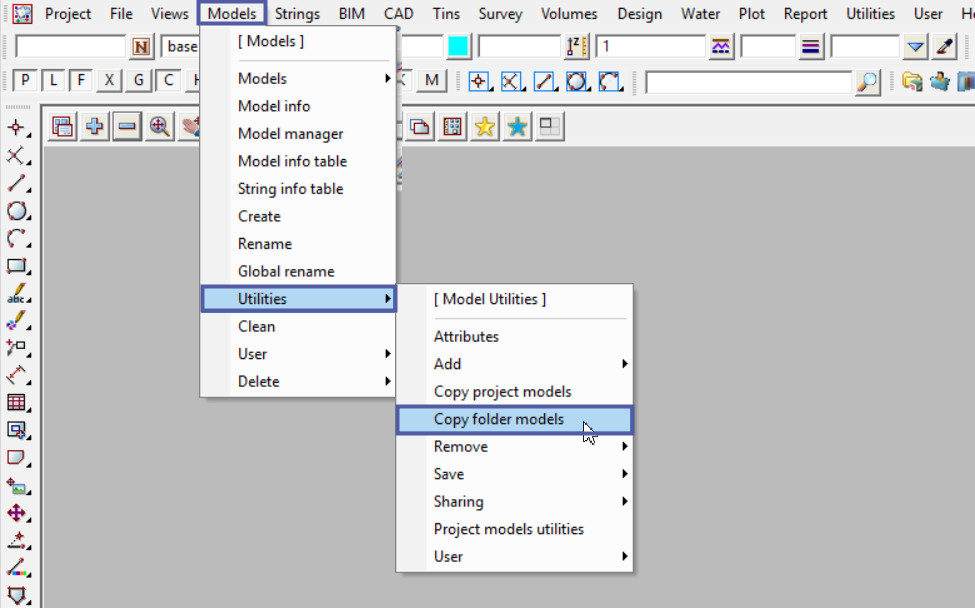
To view the Copy Folder Models Panel, Use: Models => Utilities => Copy Folder Models
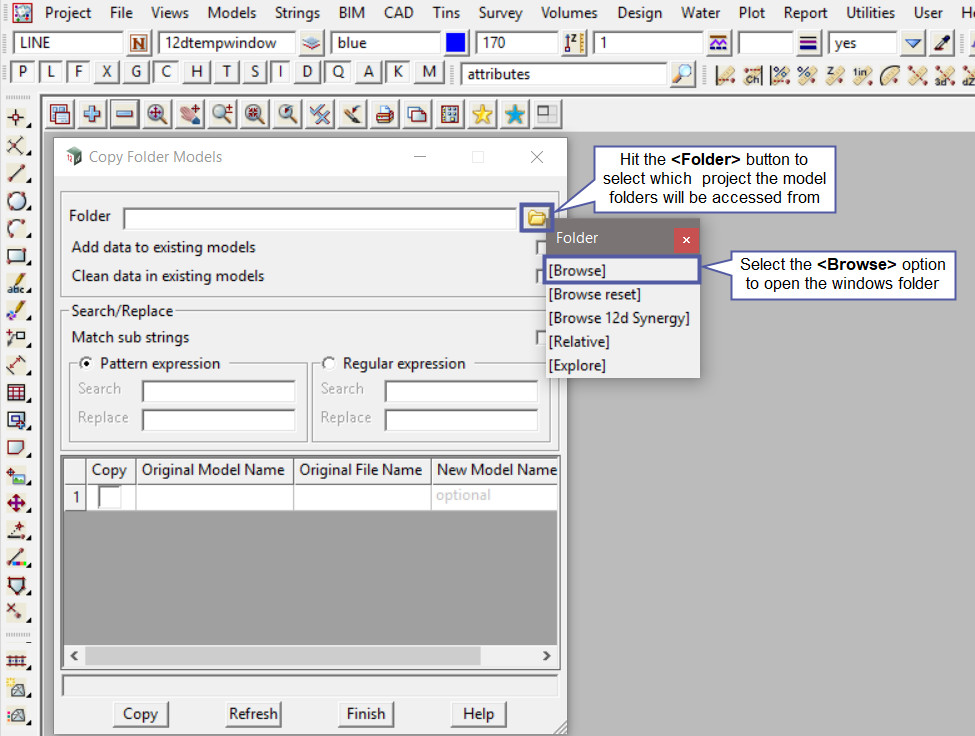
Hit the <Folder> button to select which project the model folders will be accessed from.
For this example use the <Browse> option to open the windows folder.
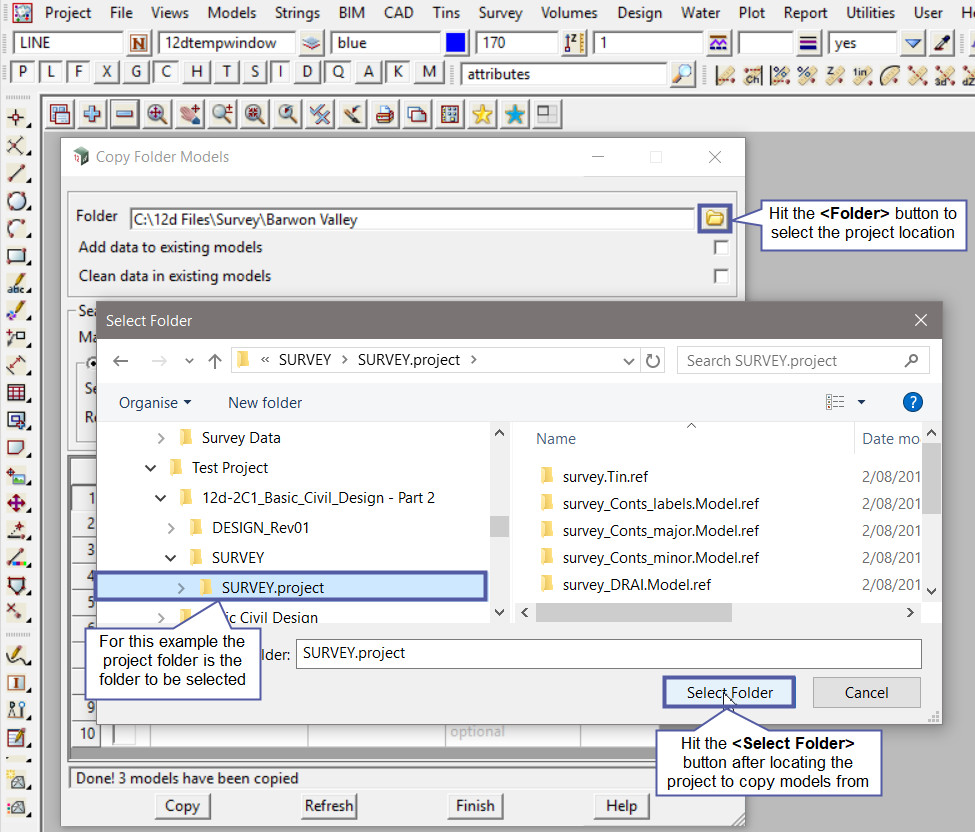
Hit the <Folder> button to select the project location, this will open a windows ‘Select Folder’ panel.
In this example the project to copy the data from is located on the C drive, and is a Survey project.
Once the project location has been selected, hit the <Select Folder> button to load the project into the panel. The project may have to be selected from a drop down list, however if you select the project folder (the .project folder) in windows the project will be loaded into the panel.
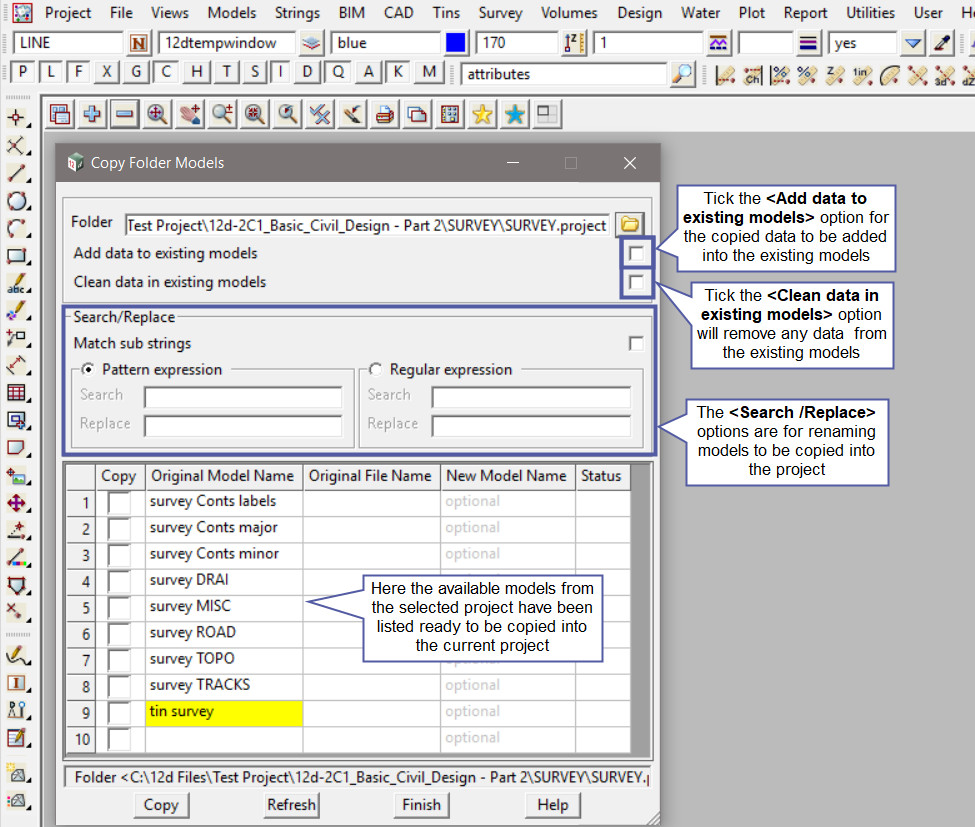
Tick the <Add data to existing models> option for the copied data to be added into the existing models.
Tick the <Clean data in existing models> option and the existing model/s will have their contents deleted before the copied data will be added into the model/s.
The <Search/Replace> option on the Copy Folder Models panel are explained in more detail on the Search and Replace Post:
Visit: Search and Replace
The Models from the selected project have been listed in the <Original Model Name> column in the panel.
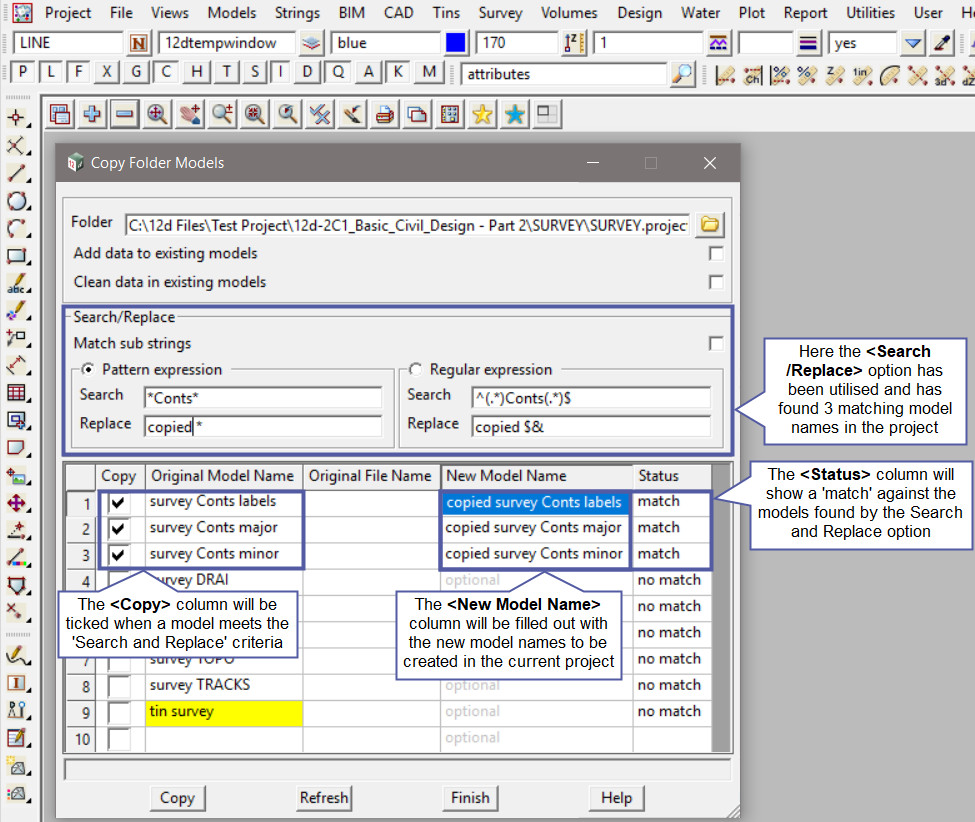
Below the <Search/Replace> option has been utilised and has found three (3) matching model names in the project. Meaning the model/s will be ticked if they match the search criteria, and a new model name also filled out if the replace option is entered correctly.
The <Status> column will show a ‘match’ against the models found by the Search and Replace option.
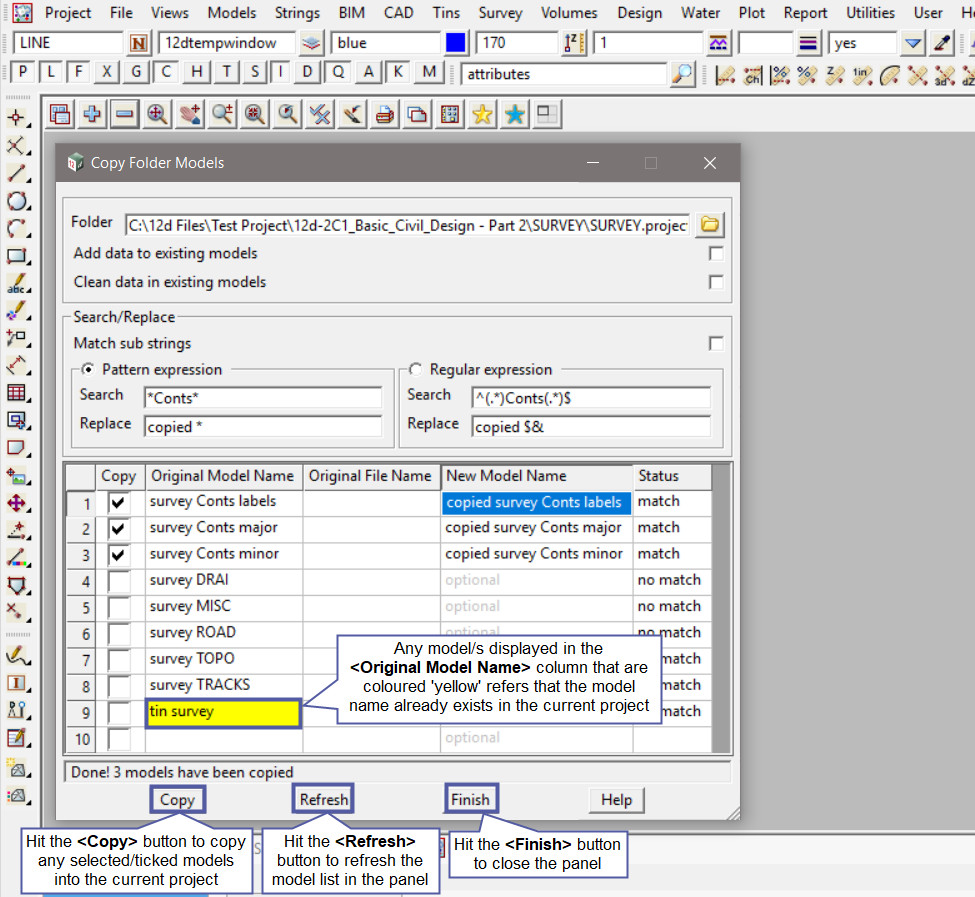
Note: Any model/s displayed in the <Original Model Name> column that are coloured ‘yellow’ refers that the model name already exists in the current project.
Hit the <Copy> button to copy any selected/ticked models into the current project.
Hit the <Refresh> button to refresh the model list in the panel.
Hit the <Finish> button to close the panel.
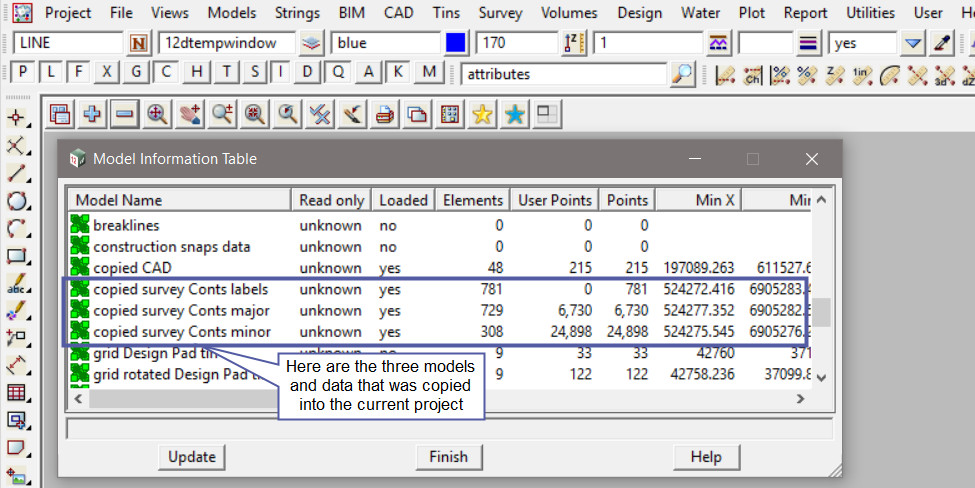
After the model/s are copied into the project, use the ‘Model Information Table’ to check that the model/s are now in the project. Use: Models => Model Information Table
If you would like to learn more about the Model Information Table and the options available,
Visit this post: Model Information Table
