This option is used to create text labels for existing contour strings.
Continue down the page to see the Label Contours Panel options.
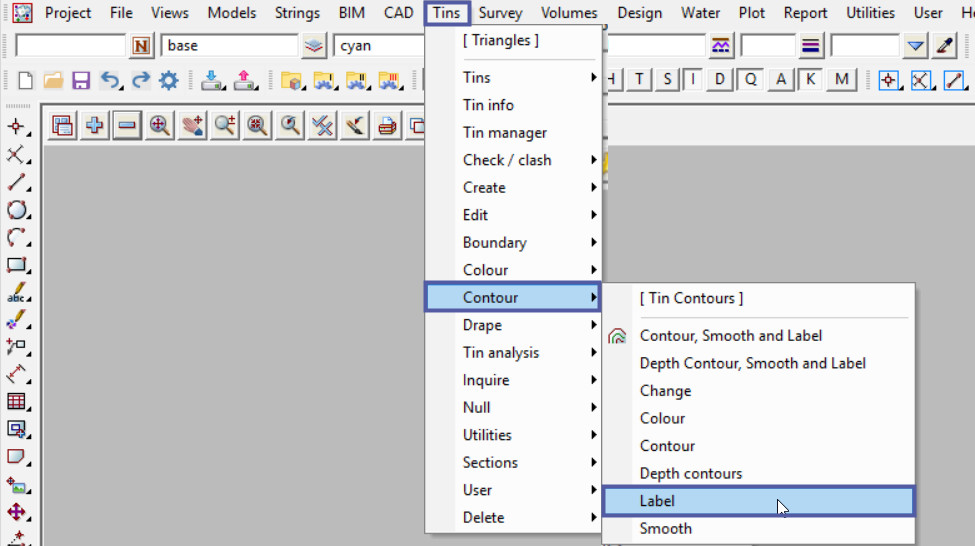
To view the Label Contours Panel, Use: Tins => Contour => Label

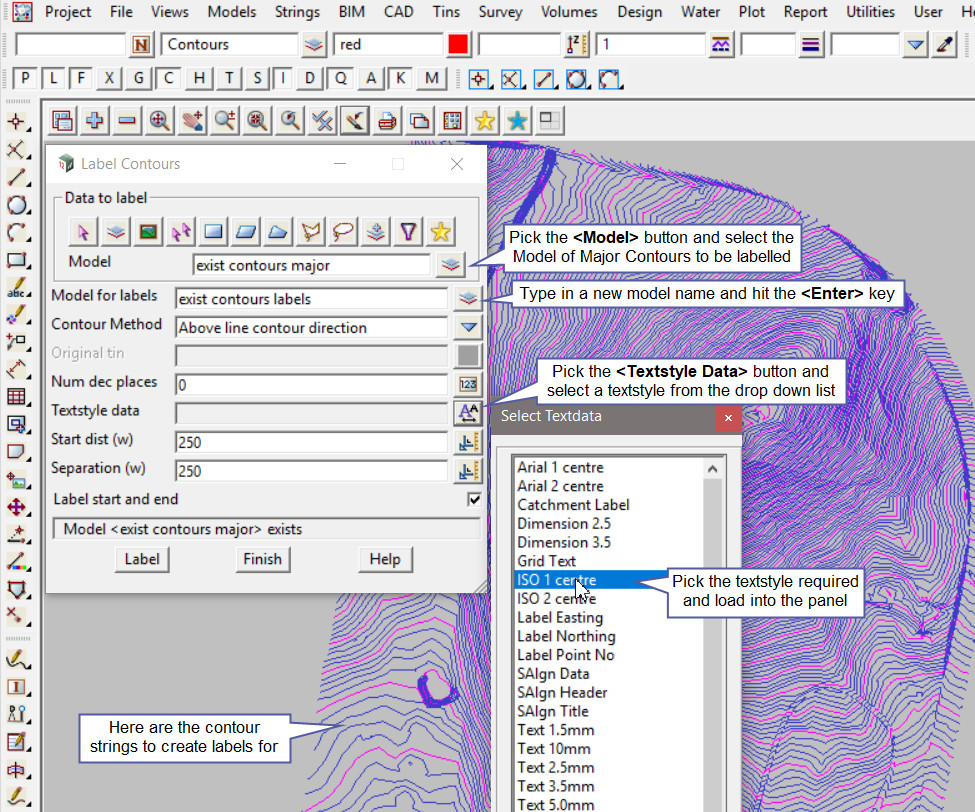
Select a Data Source of the contours to label, most likely the model option would be suitable.
If you would like to learn more about the Data Source options and how to utilise them,
Visit this post: 12d Model Panels – Data Sources
Type in a new ‘Model for Labels’ name and hit the <Enter> key.
Pick the <Textstyle Data> button and select a textstyle for the labels.
To learn more about creating Textstyles for Contours on this panel and how to utilise it,
Visit this post: Contour Smooth and Label – Contour Textstyle
In this example the ‘ISO 1 centre’ has been selected.

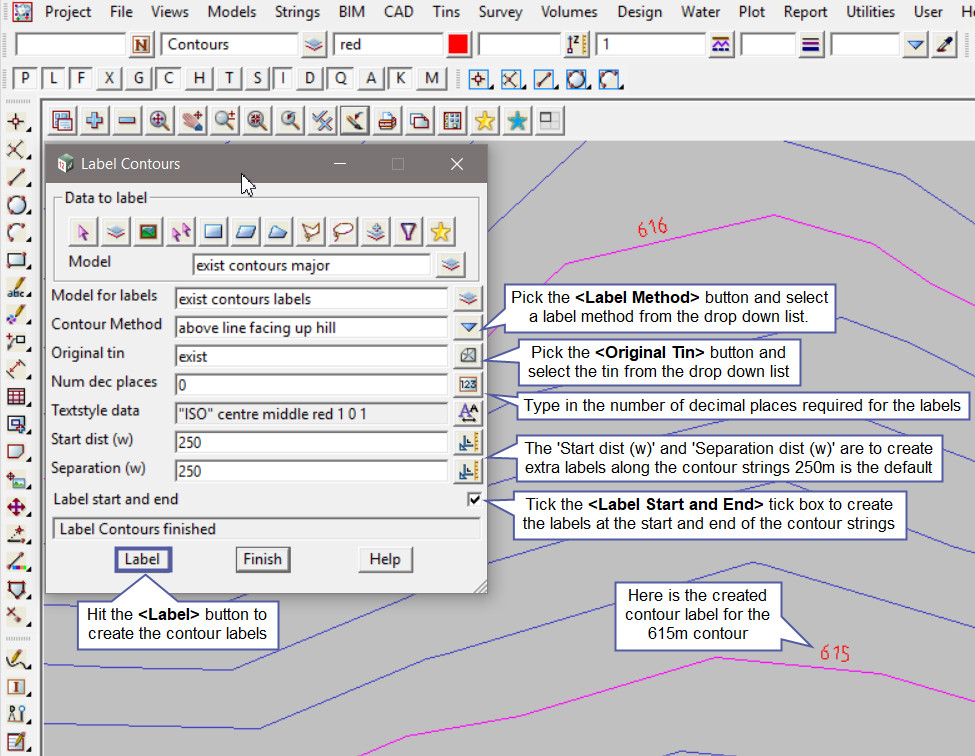
Pick the <Label Method> button and select a label method from the drop down list.
To learn more about the Label Method options on this panel and how to utilise it,
Visit this post: Contour Smooth and Label – Label Method
If the label method selected above is one with ‘facing up hill’ in it, then the ‘Original Tin’ option becomes active, and the tin of the contours must be selected for 12d Model to calculate which direction is uphill. Pick the <Original Tin> button and select the tin.
Type in the ‘Decimal Places’ value.
The ‘Start Dist (w)’ and ‘Separation (w)’ options allows users to create extra contour labels along the contour strings. The 250 default value are 250m distances between labels.
Tick on the ‘Label Start and End’ option, to create contour labels at both ends of the contour strings.
Hit the <Label> button to create the contour labels.
Hit the <+> button to turn the contour labels model onto the view.
