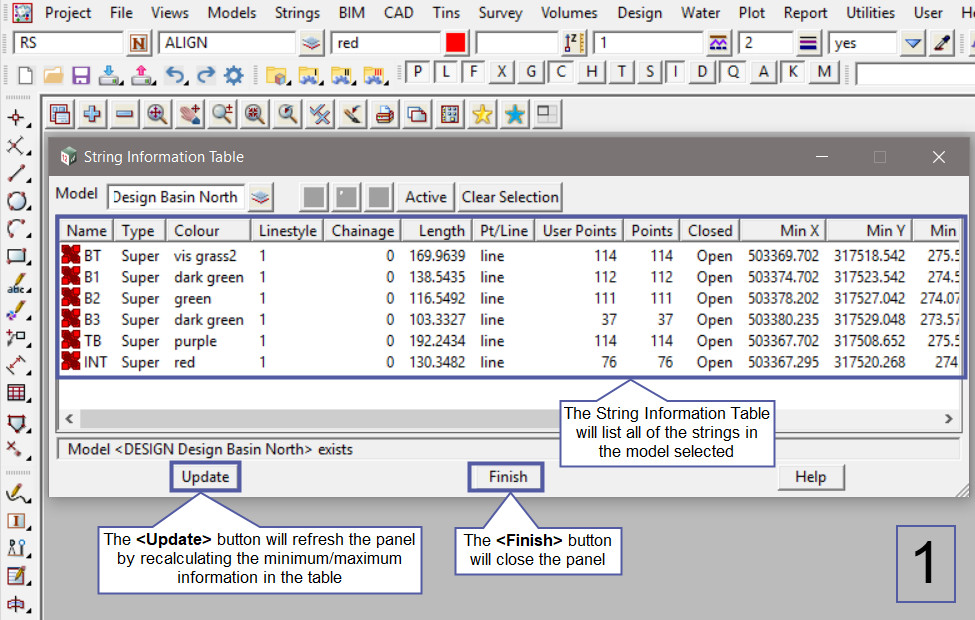
This option is used to display all the strings in a selected model in the project. The information is displayed in a table format and can be sorted by columns.
Continue down the page to see the String Information Table Panel options.
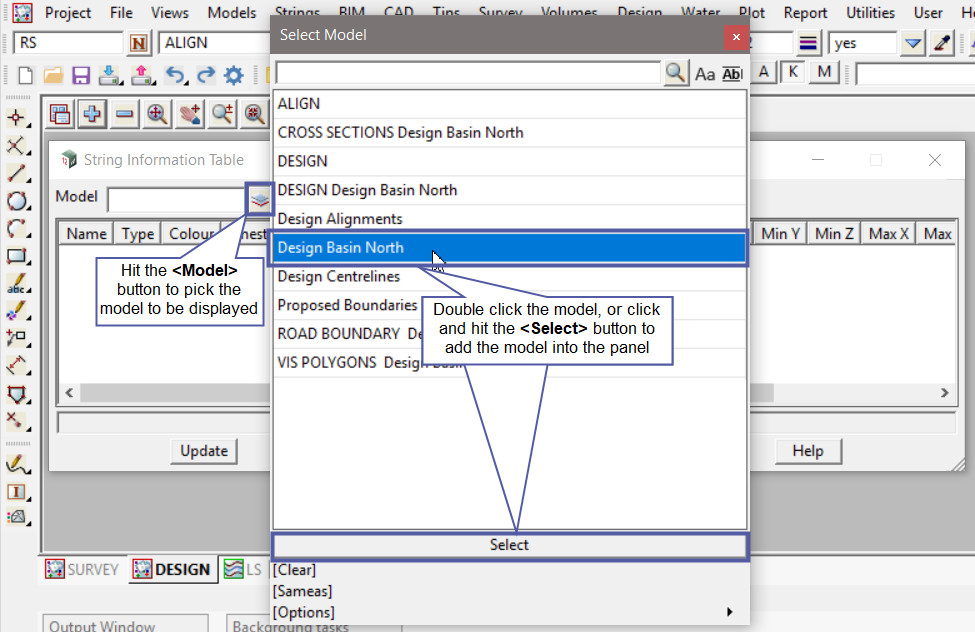
To view the String Information Table Panel, Use: Models => String Information Table
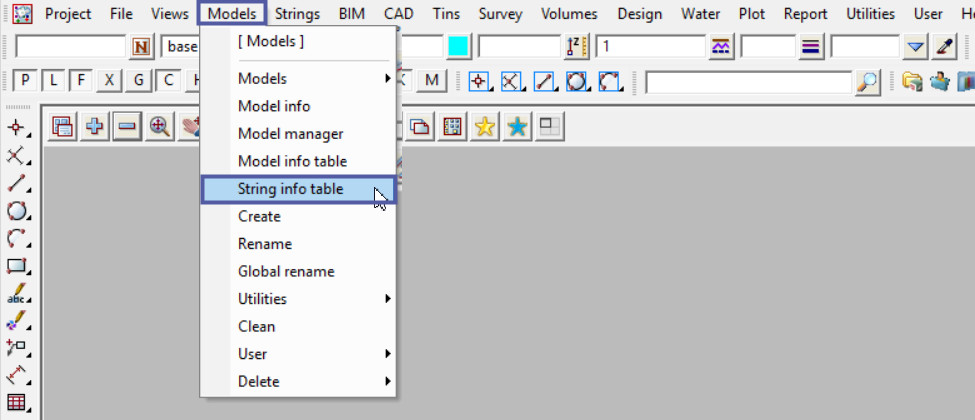
Hit the <Model> button and select the model to be displayed in the table from the drop down list. Double click on the model, or click the model and hit the <Select> button.
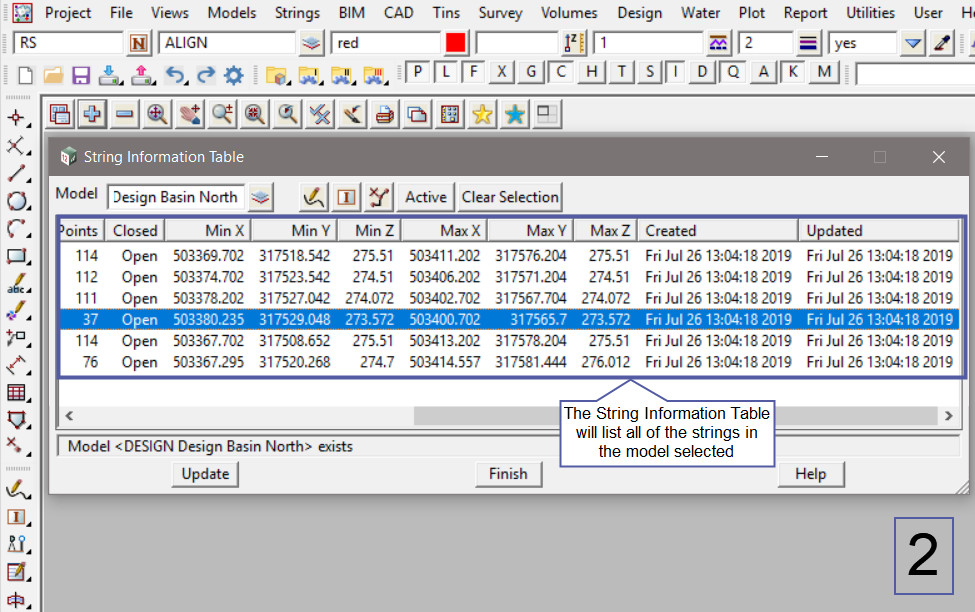
The String Information Table contains a great deal of information about each of the strings in the selected model. The Information is arranged into columns:
- Name – All the strings in the model have their string name listed in the Name column.
- Type – the string type is listed in the Type column, ie Super, Super Alignment, Drainage, Face. A Tin will also be listed as a string type.
- Colour – The Colour of the strings will be listed in this column.
- Linestyle – The Linestyle of the strings will be listed in this column.
- Chainage – The Start Chainage of each string will be listed in this column.
- Length – The overall 2d length of each string will be listed in this column.
- Pt/Line – The point/Line breakline type for each string will be listed in this column.
- User Points – The number of points listed under this column calculated towards the 12d Model license point base. Point Bases range from 50,000 points to 250 Million points. For example Contour strings, especially smooth contours create many points, so these are not included towards the point base license.
- Points – The actual number of vertices/points created for each string.
- Closed – This column will display if the string is open or closed.
- Minimum X, Y and Z – The smallest X, Y and Z coordinates for the string.
- Maximum X, Y and Z – The largest X, Y and Z coordinates for the string.
- Created – The date and time that the string was created or imported into the project.
- Updated – The date and time that the string was updated/changed in the project.
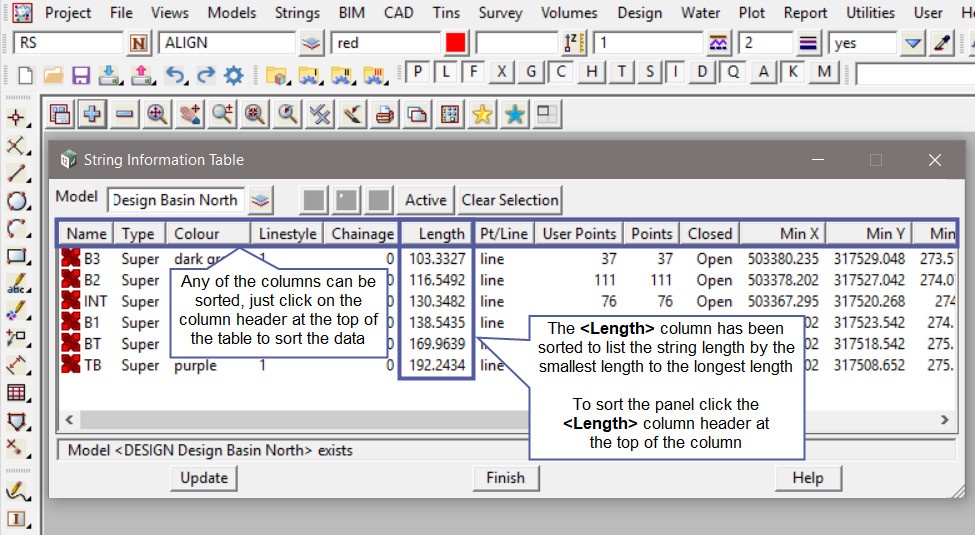
The columns can be sorted alphabetically by A-Z or numerically by the smallest to the largest numbers. The data can also be sorted in the opposite way ie, Z-A.
To sort the columns click on the column header at the top of the table.
In the example below the <Length> column has been sorted so that the string lengths are listed from the smallest to the largest.
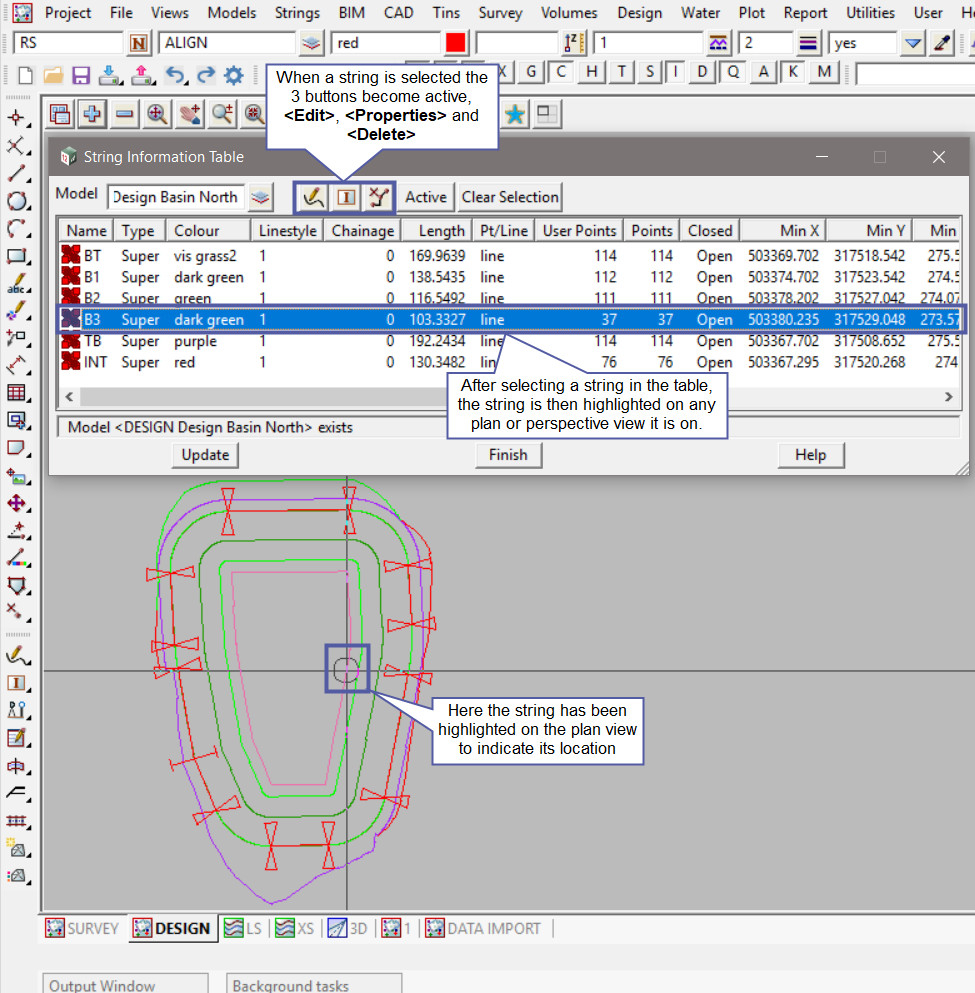
Once a string is selected in the table, it will be highlighted on any plan or perspective views it is loaded onto, as shown below by the horizontal and vertical lines on the view below. The means that the string can be easily found on the screen.
With the string selected in the table the 3 buttons at the top of the panel will become active:
- <Edit> – The edit button will open an editor for the string.
- <Properties> – The String Properties panel will be open for the selected string.
- <Delete> – This button will delete the selected string, only one at a time. BUT be careful – there is no pop-up panel to check if you want to delete the string, it will be deleted!
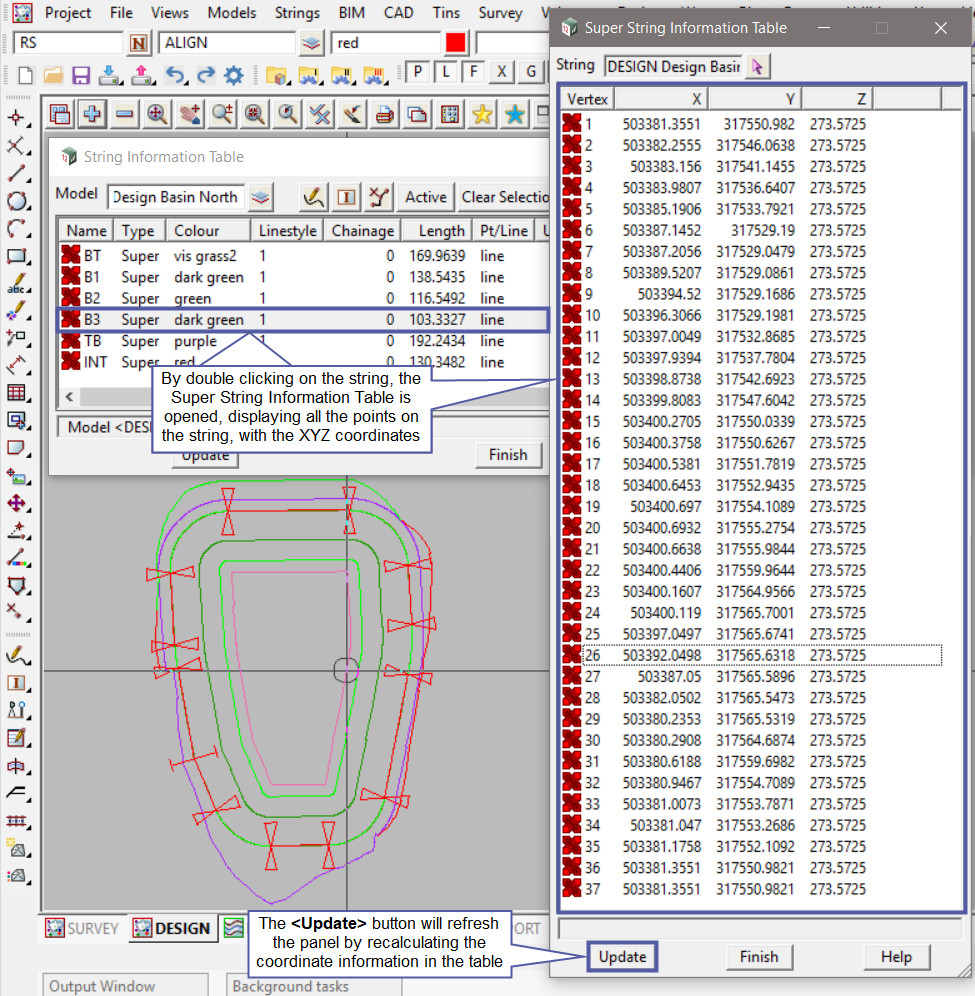
By double clicking on the selected string, another String Information Table is opened and it will list all the vertices/points for the string. The details are as shown below:
- Vertex number
- X coordinate
- Y coordinate
- Z coordinate
The String Information Table can be also opened directly from the Model Information Table.
If you would like to learn more about the Model Information Table option and how to utilise it,
Visit this post: Model Information Table
