This option is used to clone/copy a view with all it’s settings and models copied to the new view in the project.
Continue down the page to see the Clone/Copy View options.
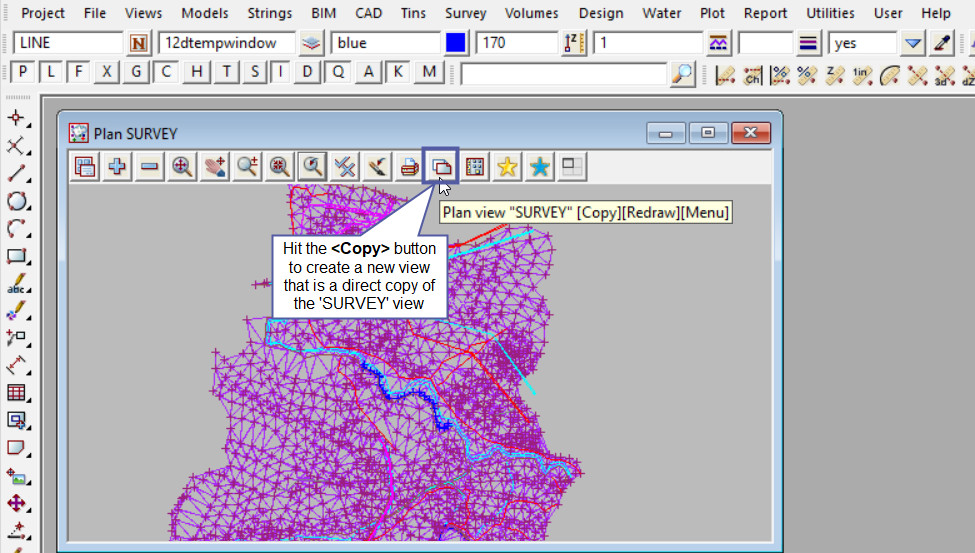
To Copy/Clone a view in the project, hit the <Copy> button on the View Toolbar.
Note: In this example a plan view is used, but the <Copy> button on the View Toolbar is the same for a section or perspective view.

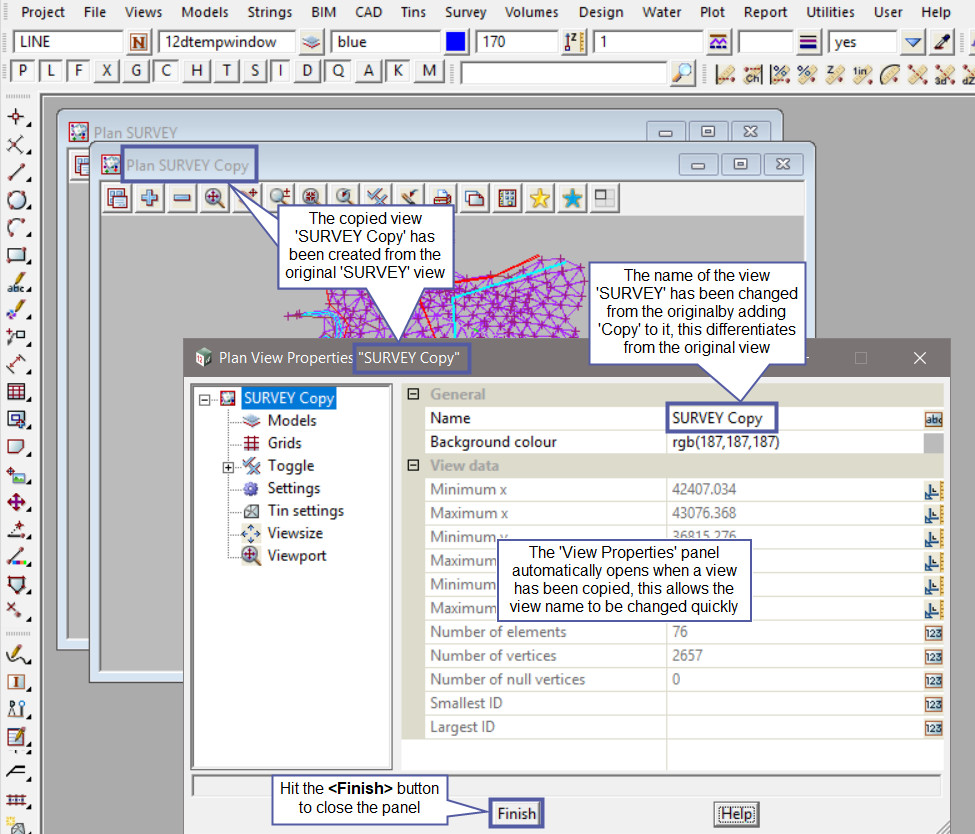
The ‘SURVEY’ view has been copied, the copied view is created at a slightly offset location, by 26 screen pixels down and right of the original view.
The original view name cannot be used for the copied view, as no two views can be named the same in 12d Model. So the new copied view will use the original name and ‘Copy’ will be added to it. In this example the original ‘SURVEY’ view will be copied as ‘SURVEY Copy’ view.
The ‘View Properties’ panel will automatically open after a view is copied, this allows the view name to be changed quickly, and any other properties for the view.
Hit the <Finish> button to close the panel.

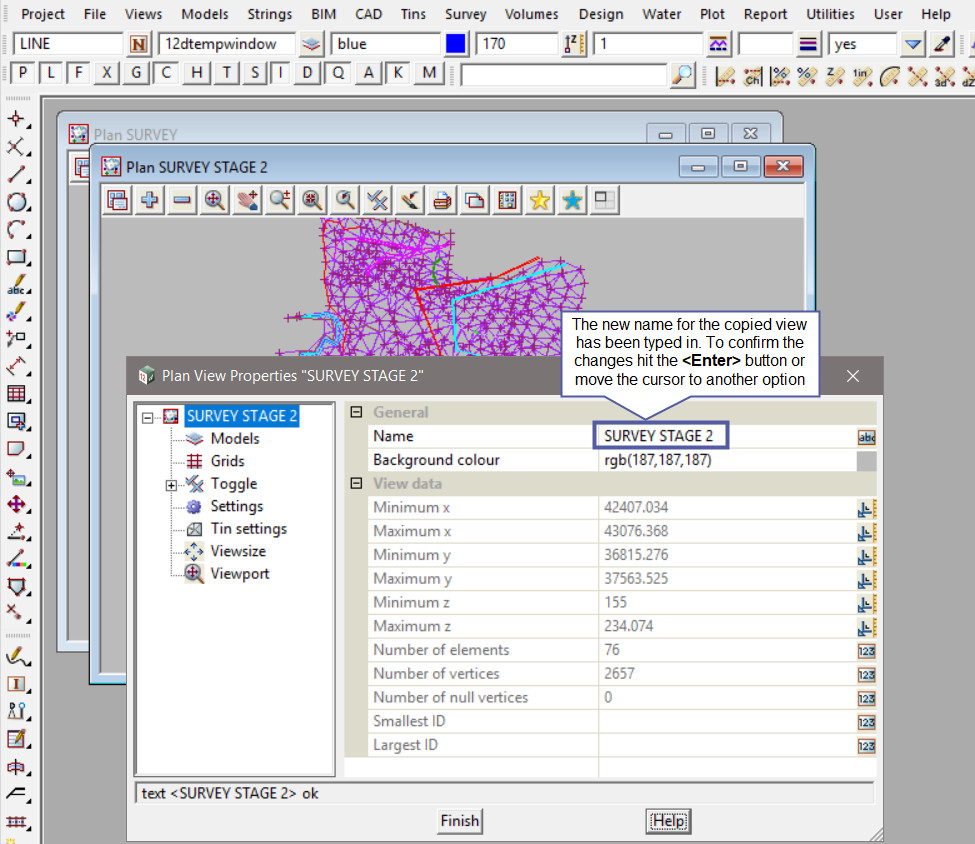
To change the name of the copied view, highlight the old view name and type in the new name for the view, to confirm the change either hit the <Enter> button on the keyboard or move the cursor to another option on the panel.

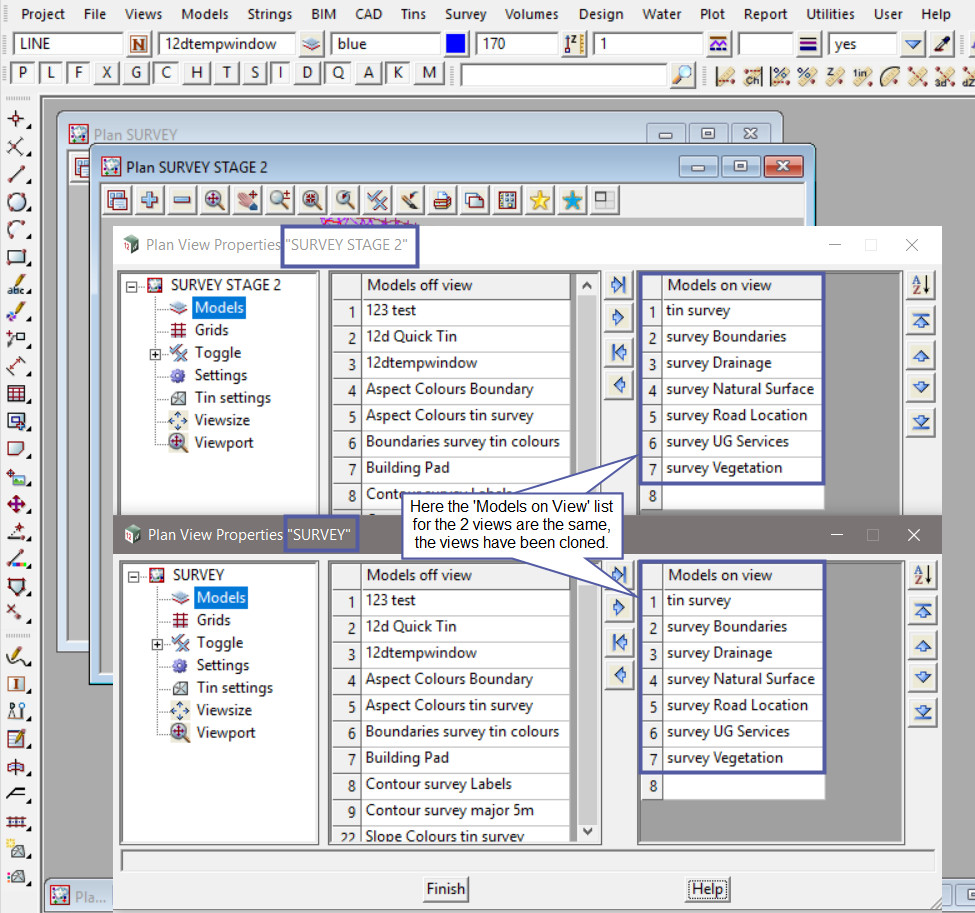
Select the ‘Models’ option on the tree structure on the left of the panel, this will show the models that are currently on the view, and the other models in the project that are available to be added to the view.
The buttons in the middle of the panel allows models to be added and removed from the view.

There are a lot of options available on the ‘View Properties’ panel, if you would like to learn more about the View Properties Panel and its options,
Visit this post: Plan View Properties
If you would like to learn more about the View Toolbar options,
Visit this post: View Toolbar Options