New linestyles can be defined from existing objects in 12d. Read on to find out how.
If you have linetypes define in a DWG file, take a look at Linestyles and Symbols from DWG to see how you can import them into 12d.
Before adding the linestyles, you will need to do some prep work on the 12d objects;
- Rotate so it is horizontal
- Move to 0,0,0 as this is the origin for the linestyle
- Delete any extra (or repetitious) objects
When creating multiple linestyles, it is recommended to have the objects for each style on it’s own Model.

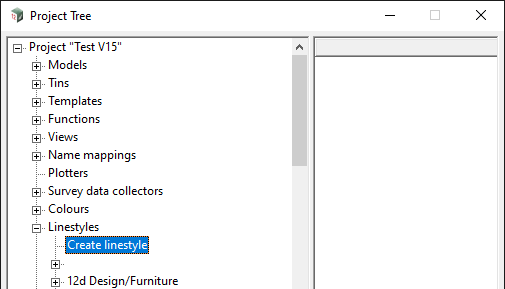
Go to Project=>Management=>Tree and expand out Linestyles, then dbl-click “Create linestyle”.

Fill out all of the details, and select the Strings or Model of objects that define the linestyle. Click <Process> and then <Write>

When writing the file, make sure Write to the Current Folder is selected, as the new linestyle will need to by copied from the linestyl.4d file into your user_linestyl.4d
In the projects Working Folder will be the file linestyl.4d . Open this in a text editor, such as Windows Notepad, and the new linestyle will be at the bottom of the file.
If you have an existing user_linestyl.4d file, you can open it in a text editor and copy/paste the new linestyle at the bottom.
worldstyle "EXAMPLE 3" {

 mode continuous

 move 0 -5
 draw 7.5 5
 draw 15 -5
 draw 22.5 5
 draw 30 -5
}
When saving the user_linestyl.4d file, ensure the you set file Encoding: ANSI (See Saving Text Files )
As mentioned in Writing Setup Files in 12d Model it is a good idea to start with an empty linestyl.4d file, to avoid the new linestyles getting mixed in with 12d’s standard.
Attached is an example linestyl.4d file that can be saved to your Working Folder;
- Download the blank_linestyl_4d.zip and extract the linestyl.4d
New linestyles will be added to this file, which can then be copied/renamed to user_linestyl.4d
More information on creating linestyles can be found in the 12d Reference Manual;
- 36.1 Line Styles
- 36.1.3 Line Style Definitions