This option displays all the settings for models in the project, in a tree structure format.
Continue down the page to see the Model Manager Panel options.
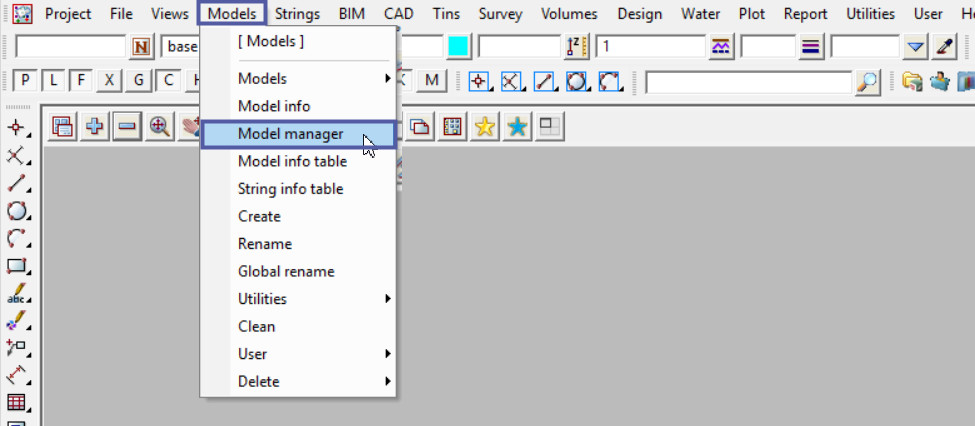
To view the Model Manager Panel, Use: Models => Model Manager
The Model Manager Panel can also be found under:
Project => Management => Managers => Model

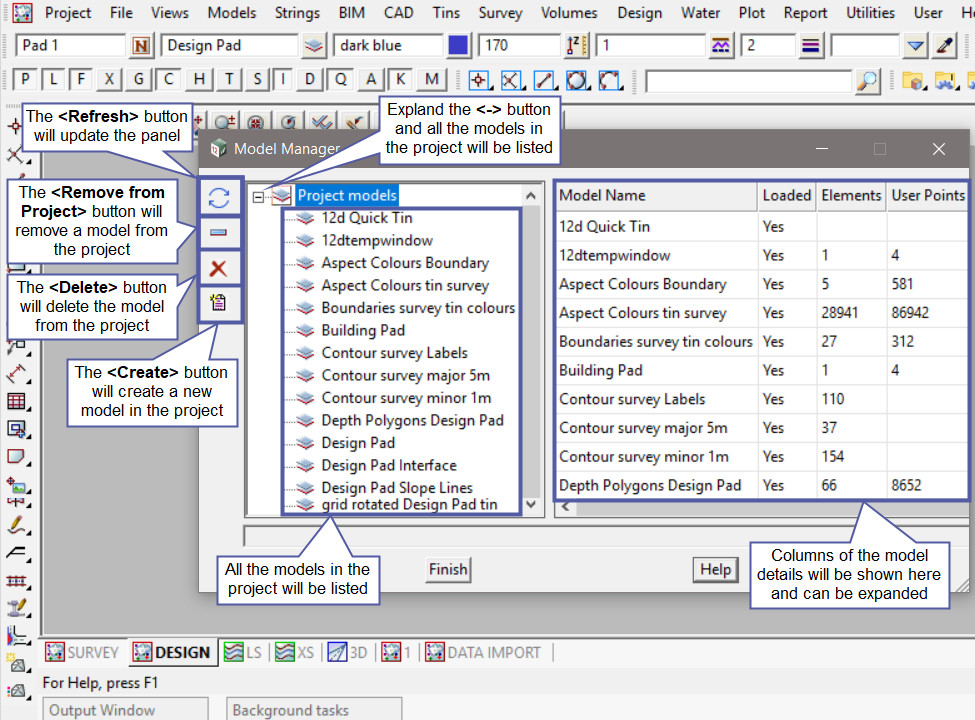
There are 4 buttons on the left side of the panel:
- <Refresh> The Refresh button will update the panel with any changes in the project.
- <Remove from Project> The Remove from Project button will remove the selected model from the project. The removed model can be added back into the project at a later time, visit this post: Add Model to Project
- <Delete> The Delete button will delete a selected model from the project. The deleted model will be moved to the Trash Bin, to learn more about the Trash Bin, visit this post: Trash Bin
- <Create> The Create button will create a new model, the create a model panel will open, if you would like to visit the post: Create a Model
Expand the ‘Project Models’ and the list of the project models will be shown, and on the right hand side of the panel there will be columns of information about each model. The panel can be expanded or the bottom and side scroll bars can be used to move around the panel.

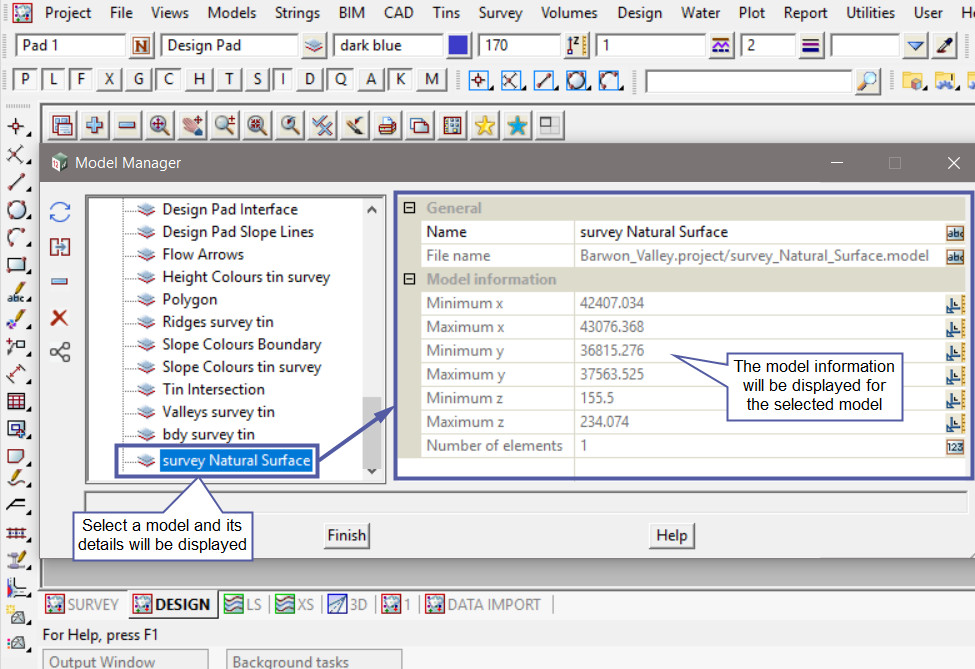
Select a Model in the list and the model details will be shown on the RHS of the panel.
- Model Name – The model can be Renamed in this panel. Otherwise visit the Rename a Model post.
- File Name – file location of the model file.
- Minimum XYZ – of all element in the model
- Maximum XYZ – of all element in the model
- Number of Elements – in the selected model

The 4 buttons on the left side of the panel have changed after a model is selected. There is a new button second down the list:
- <Clone> The Clone button will copy/clone the selected model in the list. The new model will be created in the project, with the same name as the selected model, but with ‘Copy’ added to the end of the model name.
