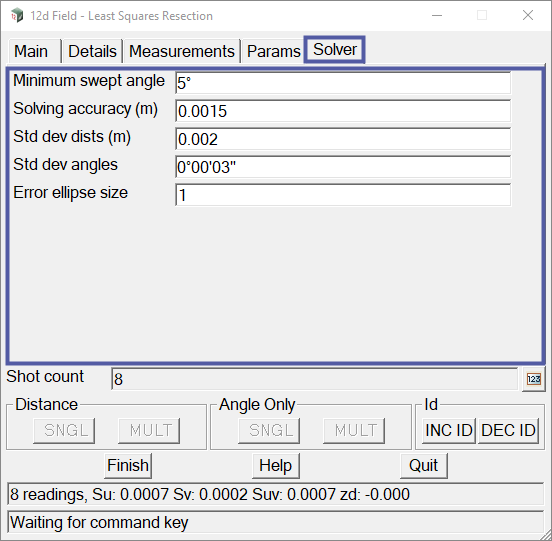
The Station LSA option opens the 12d Field – Least Squares Resection panel. This panel is used to calculate and establish the position of the instrument in relation to known control points using the mathematical reduction known as least squares, this method is known as a least squares resection.
Continue down the page to see the 12d Field – Least Squares Resection panel options.
To view the 12d Field – Least Squares Resection panel, Use: Show Options => Station Setup => Station LSA
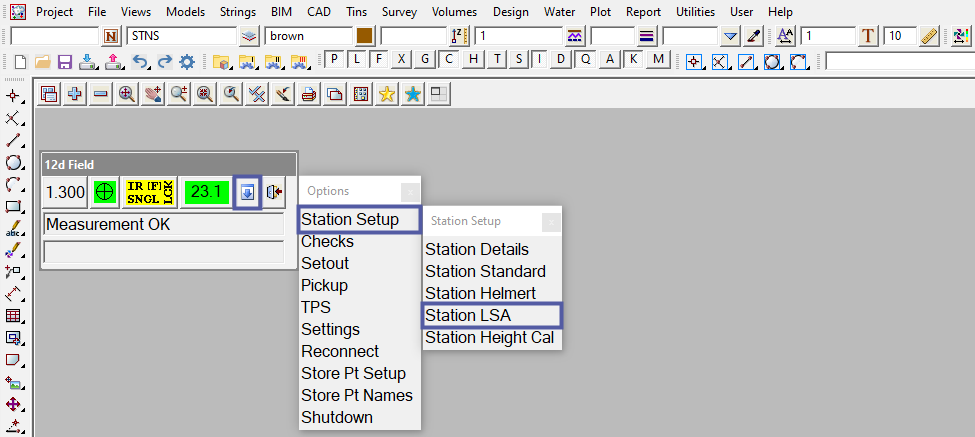
The 12d Field – Least Squares Resection panel consists of 5 tabs titled Main, Details, Measurements, Params and Solver. The panel also has several buttons that are common across many 12d Field panels.
To learn more about these buttons,
Visit this Post: Common Function Panel Buttons
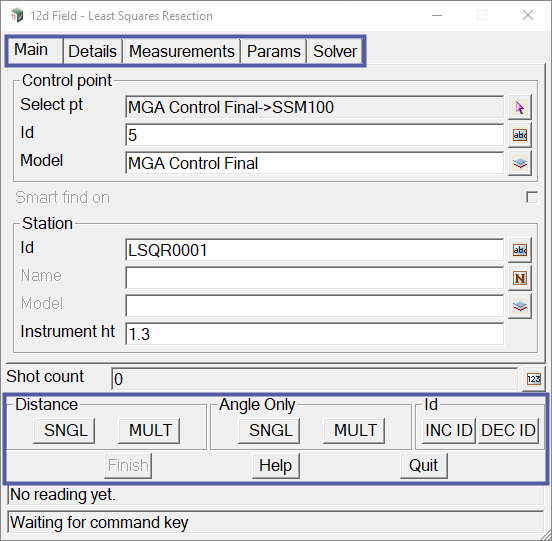
The Main tab on the 12d Field – Least Squares Resection panel is used to select which control point(s) are being measured, with the instrument, and to define the details of the station that will be created.
All that the user needs to do is select the point (by using the Select pt arrow button) that the measurement will be taken on. The Id (point id of selected point) and Model (the model that the selected point is in) fields will automatically be derived from the point selected.
In the image below, SSM100 (the point that the first measurement will be taken at) has been selected and a instrument height of 1.3 has been entered. After taking the measurement a shot count of 1 is displayed.
The Main tab on the 12d Field – Least Squares Resection panel also has the option to toggle Smart find on or off. Continue down this page to learn more about Smart find.
To take another measurement to a different control point the user needs to just select the control point, using the Select pt arrow button again, and command the instrument to take the measurement by using one of the measurement command buttons (<SNGL> or <MULT>).
The 12d Field – Least Squares Helmert panel allows the user to take as many shots as the user wishes, unlike the 12d Field – Helmert Resection panel that only allows a maximum of six shots.
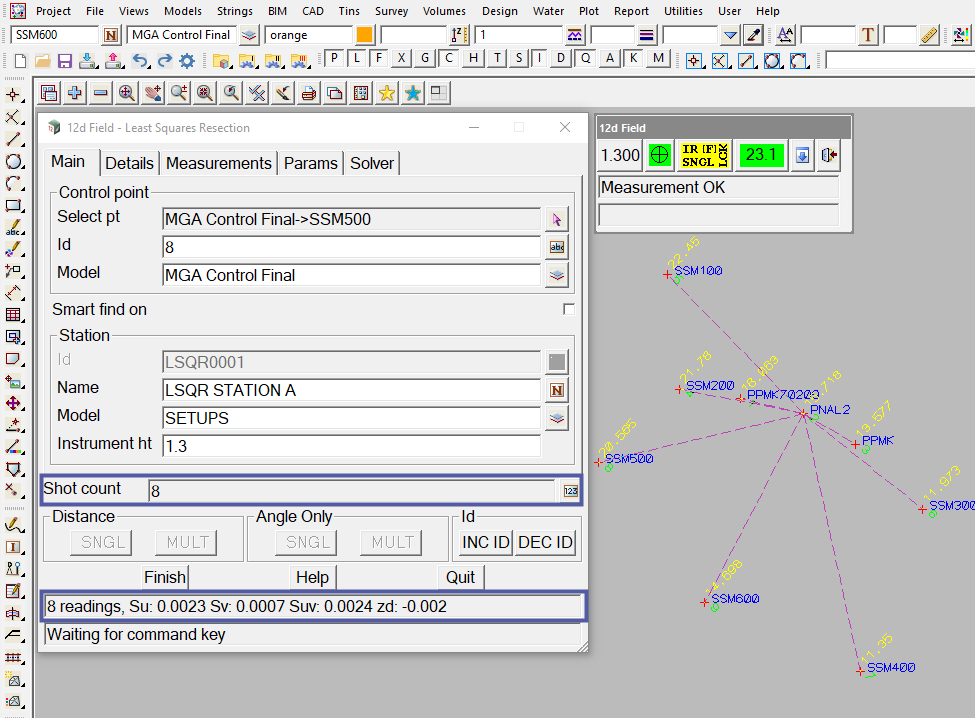
The image below shows a 8 point resection (the shot count is 8).
Note: The output window on the 12d Field – Least Squares Helmert panel states the positional accuracy of the resection being Su: 0.0023, Sv: 0.0007, Suv: 0.0024, zd: -0.002
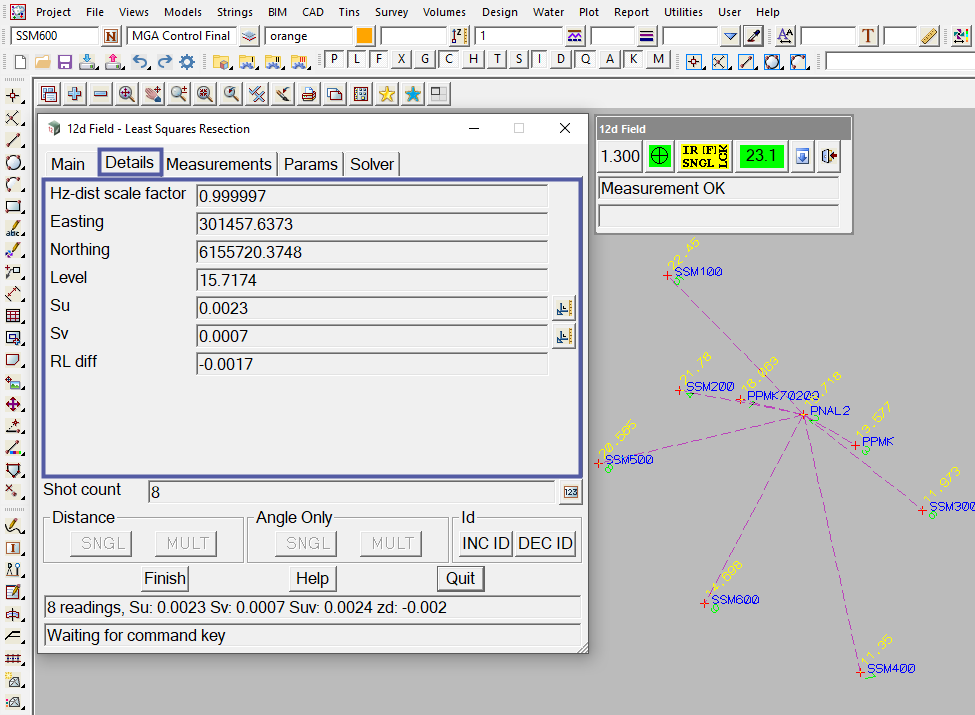
The Details tab on the 12d Field – Least Squares Resection panel displays the information relating to the accuracy and position calculated from the least squares resection of measurements taken.
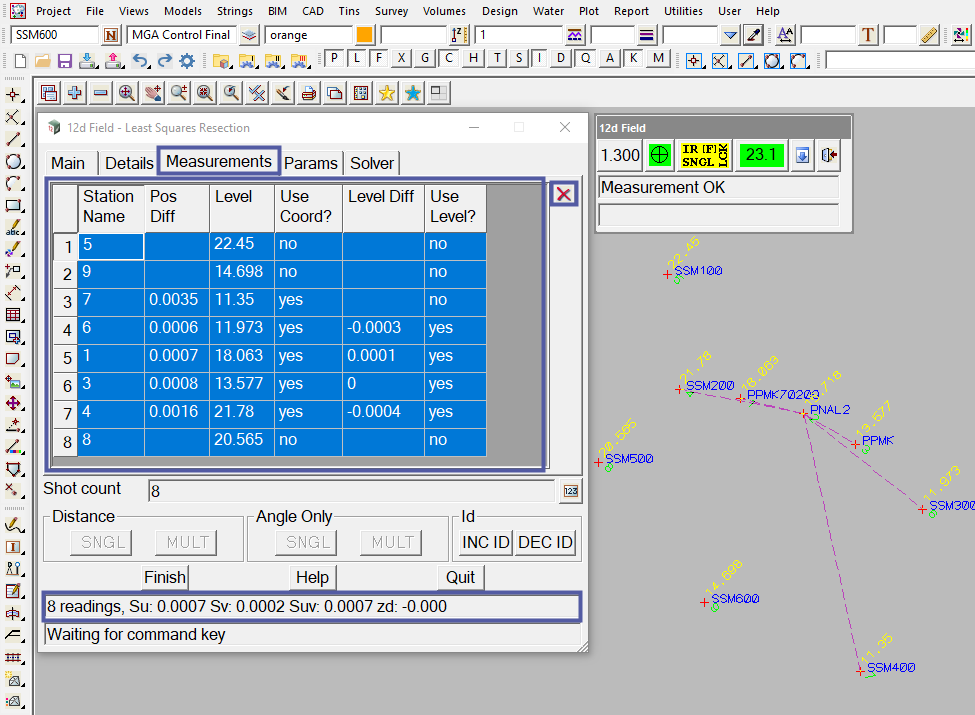
The Measurements tab on the 12d Field – Least Squares Resection panel displays the information relating to the positional difference and level difference of each measurement taken within least squares resection. This allows the user to decide what measurements to use to achieve the best possible resection result. This can be done by toggling, by right-clicking in the appropriate box, the Use Coord? and Use Level? fields from yes to no. It also allows the user to delete a measurement by selecting the row that the measurement is on and pressing the delete button (red cross at the top right corner of the panel).
The first image below shows the measurement details of each measurement taken within the least squares resection. All measurements are being used in the calculation and the output window on the 12d Field – Least Squares Helmert panel states the positional accuracy of the resection being Su: 0.0023, Sv: 0.0007, Suv: 0.0024, zd: -0.002
In the second image below measurements 1 (to control point 5), 2 (to control point 9) and 8 (to control point 8) have been toggled to “no” for the Use Coord? field and measurements 1 (to control point 5), 2 (to control point 9), 3 (to control point 7) and 8 (to control point 8) have been toggled to “no” for the Use Level? field, as the positional error of these measurements were unsatisfactory for the users accuracy requirements. 12d Field recalculates the resection instantly when Use Coord? and/or Use Level? fields are toggled off or on and displays the new positional accuracy of the resection (Su: 0.0007, Sv: 0.0002, Suv: 0.0007, zd: -0.000) in both the output window and the Details tab.
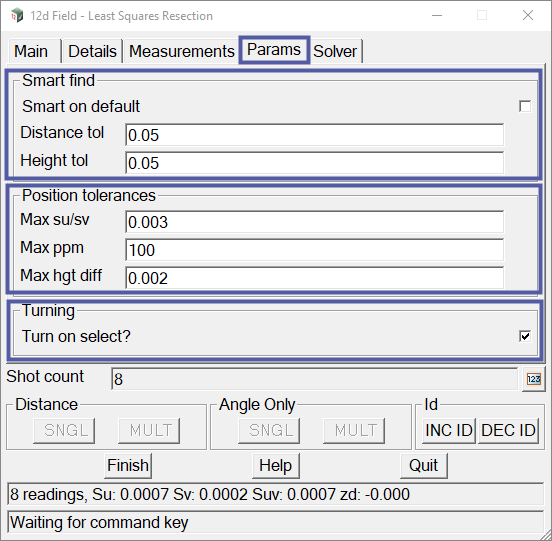
The Params tab on the 12d Field – Least Squares Resection panel allows the user to set the maximum tolerances that 12d Field will accept for a shot to be out of its true position when using smart find. It also allows the user to have smart find toggled on or off by default.
When smart find is enabled the user only has to specify and measure the first measurement location. After the first measurement has been taken the user can then take another measurement on a different control point and 12d Field will automatically recognise/calculate the control point that is being measured, if it is within the set tolerances. This is very handy if the user only knows the location/point id of one or a few control points and wishes to shoot ones that the user is unsure of.
In addition the Params tab on the 12d Field – Least Squares Resection panel allows the user to set the tolerances 12d Field will accept in establishing the station. If the least squares resections positional tolerances are not within the set parameters a warning will be displayed, after pressing the finish button, and an option to accept or decline the setup will be given.
The Params tab on the 12d Field – Least Squares Resection panel also allows the user to toggle the ‘Turn on select?’ option on or off. The ‘Turn on select?’ option will command the instrument to automatically sight the control point after it has been selected (this will only work after two control points have been measured).
Note: The ‘Turn on select?’ option will not work if Smart find is active.
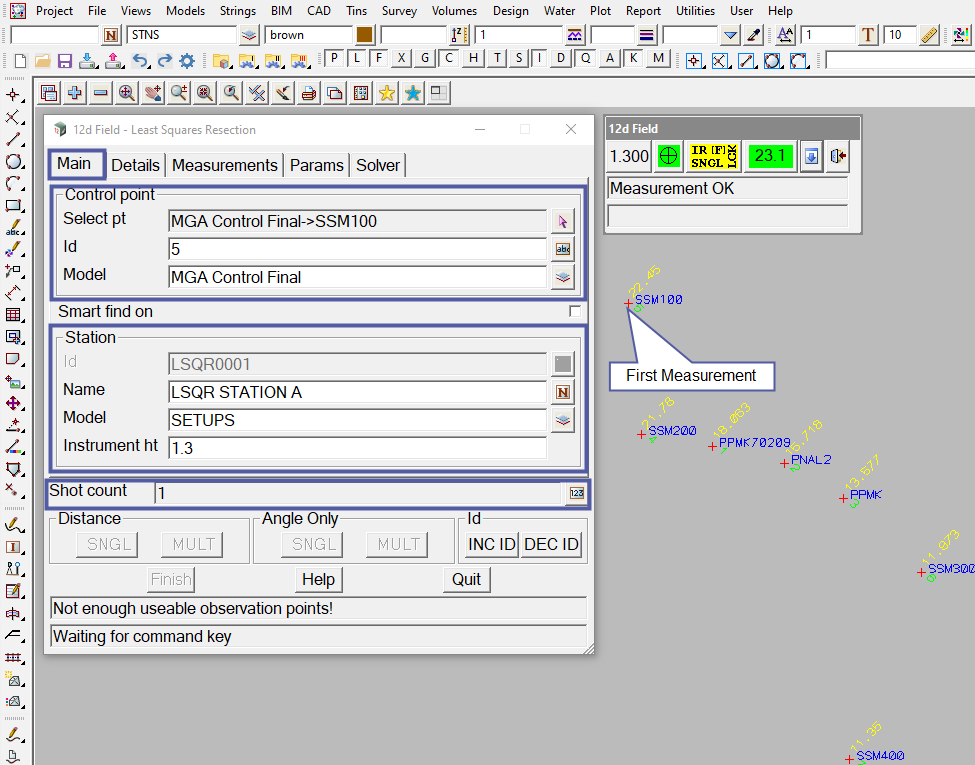
The Solver tab on the 12d Field – Least Squares Resection panel allows the user to set the the mathematical constraints to be applied in the least squares resection calculation. It also allows the user to set the display size of the error ellipse for better visualisation of the ellipsoid.
