This option will describe how to populate a range file panel instead of filling the panel/file out manually.
The video below will show how to populate a Range File Panel.
Continue down the page to see the options for populating a Range File Panel in 12d Model.
To create a Legend or Table of your Range File results, refer to “Tabulate Range File“.
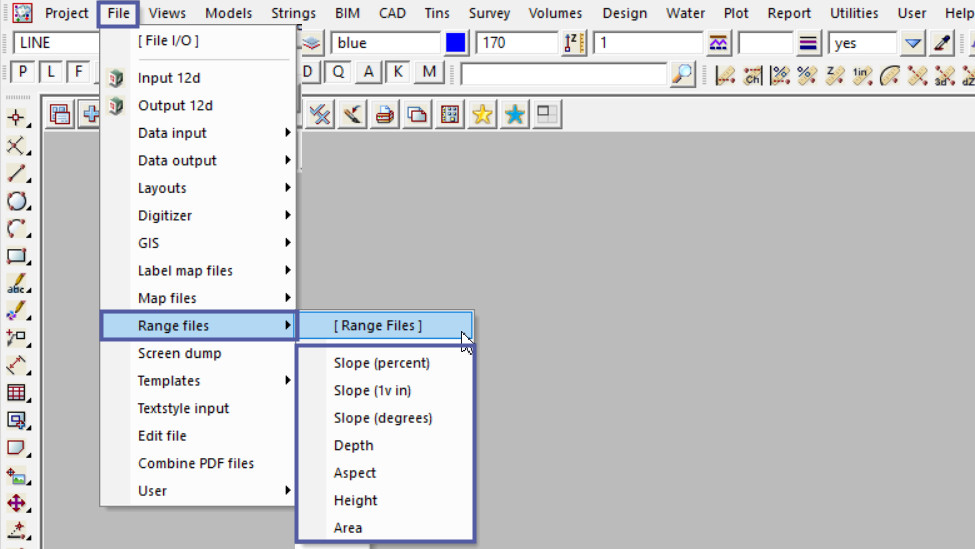
To view the Range File Panels available, Use: File => Range Files
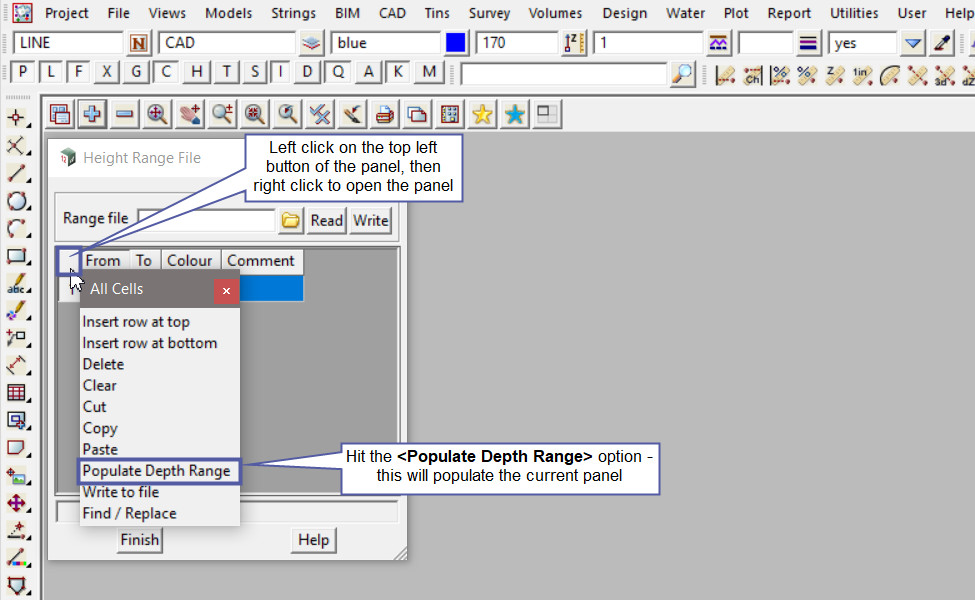
Once the panel is open, left click on the top left button of the panel, then right click to open the panel menu.
Hit the <Populate Depth Range> option – this will populate all the range file panels.
The <Populate Depth Range> panel will open.
Type in the value for the <From> option. This will be the start value for the range that needs to be populated. For this example the range will start at 0.
Type in the value for the <To> option. This will be the end value for the range that needs to be populated. For this example the range will end at 10.
Type in the <Interval> value, for this example it will be an interval of 1.
Pick the <Start Colour> and <End Colour> button and select a start and end colour for the rows to be populated.
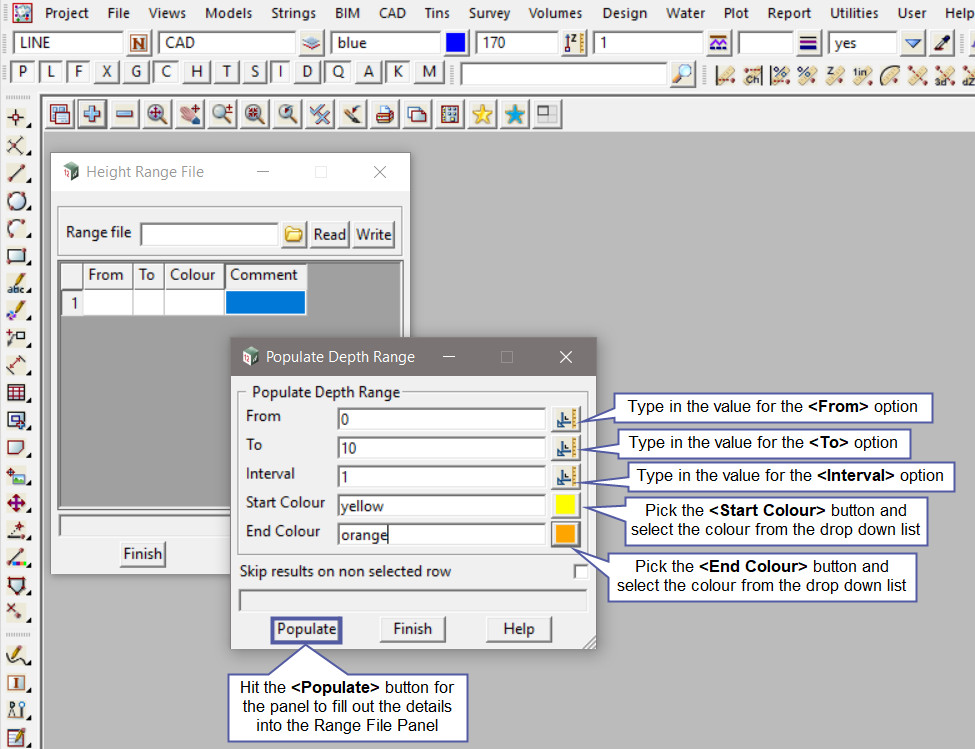
Hit the <Populate> button to populate the Range File Panel. In this example 10 rows have been filled out and a different colour calculated from Yellow to Orange for each row.
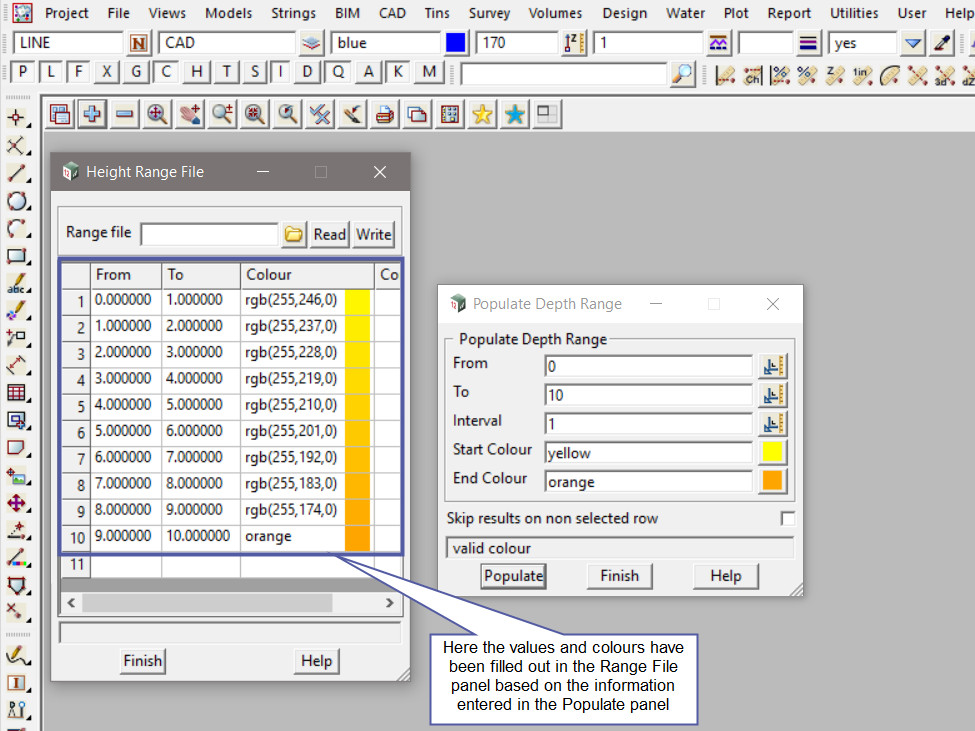
Unfortunately the Populate range panel will not append to Range File Panel.
A trick is to have a second Range File panel and to copy the rows across to create a finished Range File. To quickly open a second panel, we will duplicate the panel.
Left click on the <12d Model Symbol> and the panel menu will appear.
Pick the <Duplicate> option from the drop down list.
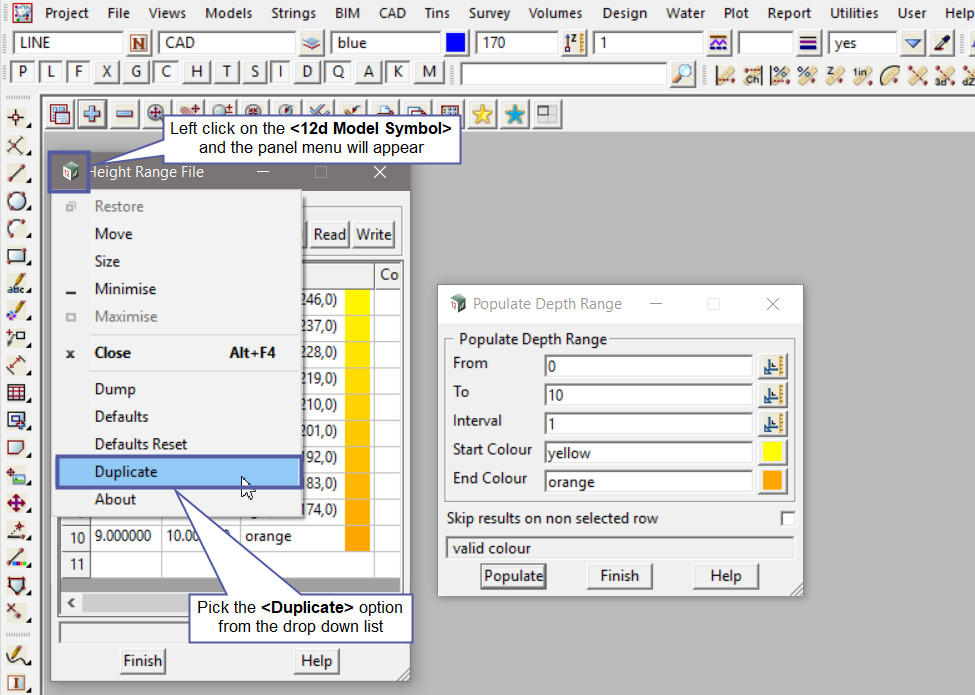
The duplicated panel will be empty.
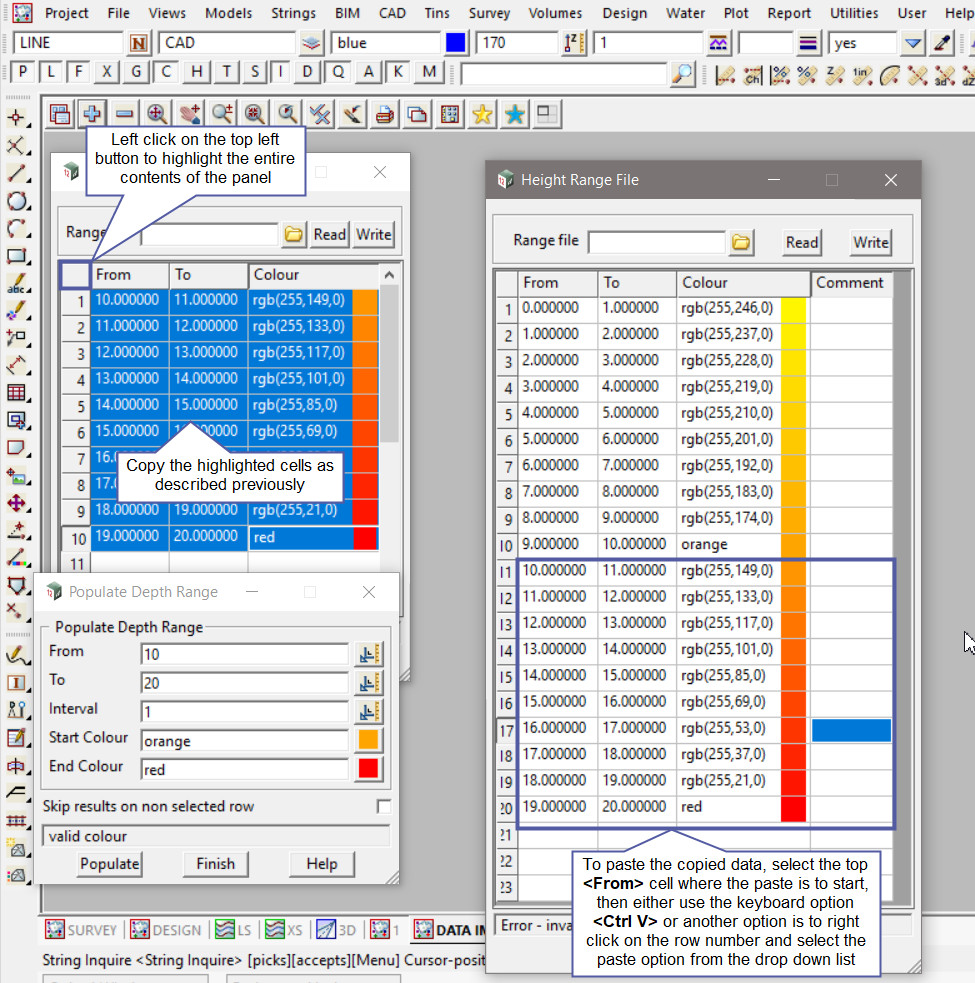
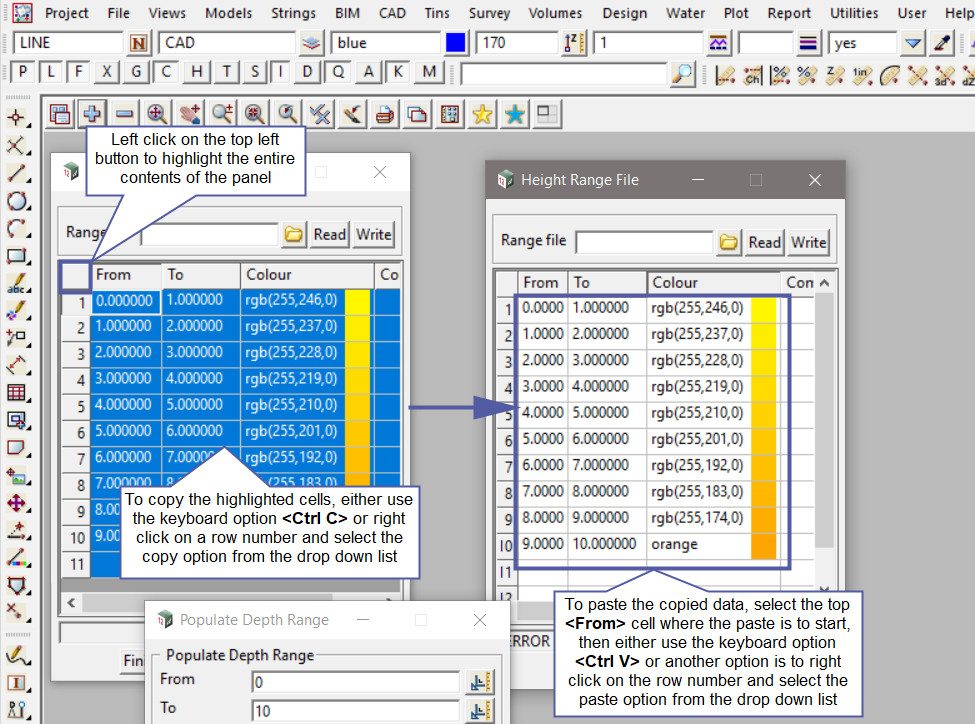
To copy the rows of data across to the new panel, left click on the top left button to highlight the entire contents of the panel, then to copy the data either use the keyboard option <Ctrl C> or right click on a row number and select the copy option from the drop down list.
To paste the data, select the top cell under the <From> column. Then either use the keyboard <Ctrl V> option, or right click on on the row number and select the paste option from the drop down list.
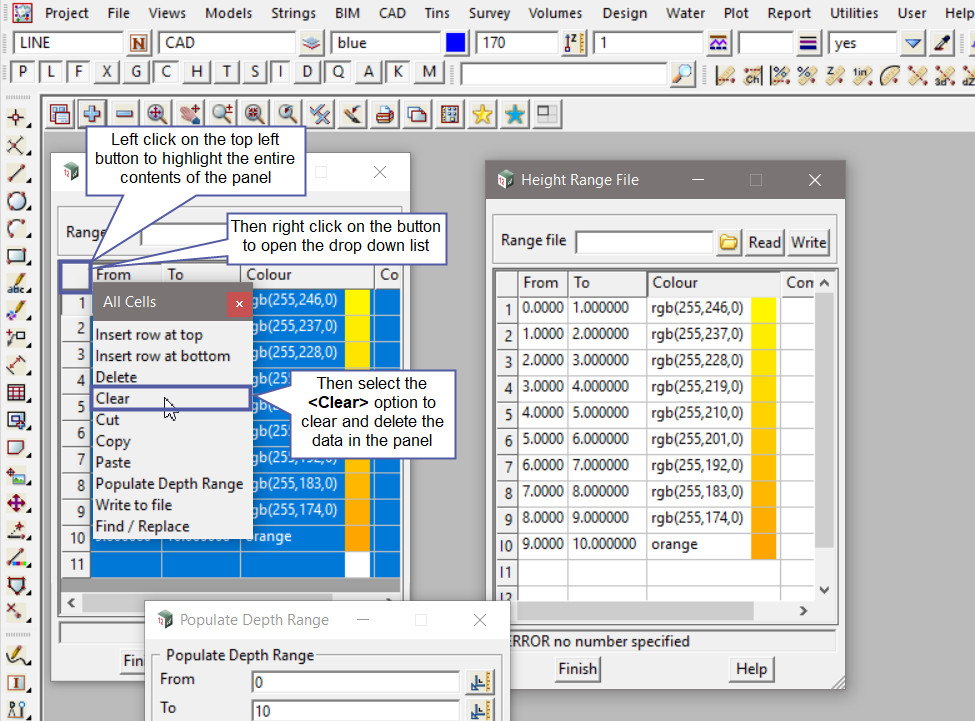
To clear the first panel to allow the panel to be populated again, left click on the top left button to highlight the entire contents of the panel. Then right click on the button to open the drop down list.
Select the <Clear> option to clear and delete the data in the panel.
Fill out the populate panel again and hit the <Populate> button to populate the Range File panel.
Type in the value for the <From> option. This will be the start value for the range that needs to be populated. For this example the range will start at 10.
Type in the value for the <To> option. This will be the end value for the range that needs to be populated. For this example the range will end at 20.
Type in the <Interval> value, for this example it will be an interval of 1.
Pick the <Start Colour> and <End Colour> button and select a start and end colour for the rows to be populated.
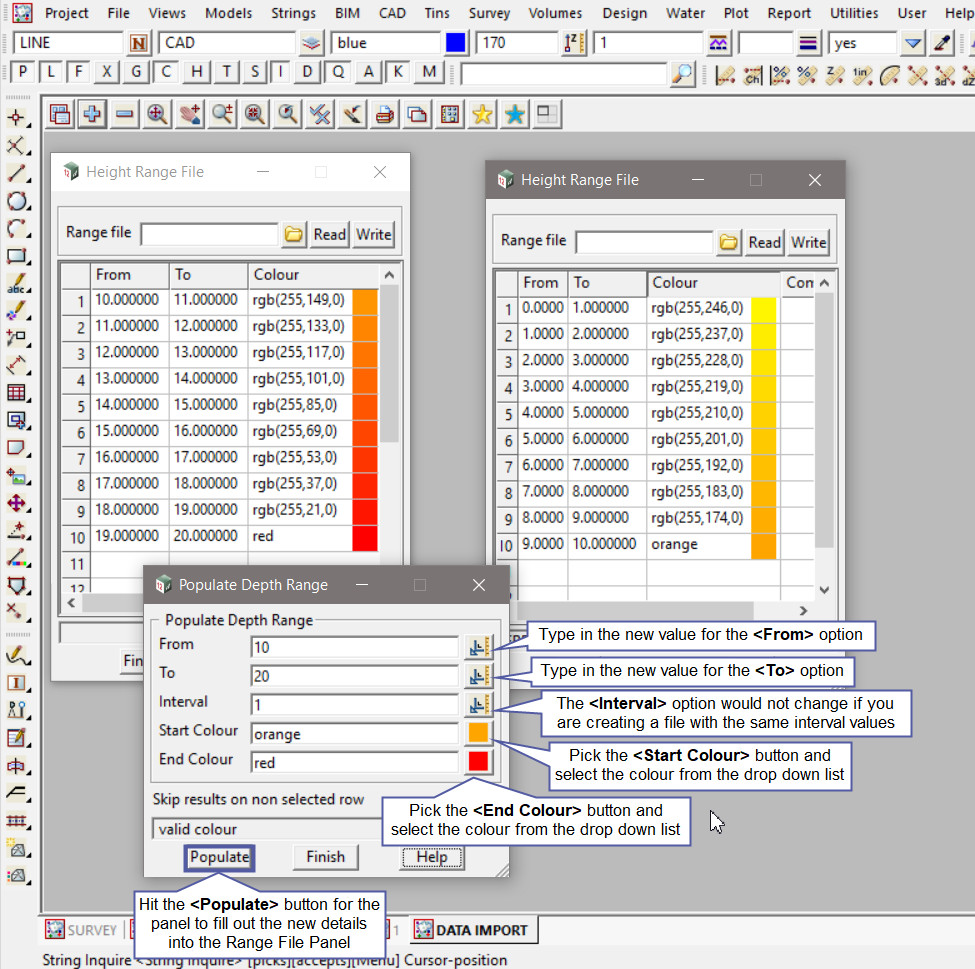
Again copy the newly populated data from the first panel to the second panel. To paste it in the correct position, click on the first clear <From> cell (under the 9.000000 cell), and then paste the data.
This is one process to be able to create and build up the range file that you require.
