Summary
Network Licensing of 12d Model allows multiple users to have access to 12d Model without the need to move physical dongles from machine to machine.
If you have been sent a Network Dongle then the steps for installing and configuring the dongle are as follows.
On the server;
1. Install the CodeMeter dongle drivers;
https://downloads.12dmodel.com/V15/12d_Model_15/CodeMeterRuntime_latest.exe
2. Plug in the dongle.
3. Open the C/M Control Center (from the Taskbar) and click <WebAdmin>
![]()

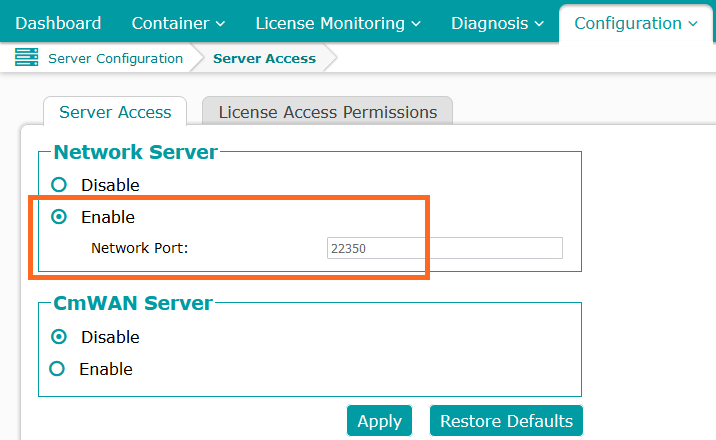
4. In the WebAdmin, go to: Config>Server>Server Access
And set Network Server: Enable
The click <Apply>
Note access to the Network Dongle must be allowed via Port: 22350
For more info, refer “10. CodeMeter Control Center & WebAdmin” in the Installing 12d Model 15 guide;
https://downloads.12dmodel.com/V15/12d_Model_15/Installing_12d_Model_15.pdf
On the users computer;
IF this is a new install of 12d Model, then please see here first;
https://12dwiki.com.au/installing-12d-model/
1. Startup 12d Model, and when you get the Autho Error panel, click <dongles.4d>
(Alternatively, from inside 12d Model go to Project>Management>Dongles>Dongles.4d Editor)
![]()
2. <Add> a new dongle and select Type: CodeMeter- Network
You can give the dongle a cosmetic name.
3. Click the C/M icon, to open the CodeMeter Browser
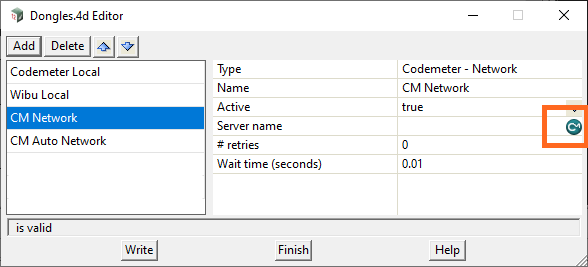
4. 12d should automatically find the Network Dongle.
Select the dongle number (ec514….), and click <Select>

If 12d does not find the dongle within 30-60sec, there is usually a problem with access.
Most commonly this is the WebAdmin>Server Access or port access has been denied.
5. Back on the Dongles.4d Editor click <Write> and save the file to the “user” folder.
Rollout to Multiple Clients
Follow the “Client” steps above to allow multiple users access to the Network Dongle.