This option is used to create polygons around the regions calculated from a depth range file between to selected tins. This allows to view where the areas of cut and fill are located.
Continue down the page to see the Depth Range Polygons Panel options.
To view the Tin Tin Depth Range Polygons Panel,
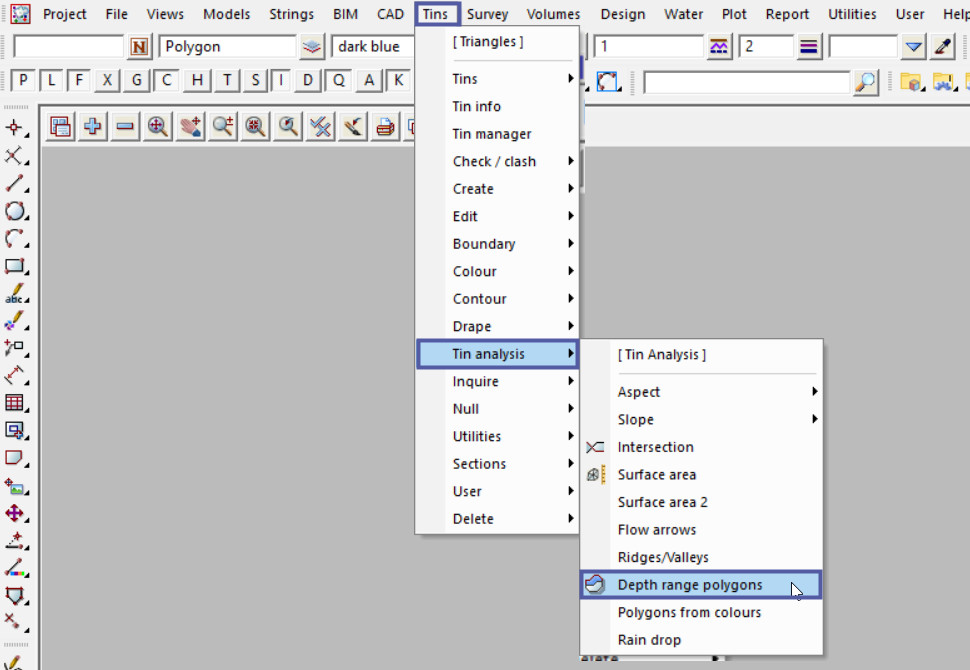
Use: Tins => Tin Analysis => Depth Range Polygons

To create the Depth Range Polygons between the two tins:
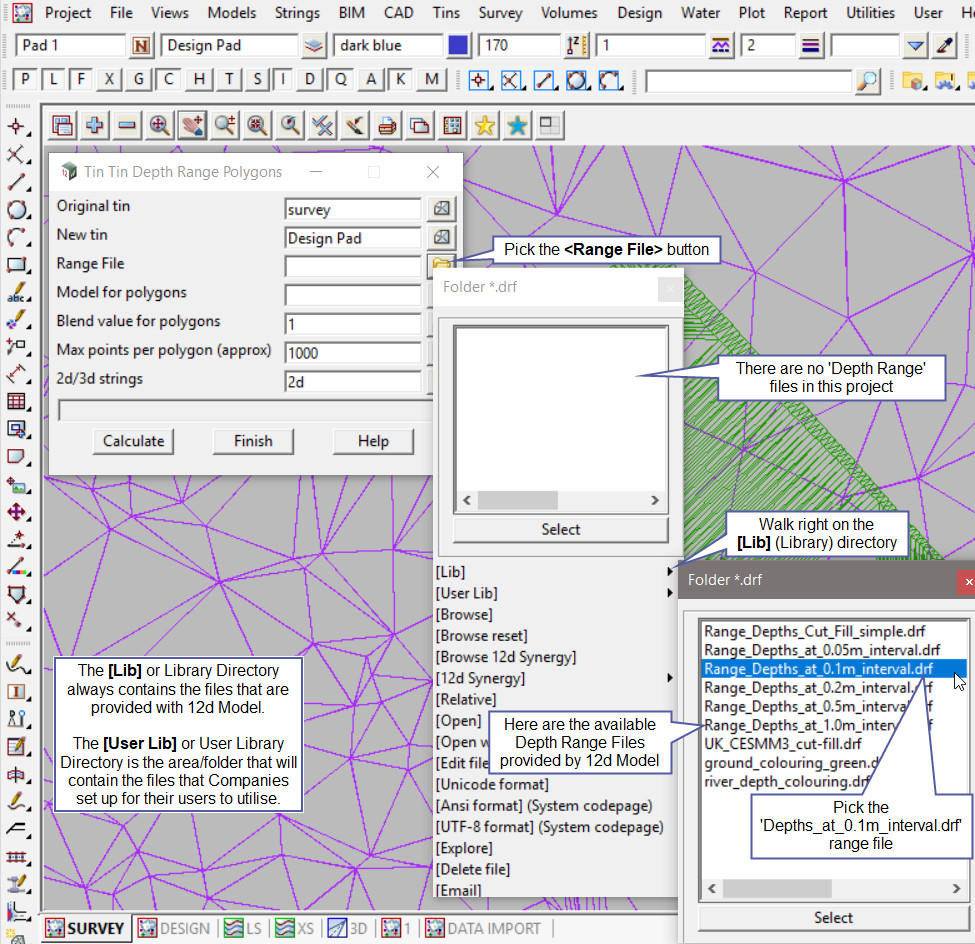
Pick the <Tin> button and select the original tin required.
Pick the <Tin> button and select the new tin required.

Pick the <Range File> button and then walk right on the [Lib] (Library) directory, and select the ‘Range_Depths_at_0.1m_interval.drf’ file.
Note: The [Lib] (Library) directory always contains the files that are provided with the 12d Model program. These files can be exactly what you are looking for and be used straight away, or a great example file that can be used to create the file required.

Either type in a new model name or pick the <Model> button and select a model from the drop down list for the ‘Model for polygons’.
Hit the <Calculate> button to create the depth range polygons between the two selected tins.
Pick the <+> button on the plan view and select the new model from the drop down list.
The Depth Range Polygons have been created based on the depths between the two tins.
Note: Every time the Depth Range Polygons panel is re-run the data is recreated, meaning that there can be duplicate sets of data, to clean the models out, Use the ‘Clean Model’ option found in: Models => Clean
If you would like to learn more about the Clean Model Panel and how to utilise it,
Visit this post: Clean Model

The other options on the panel are:
‘Blend value for polygons’ is the value of blending between 0 and 1. 0 means the polygon is totally transparent (and hence invisible) and 1 means that the polygon is opaque (non-translucent) and can’t be seen through at all. If blank, then the value is taken as 1 and the polygon is opaque (non-translucent).
‘Max points per polygon (approx)’ is when a polygon is created and the number of vertices in it is greater than this value, the polygon will be split into a number of polygons.
‘2d/3d strings’ is if set to 2d, the created strings are 2d strings with a z-value equal to the depth, then if set to 3d original/new, the depth strings are draped over the original/new tin to form 3d strings.
Depth Range File Panel Example
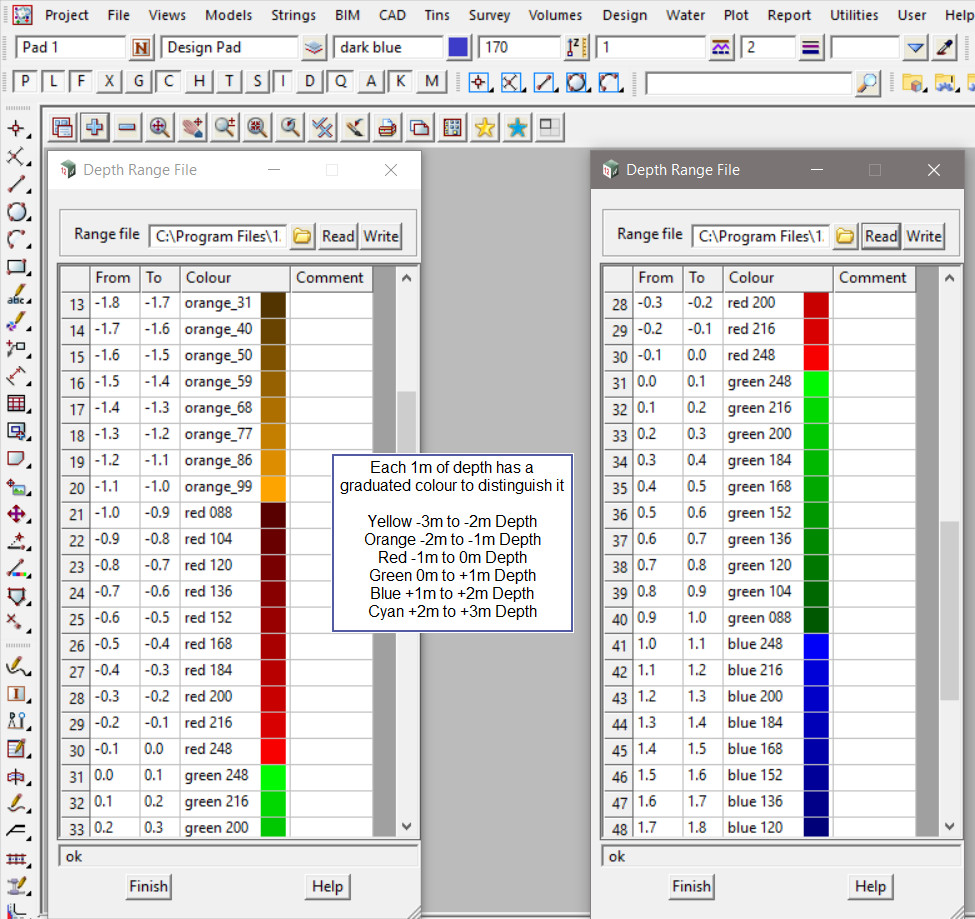
To open the Depth Range File to view its contents, pick the <Range File> button and then select the [Open] option from the list.

The Depth Range File panel will open and have the file shown.
In this example there are six different colour graduations to differentiate between the cut (negative -3m to 0m) depths and fill (positive 0m to 3m) depths.
If you would like to learn more about the Depth Range File Panel and how to utilise it,
Visit this post: Depth Range File
