This option is used to create a separate face (string) for each triangle in a Tin in the project.
Continue down the page to see the Create Tin Faces Panel options.
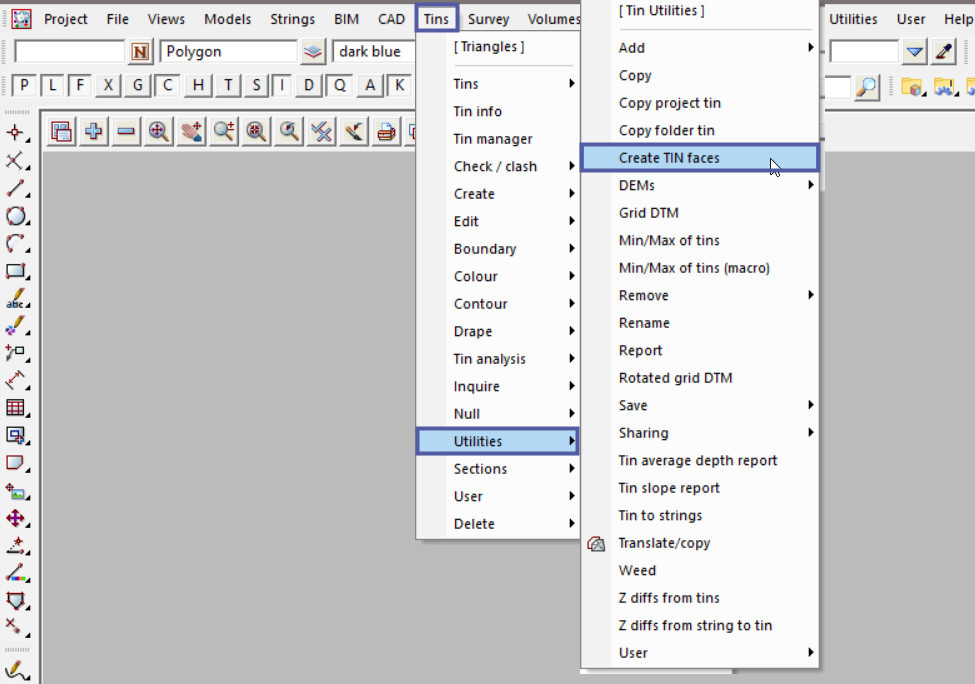
To view the Create Tin Faces Panel, Use: Tins => Utilities => Create Tin Faces

Create Triangle Faces (Strings)
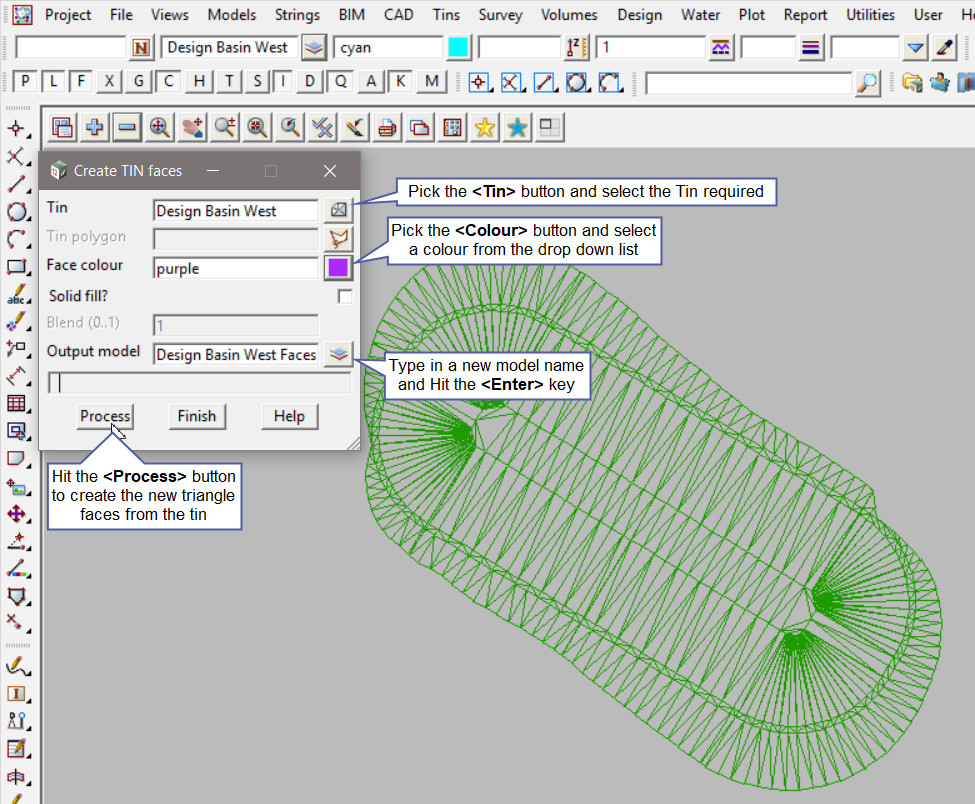
Pick the <Tin> button and select the tin required.
The ‘Tin Polygon’ option if a polygon string is selected, faces are created from triangles whose centroid is inside the selected polygon. This option has not been used in this example.
Pick the <Colour> button and select the colour from the drop down list for the new triangle strings.
Hit the <Process> button to create the new triangle faces.

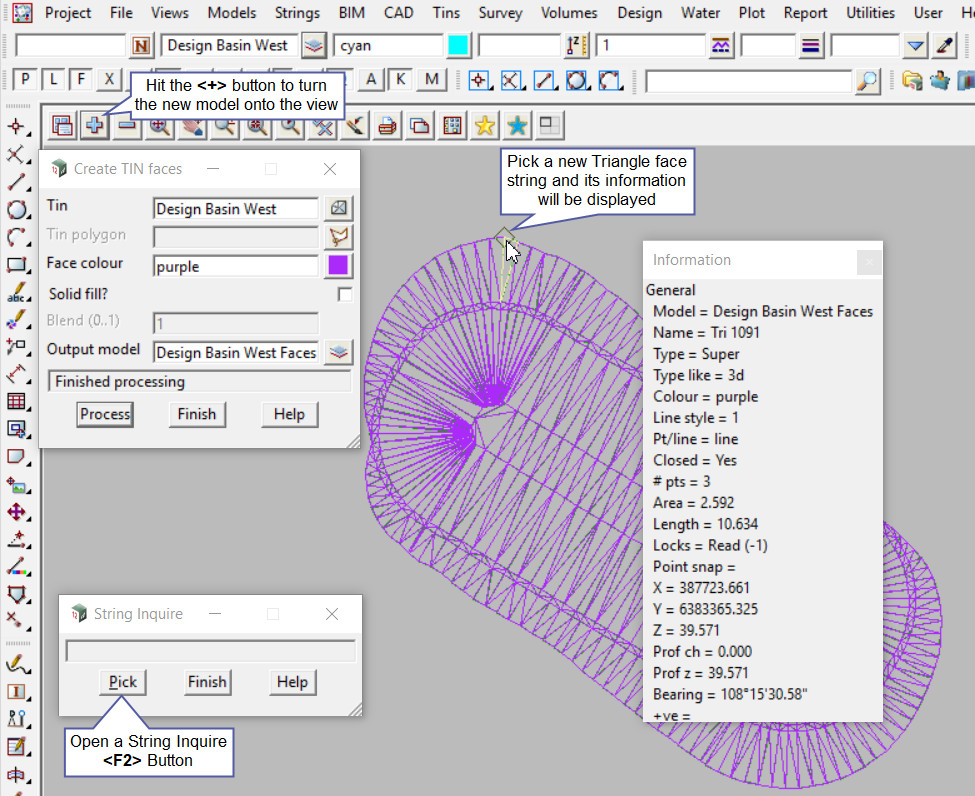
Hit the <+> button to turn the new model onto the view. The new ‘Design Basin West Faces’ model has been added to the view.
Use a String Inquire to check the details of the new triangle faces.

Create Solid Triangle Faces
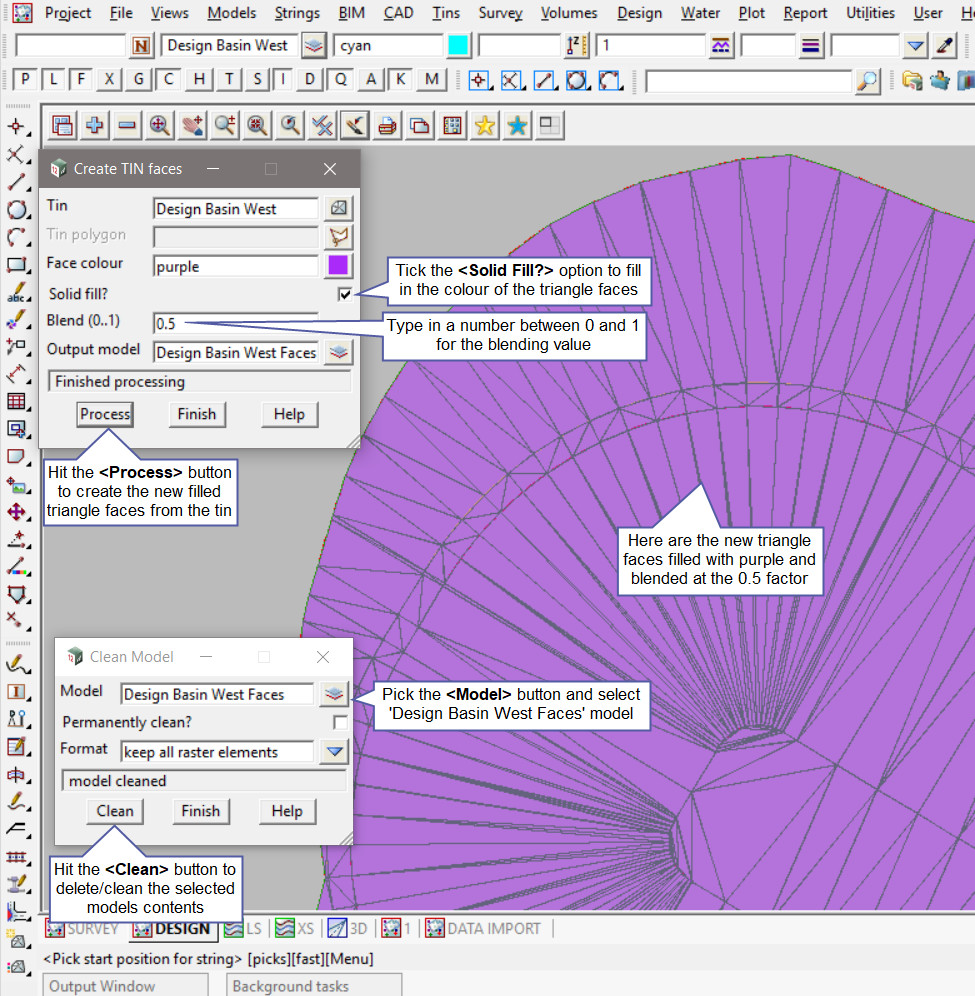
Tick the ‘Solid Fill ?’ option, this will create a solid triangle face string, basically filling the string with the selected colour.
Type in a ‘Blend (0..1)’ number between 0 and 1 for the blending factor. If a value of 0 is typed in it means the face is totally transparent (and hence invisible) and if a value of 1 is typed in it means that the face is opaque (non-translucent) and can’t be seen through at all, it is solid.
If blank, then the value is taken as 1 and the polygon is opaque (non-translucent).
In this example a blending value of 0.5 has been used.

Note: Every time the Create TIN Faces panel is re-run the data is recreated, meaning that there can be duplicate sets of data, to clean the models out,
Use the ‘Clean Model’ option found in: Models => Clean
If you would like to learn more about the Clean Model Panel and how to utilise it,
Visit this post: Clean Model