This option is used to create a set of contour strings from an existing Tin in the project.
There is another option to create contour strings and it is available under the Tins => Contour => Contour, Smooth and Label menu. This is a function and will allow the option settings to be saved.
If you would like to learn more about the Contour, Smooth and Label panel and the options available, visit this post: Contour, Smooth and Label
Continue down the page to see the Contour a Tin Panel options.
To view the Contour a Tin Panel, Use: Tins => Contour => Contour

Contour Definitions in 12d Model:
Contours for a surface when created, create strings of constant height, and lay over the tin surface.
Note: The contours shown on the view using the Toggle Button from the View Menu are just display contours: they are NOT Contour Strings. Display contours cannot be exported or labelled, if you try to use a string inquire you will find you cannot select them – that’s because they are not strings.
Creating Contour Strings
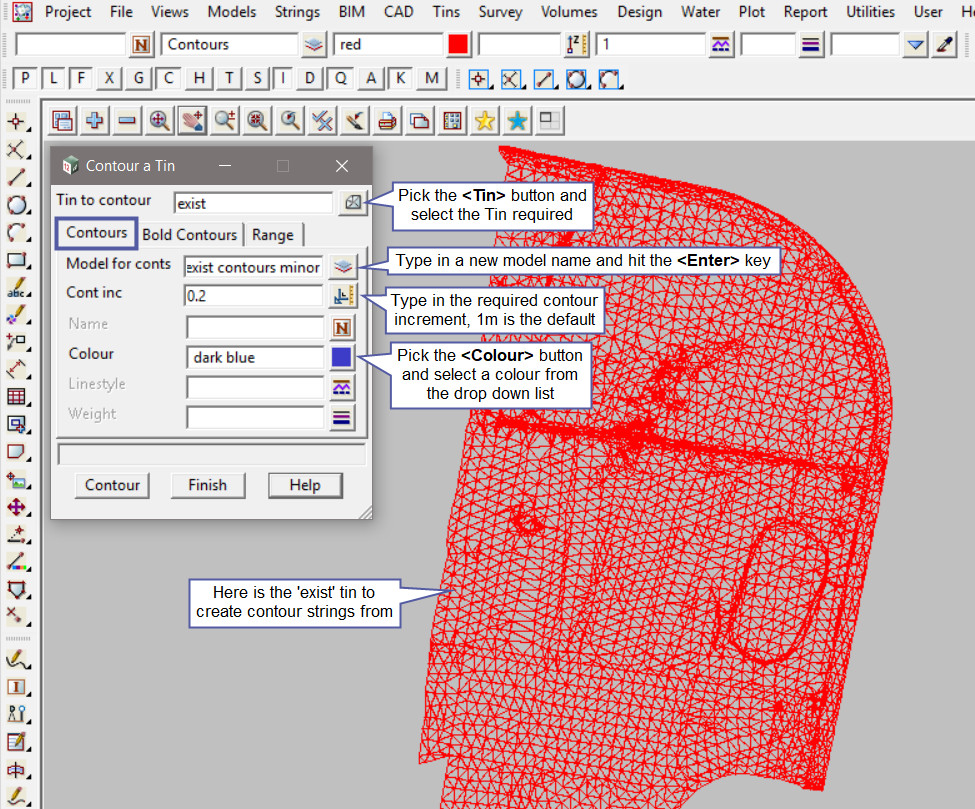
Pick the <Tin> button and select the tin from the drop down list.
Contours Tab
Type in a new ‘Model for Contours’ name and hit the <Enter> key.
Type in the ‘Contour Increment’ value. The default is 1m. In this example 0.2m is entered.
The ‘Name’ option allows the user to enter a name for the contour strings, if left blank the strings will be given a default name by 12d.
Pick the <Colour> button and select a colour from the drop down list.
The ‘Linestyle’ and ‘Weight’ options will allow users to select a linestyle and weight for the contour strings when they are created. If left blank the linestyle will be given a default style of 1 (continuous line), and no weight will be assigned to the strings.

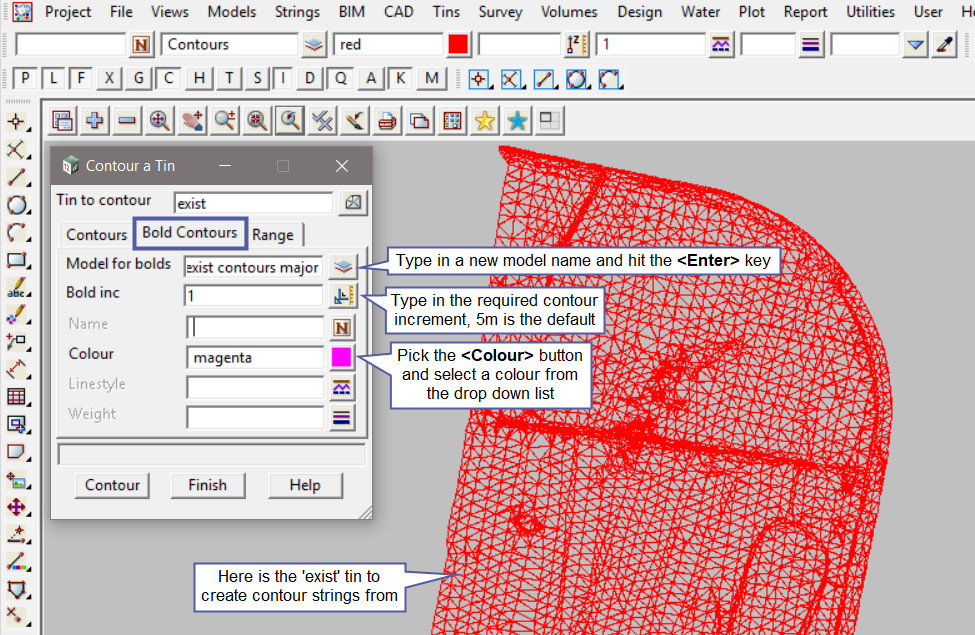
Bold Contours Tab
Type in a new ‘Model for Bold Contours’ name and hit the <Enter> key.
Type in the ‘Contour Increment’ value. 5 is the default value. In this example 1m is entered.
The ‘Name’ option allows the user to enter a name for the contour strings, if left blank the strings will be given a default name by 12d.
Pick the <Colour> button and select a colour from the drop down list.
The ‘Linestyle’ and ‘Weight’ options will allow users to select a linestyle and weight for the contour strings when they are created. If left blank the linestyle will be given a default style of 1 (continuous line), and no weight will be assigned to the strings.

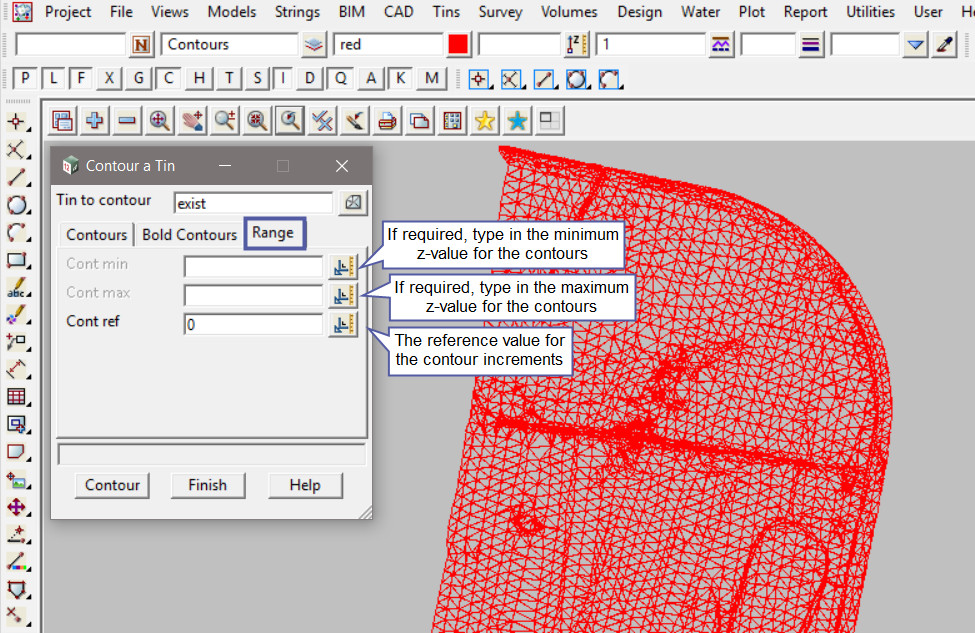
Range Tab
The ‘Contour minimum’ and ‘Contour maximum’ options have been detailed in the post below.
To learn about the Range Tab on this panel and how to utilise it,
Visit this post: Contour Smooth and Label – Range Tab

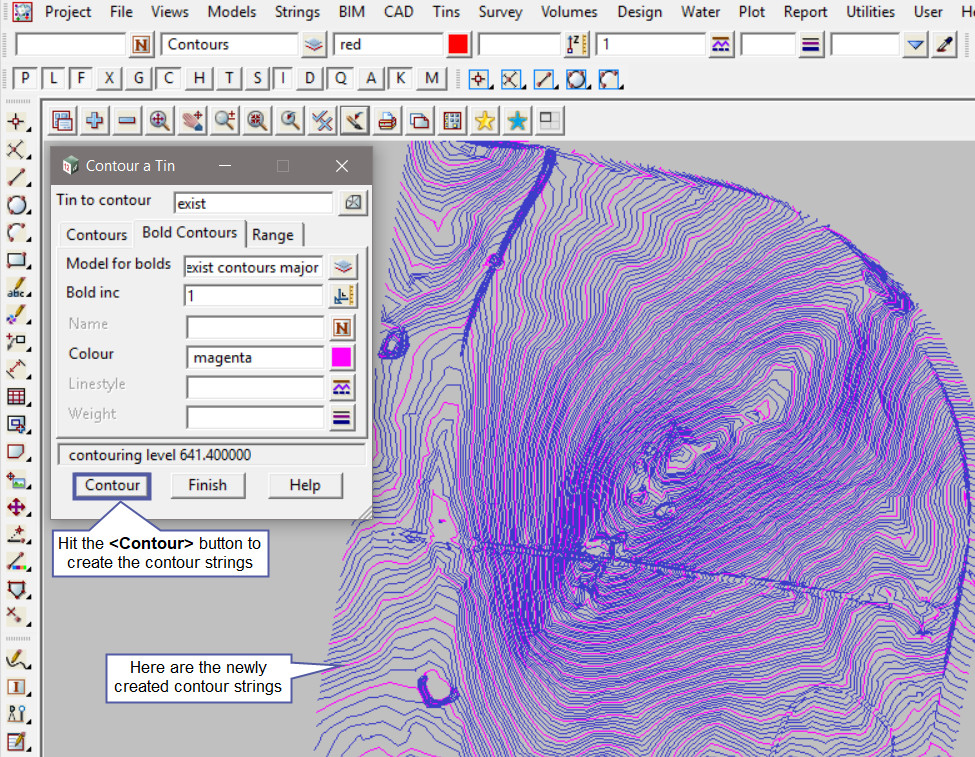
Hit the <Contour> button to create the contour strings.
Hit the <+> button on the view to turn on the contour models to the view.
To learn about creating Contour Labels for the created contour strings, it requires the use of another panel. To learn about the ‘Label Contours’ panel and how to utilise it,
Visit this post: Label Contours
