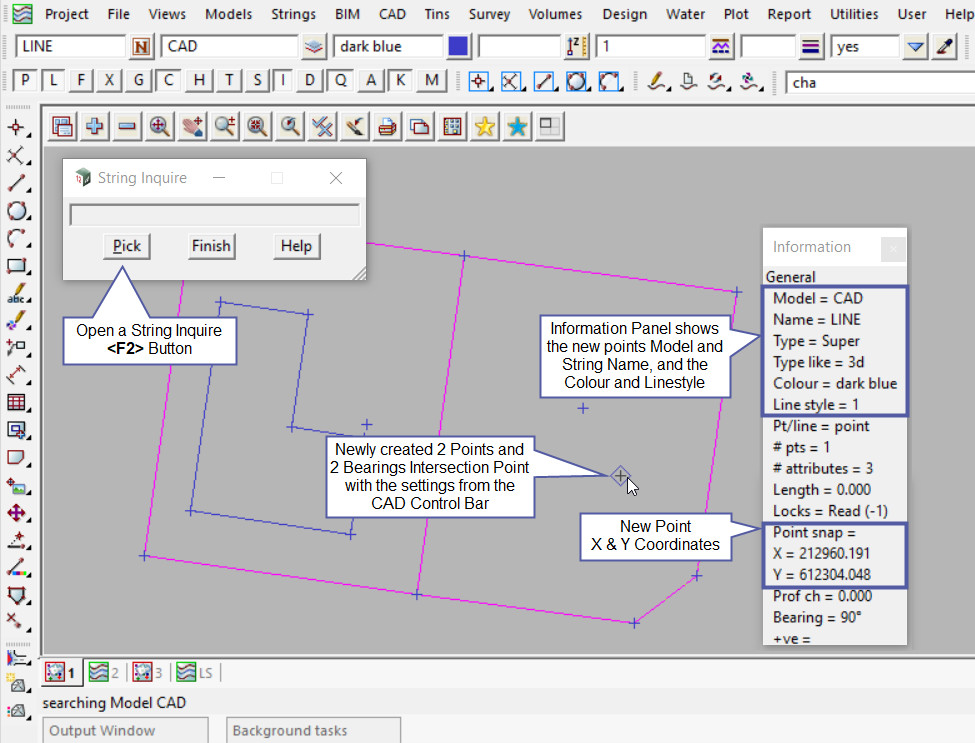
This tool is used to create a CAD Point by 2 Points and 2 Bearings.
The video below will show how to create a CAD Intersection of 2 Points and 2 Bearings.
Or continue down the page to see the CAD Intersection 2 Points and 2 Bearings create options.
This CAD Intersect 2 Points and 2 Bearings option is found on the CAD Intersection Toolbar, and is the 3rd option when the toolbar files out.
Or from the menu, Use: CAD => Intersection => 2 Points and 2 Bearings
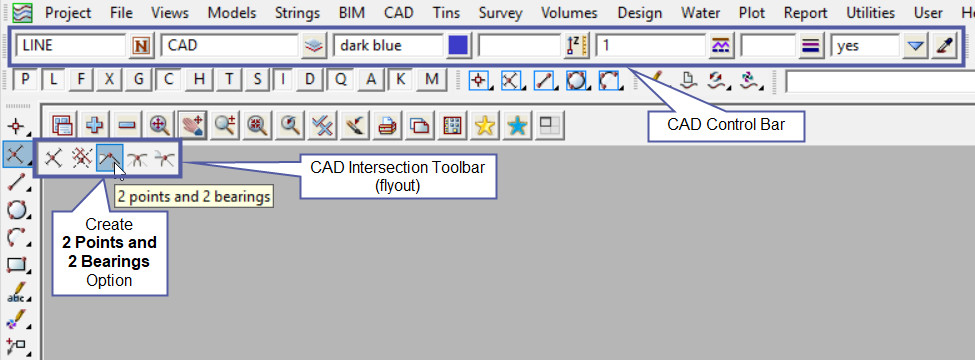
CAD Control Bar Options
The Point is created and placed using the details from the CAD Control Bar, these include,
String Name, Model, Colour, Z – Value, Linestyle, Weight and Tinable.
If you would like to learn more about the CAD Control Bar and how to utilise it,
Visit this post: CAD Control Bar – How to Utilise It
Example 1
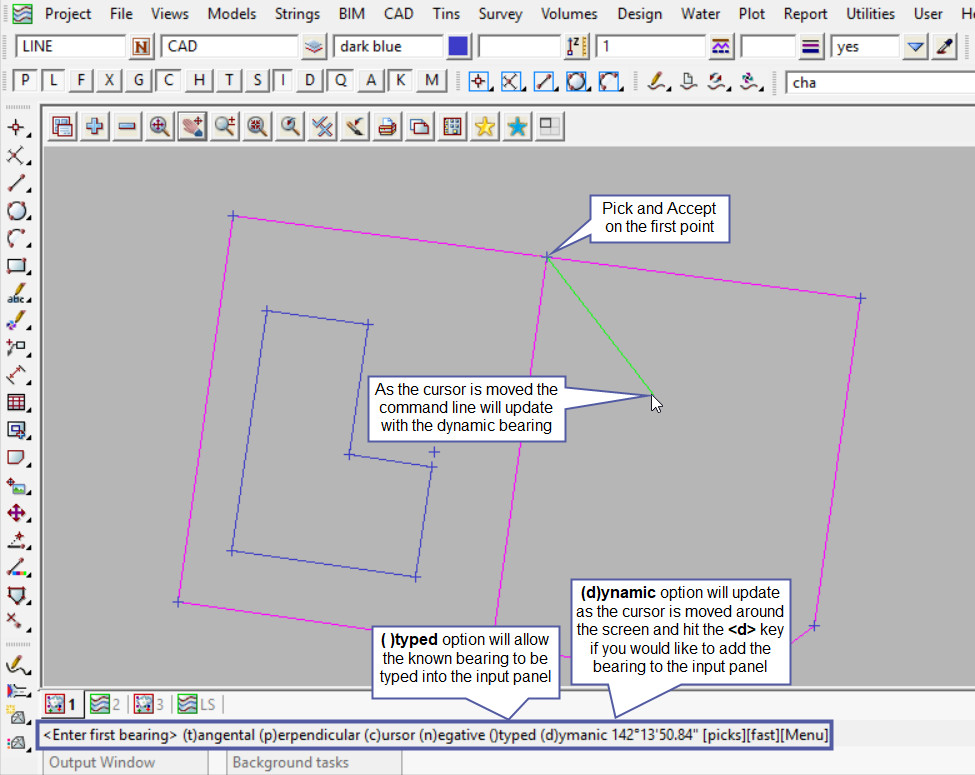
To create a point at the intersection of 2 Points and 2 Bearings, initially select the first point for the first bearing to start from.
If you know the bearing to enter, then hit the <spacebar> on the keyboard.
If you would like to use the dynamic bearing from the cursor position, then hit the <d> on the keyboard.
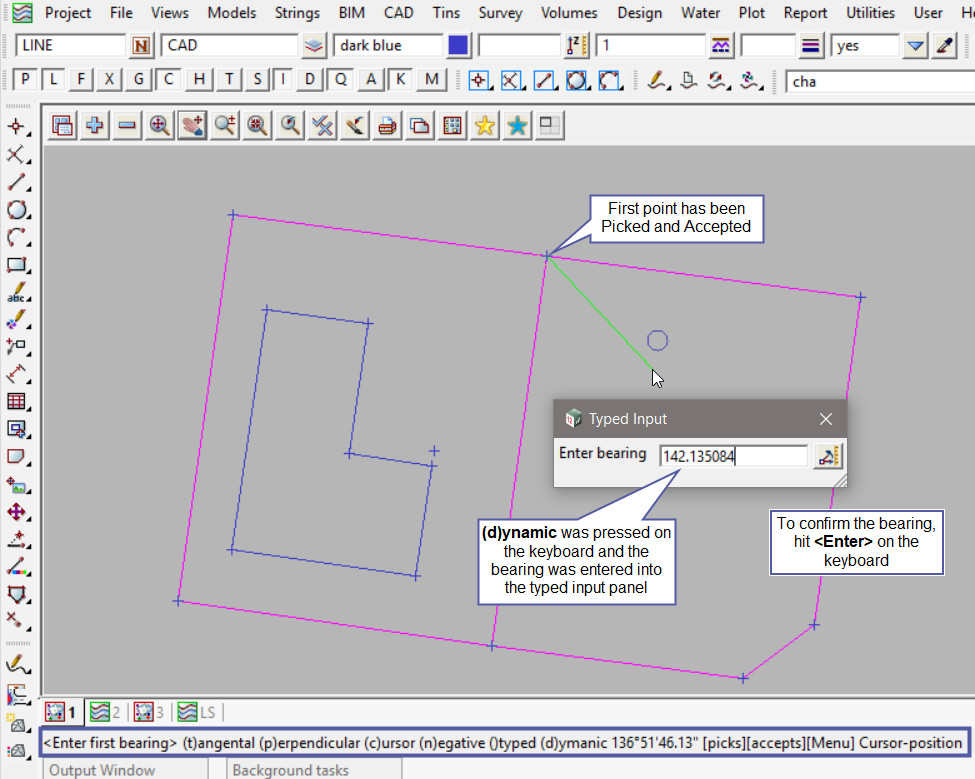
For this example the <d>ynamic button was used and the dynamic bearing will be entered into the typed input.
To confirm the bearing, hit <Enter> on the keyboard.
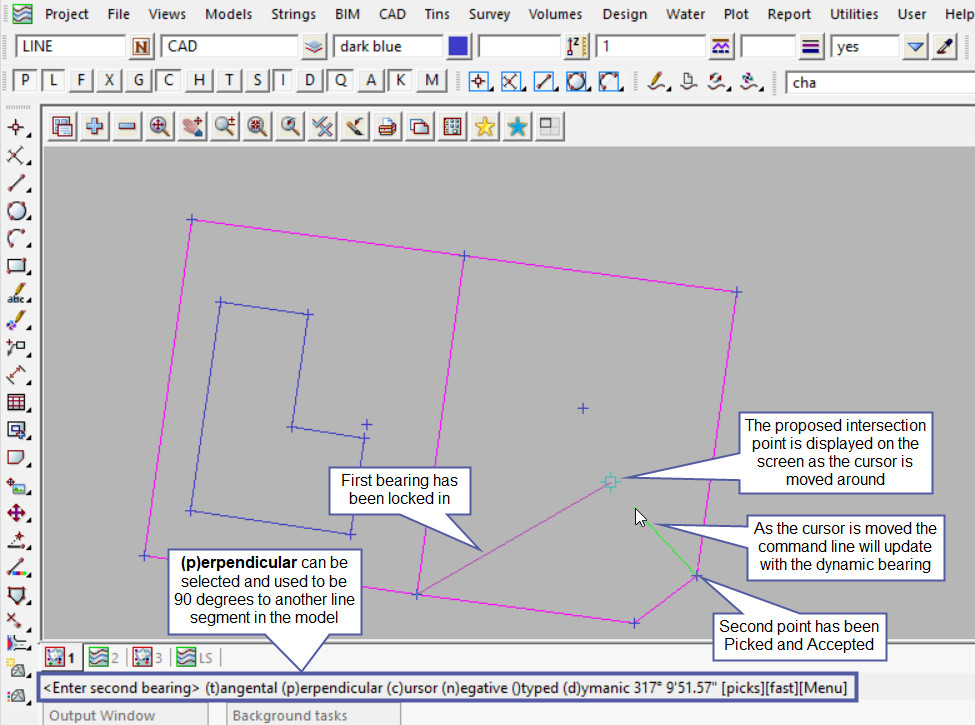
The first bearing has been locked in, now pick and accept the second point for the second bearing to start from.
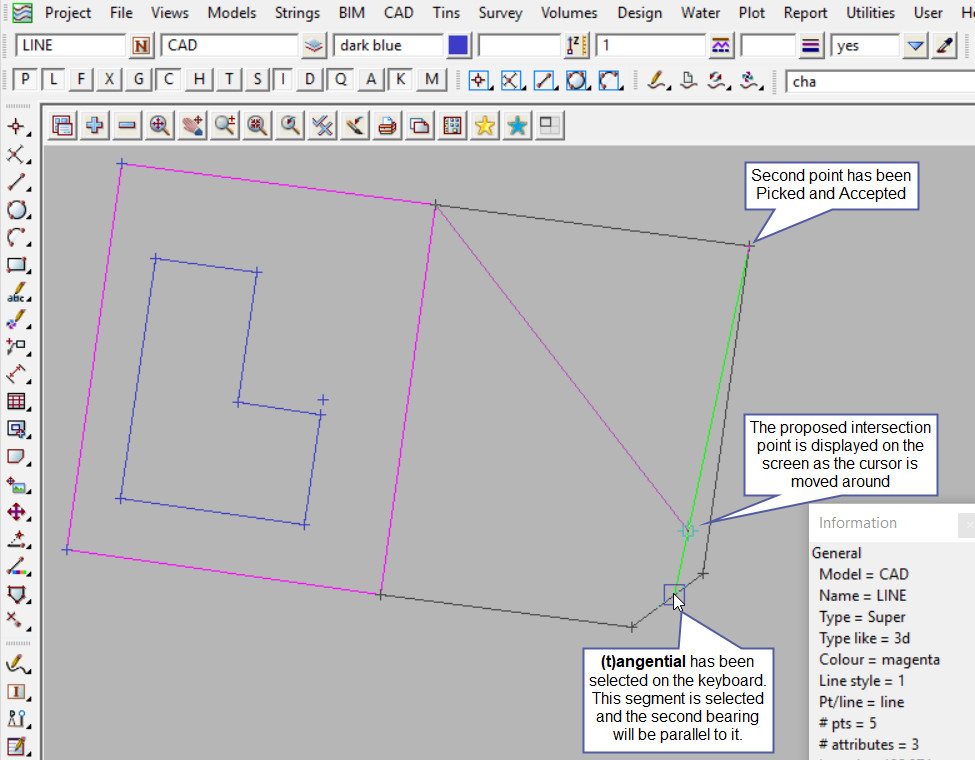
As the cursor is moved around the screen the calculated intersection point will be displayed and again a dynamic bearing could be used, but for this example we will use the <t>angential option available.
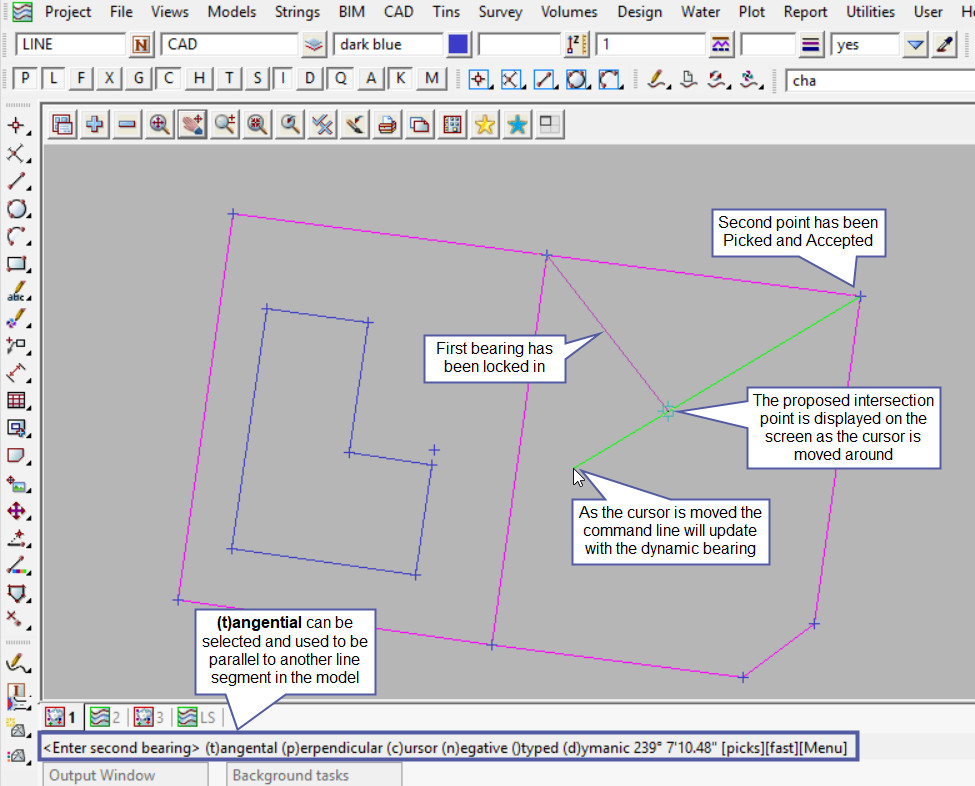
Type the <t>angential option into the keyboard and pick and accept the chamfer on the corner of the block. The second bearing will be parallel to the chamfer line and intersect with the first bearing.
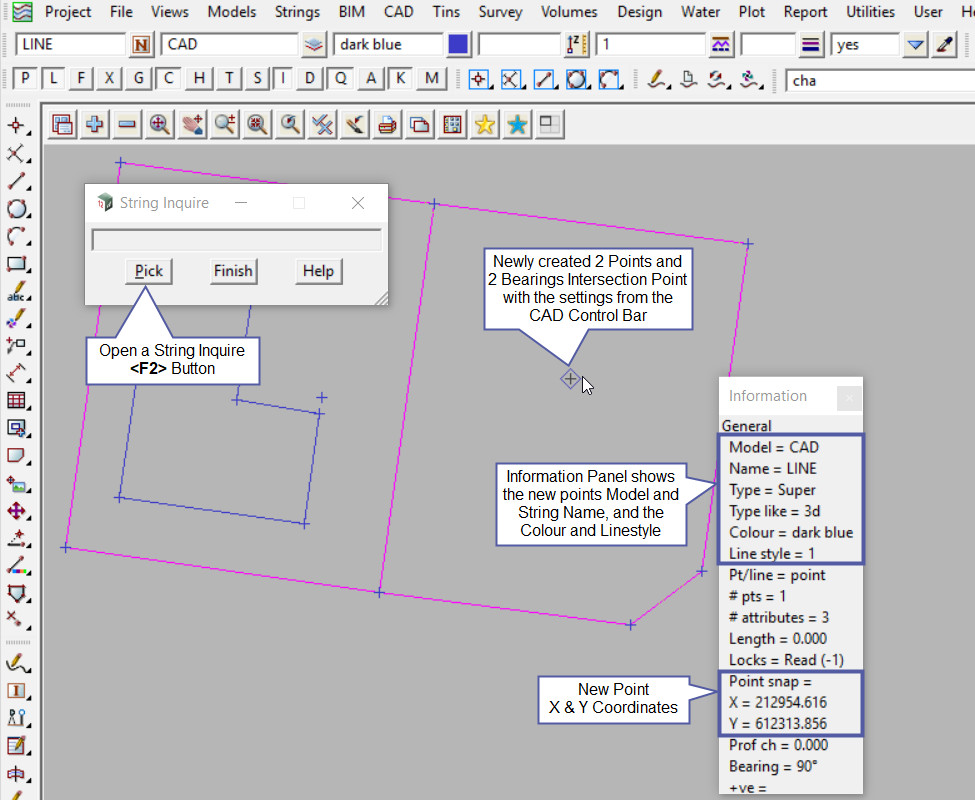
The new one point string has been created with the setting from the CAD Control Bar.
Note: Turn the model onto the screen if the point is not shown.
Note: If a second point is to be created the option is still active in the project until another option is selected, or it is cancelled. The user can select the next start position and use the option again.
Example 2
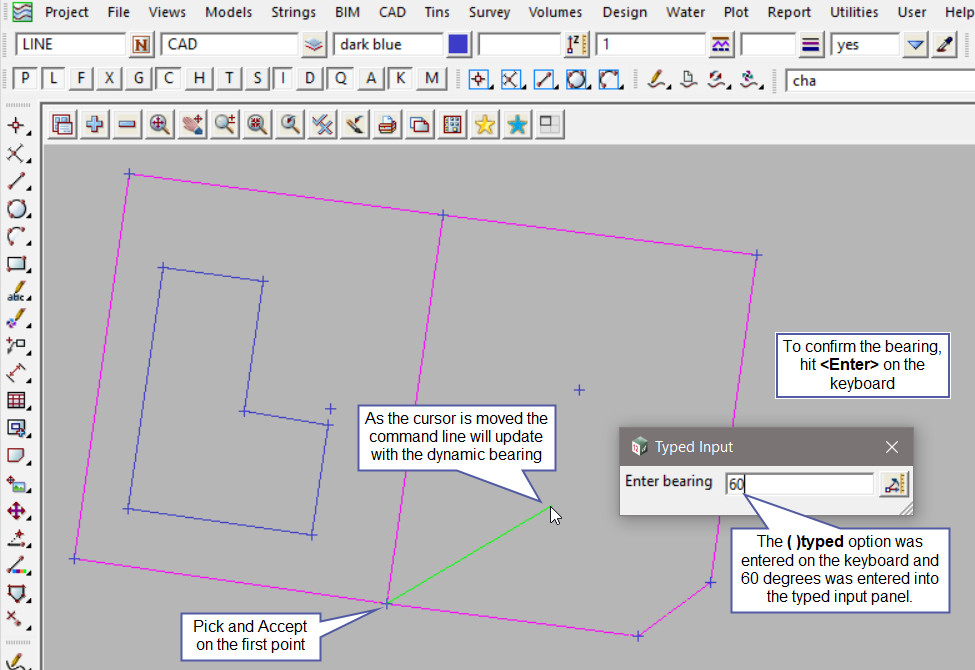
Firstly select the first point for the first bearing to start from.
If you know the bearing to enter, then hit the <spacebar> on the keyboard, here we have used 60 degrees. Hit the <Enter> key to confirm the bearing.
The first bearing is now locked in. Select the second point for the second bearing to start from. As the cursor is moved around the screen the calculated intersection point is shown.
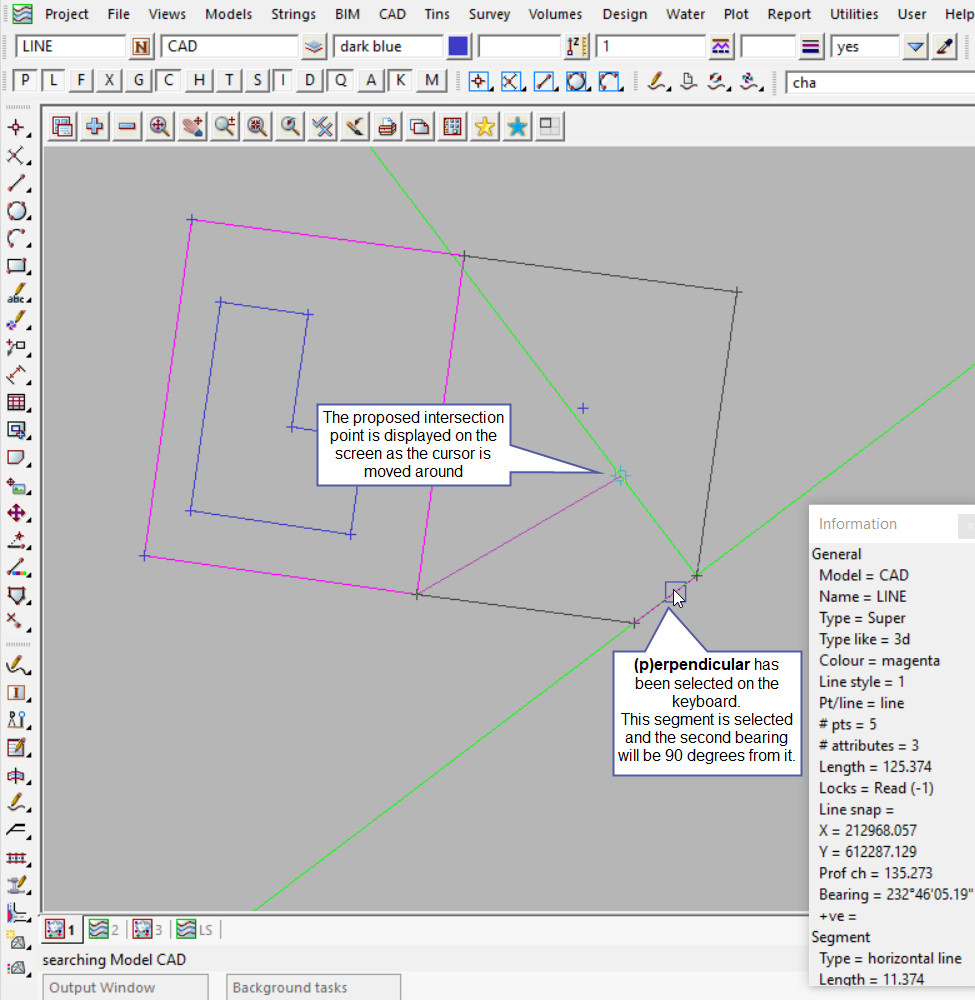
Hit the (p)erpendicular key to use the perpendicular option. Select the chamfer corner on the block and then the perpendicular line will be displayed and the proposed intersection point. If this is correct hit the accept button to create the point.
The new one point string has been created with the setting from the CAD Control Bar.
