This page provides you with a simple 4 step process for sending 12d Model data into Revit using the IFC file format.
- STEP 1 – (12d Model) Export a DWG File
- STEP 2 – (Revit) Create Revit Project and Link the DWG File
- STEP 3 – (12d Model) Export IFC File
- STEP 4 – (Revit) Link IFC File
The workflow for each of these steps is very straightforward and is shown in detail below.
1.1 Create a point in 12d Model at a known coordinate close to your project. Set a ‘cross’ symbol so that the point can be seen in Revit.
This point will be used in Revit to set the “Project Base Point”
In the example we have chosen E 256 250 and N 7 411 450
Important: Ensure that the location of the point you choose, is at the most furthest point in your project to the South and West. ie. in the bottom left corner location.

1.2 Export a DWG file from 12d Model of the point that you have just created.
In the example we have included other design strings, these are included for visual reference only.

2.1 Create a new Revit project, use Insert > Link CAD and select the file from Step 1 selecting “Auto – Center to Centre” Positioning method.
Un-tick “Orient to View” tick box.

2.2 The DWG data appears on your screen, along with the Project Base Point
Use the Move option to move the DWG data from the centre of the cross (the point created in 12d at the known co-ordinate) to the Project Base Point at E 0.0 , N 0.0 location.

2.3 Note that the cross point from the DWG file is now at co-ordinate E 0.0, N 0.0
Use Manage > Coordinates > Acquire Coordinates
Select the DWG file to Acquire its coordinates
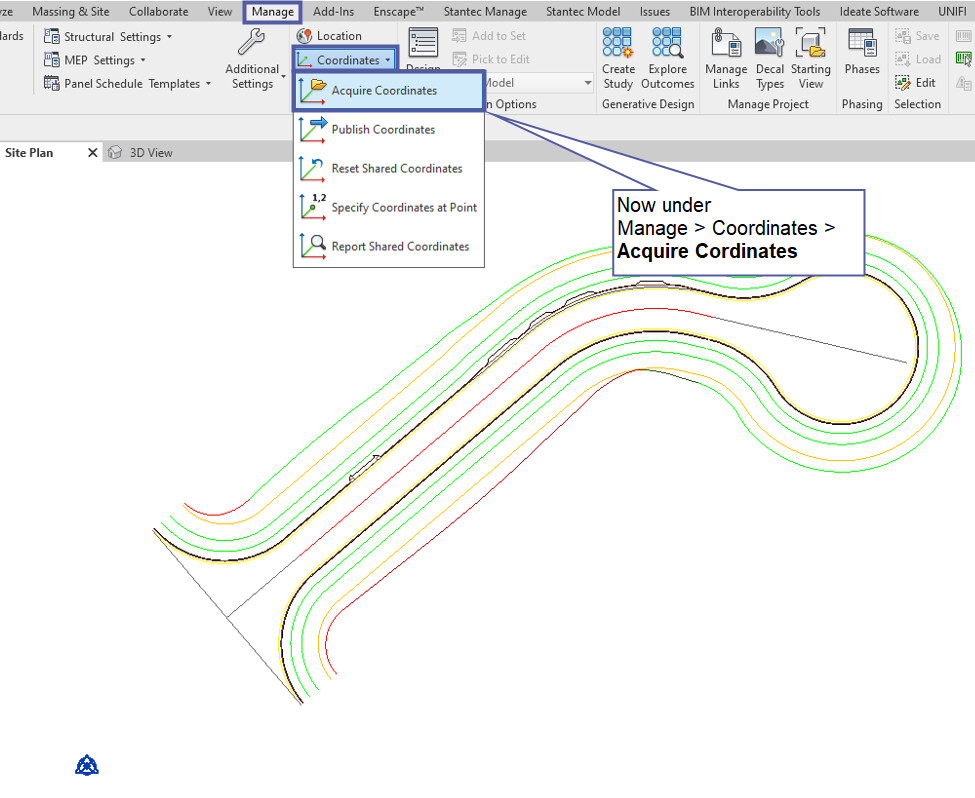
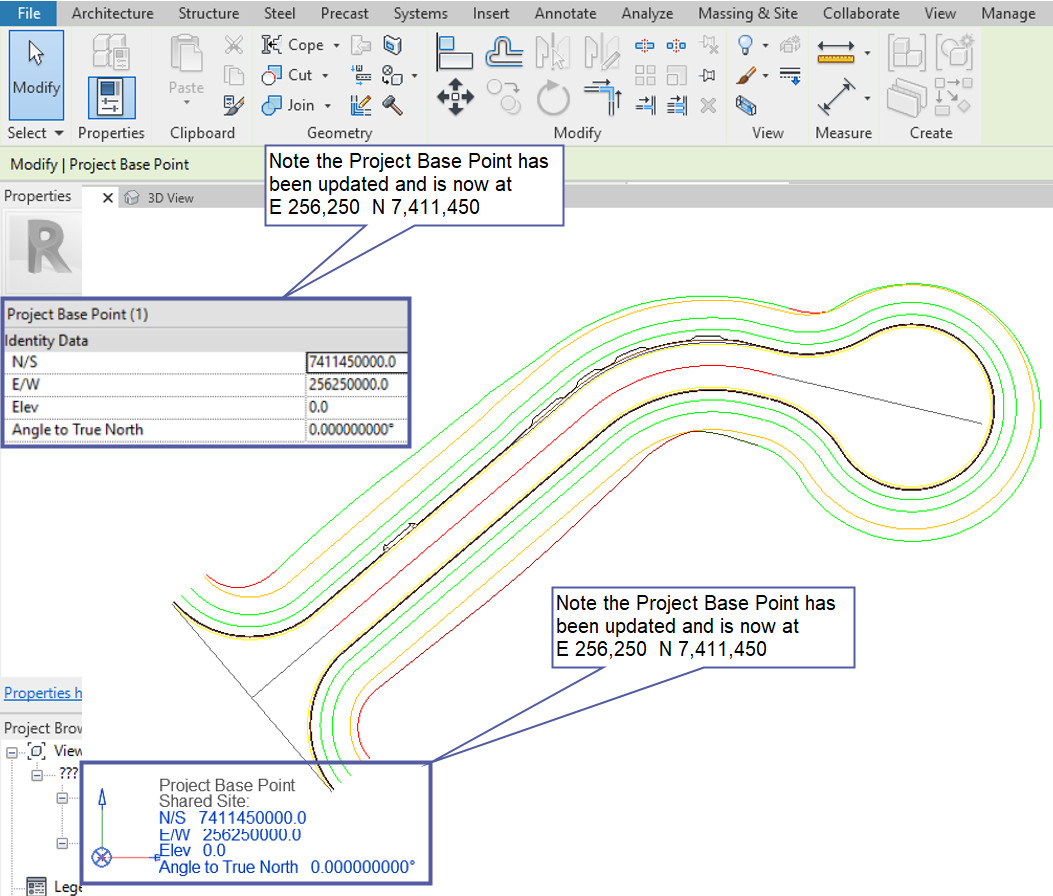
2.4 This will change the “Project Base Point” so that it has the world co-ordinates of the point you created in 12d Model in step 1.
Notice that the E and N co-ordinate values of the Project Base Point have changed.
3.1 Export your data from 12d Model using the IFC option.
IFC (Industry Foundation Class) is the best format for exchanging data between 12d Model and Revit.
This format will keep the attribute rich design information from 12d Model and pass it into Revit.
Important: Ensure that you include the point you have created in Step 1.
This can be found under the main menu
- BIM > Export > IFC > IFC express writer (using Version 14)
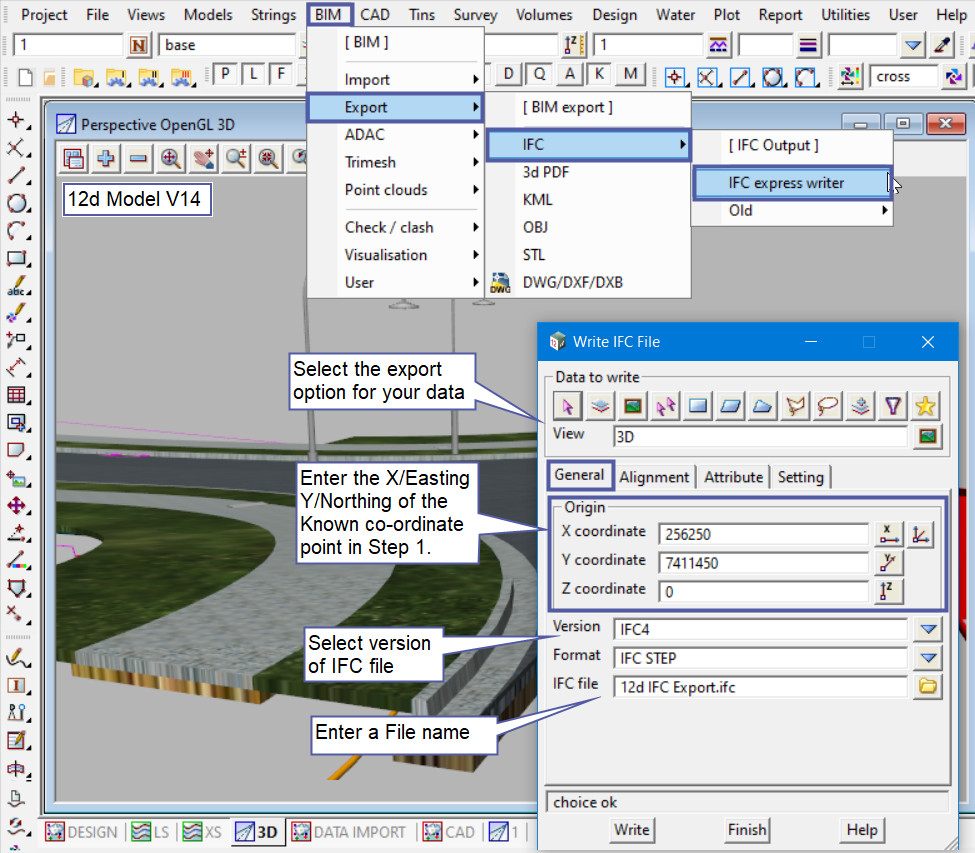
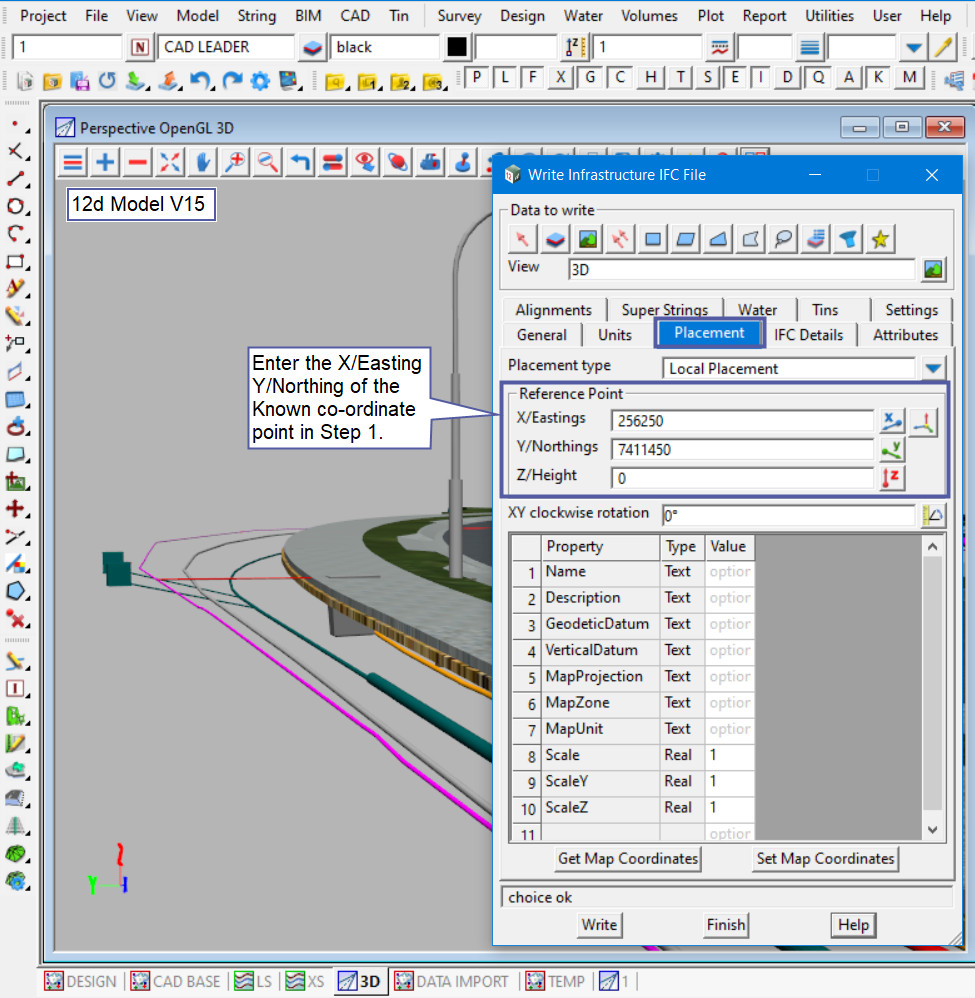
- BIM > Export > IFC > IFC Write Infrastructure (using Version 15)

in the Placement tab enter the Reference / Origin co-ordinate of the known point in Step 1.
4.1 In your Revit Project, go to Insert > Link IFC, select the IFC file exported from 12d Model.

4.2 Now the 12d Model IFC data is in the correct location in Revit (Site Plan View)

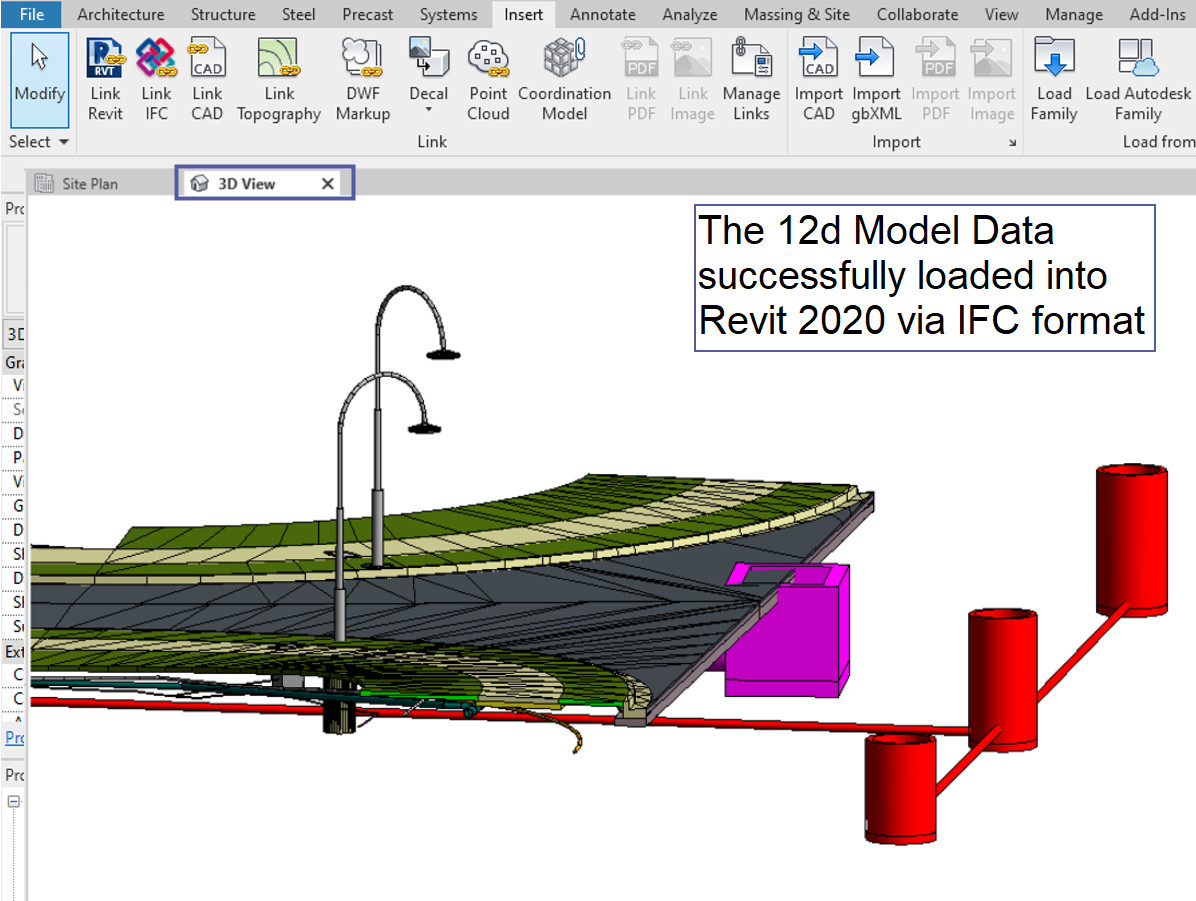
4.3 Now lets take a look at the (3D View)

Note: If you already have an existing Revit Model and want to Link an IFC file, you can use the same workflow and link in the Revit Model created following the steps above.
One additional step is needed in Revit; to change the Linked IFC file from an Overlay to an Attachment.
The IFC data will now pass through and be seen when linked.
You will need to complete Steps 1 and 2 only once to set up the ‘Project Base Point’ in Revit
The ongoing workflow to update the 12d Model information in Revit would simply be to repeat Steps 3 and 4.
Notes about the example used in this post:
- This example has used both 12d Model Version 14 and 15 to create the IFC files.
- The IFC format version used is “IFC4” in both V14 and V15.
- The version of Revit used is 2022.
- The 12d Model project used is in MGA Zone 56 co-ordinate system