This tool is used to create a Boundary string/s around a Tin, to ensure that the unacceptable triangles around the edges of the tin that have been nulled will be saved if the tin is retriangulated.
The video below will show how to create a Tin Boundary string/s and save it to the Tin for when the tin requires a retriangulation.
Or continue down the page to see the Tin Boundary create options.
To view the Tin Boundary Panel, Use: Tins => Boundary => Boundary
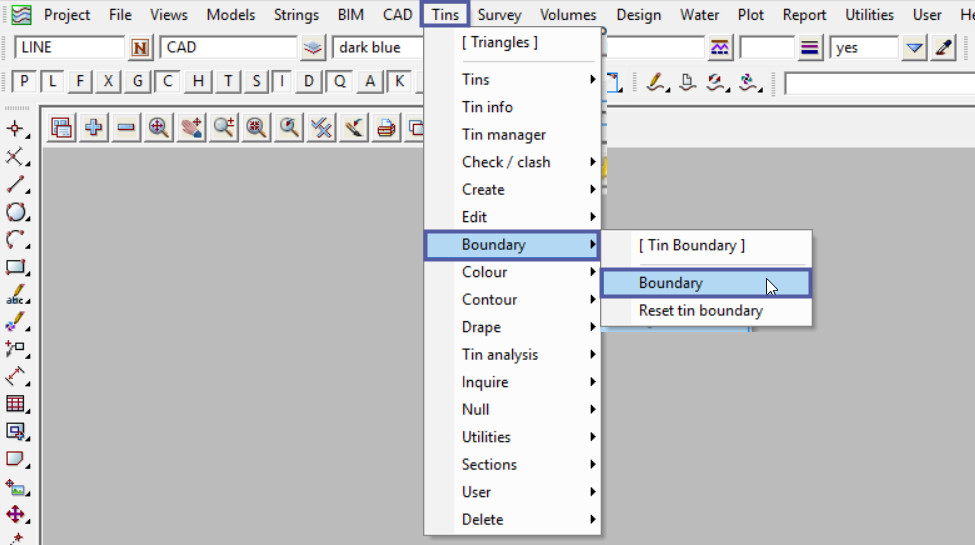
The Boundary option is used to construct the boundary string/s for a tin, i.e. the strings going around the edges between the null and non-null triangles in the tin. If the tin has holes (internal null regions), then there will be more than one boundary string created.
Pick the <Tin> button and select the Tin to create a boundary string/s around.
Either pick a model from the drop down list or type in a new model name for the ‘Model for Boundaries’. i.e. – ‘bdy survey tin’.
Pick a Colour for the new boundary.
Hit the <Create> button to create the new boundary string/s.
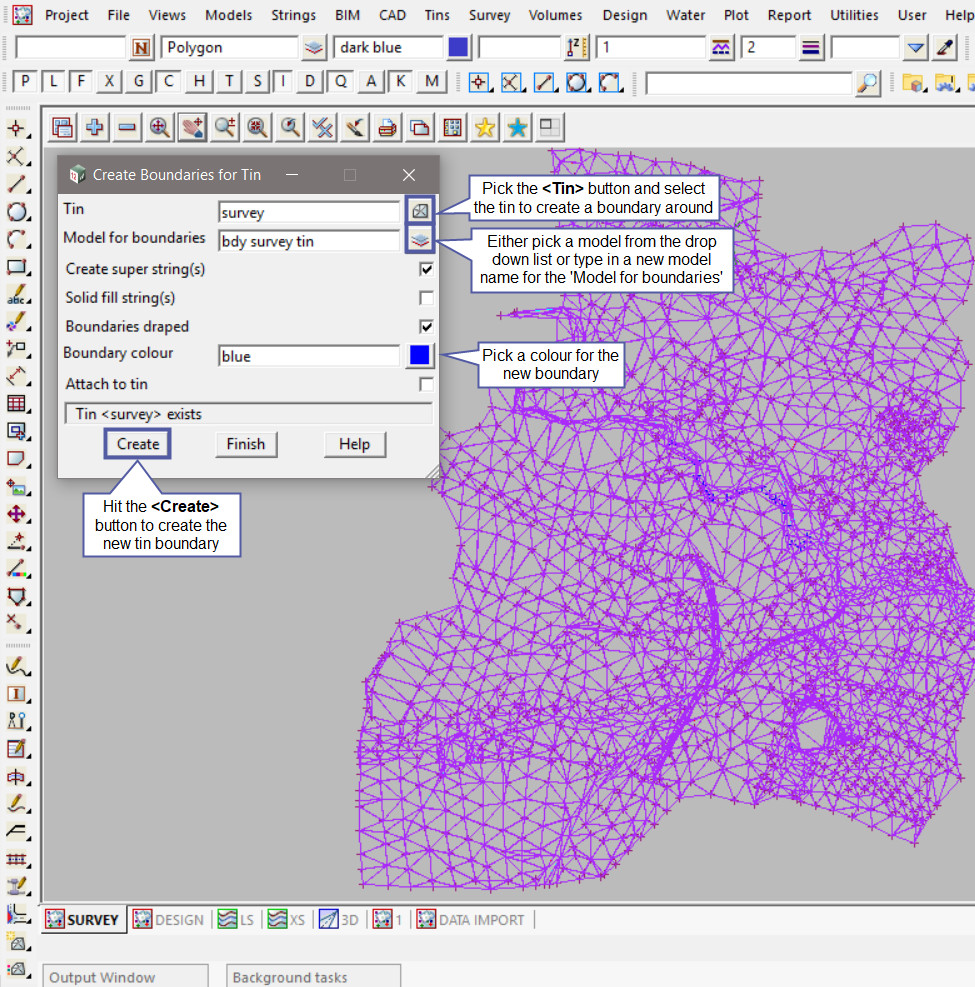
The panel tick boxes are:
- ‘Create Super String(s)’ – if ticked which is the default, the created boundary strings will be super strings, if not ticked they will be created as 3d strings.
- ‘Solid fill string(s)’ – if ticked, each of the boundaries is solid filled with the tin colour.
- ‘Boundaries Draped’ – if ticked which is the default, the created boundary strings will have the z-values applied to the new boundary strings.
- ‘Attach to tin’ – if ticked, the boundaries are remembered with the tin when you have the 250M version of 12d Model, and have Model Density turned on, if the density is such that the tin would only be drawn
as a red rectangle, the boundaries are drawn instead of the red rectangle.
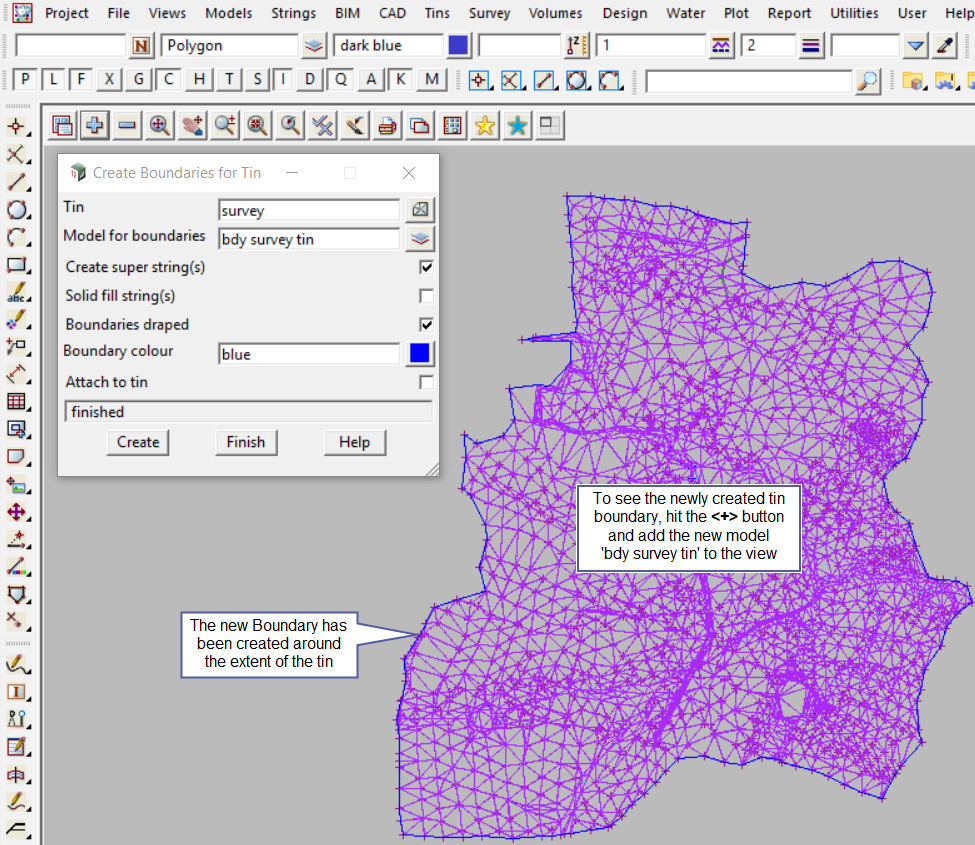
The new boundary string has been created and turned onto the view.
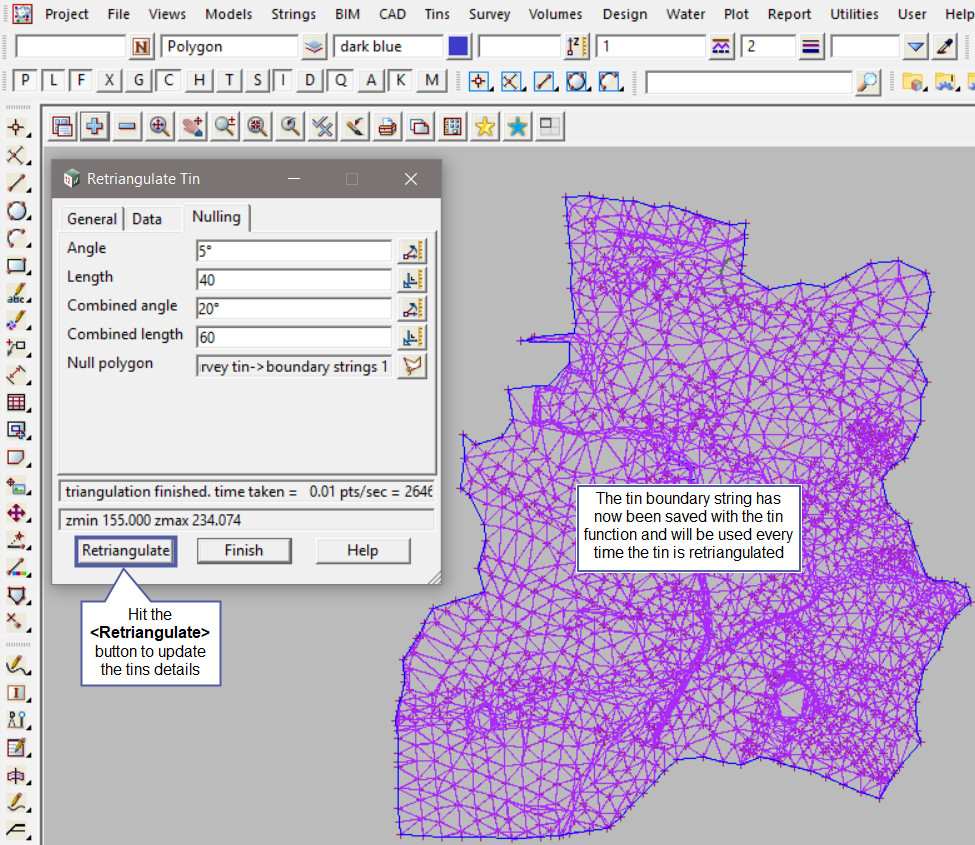
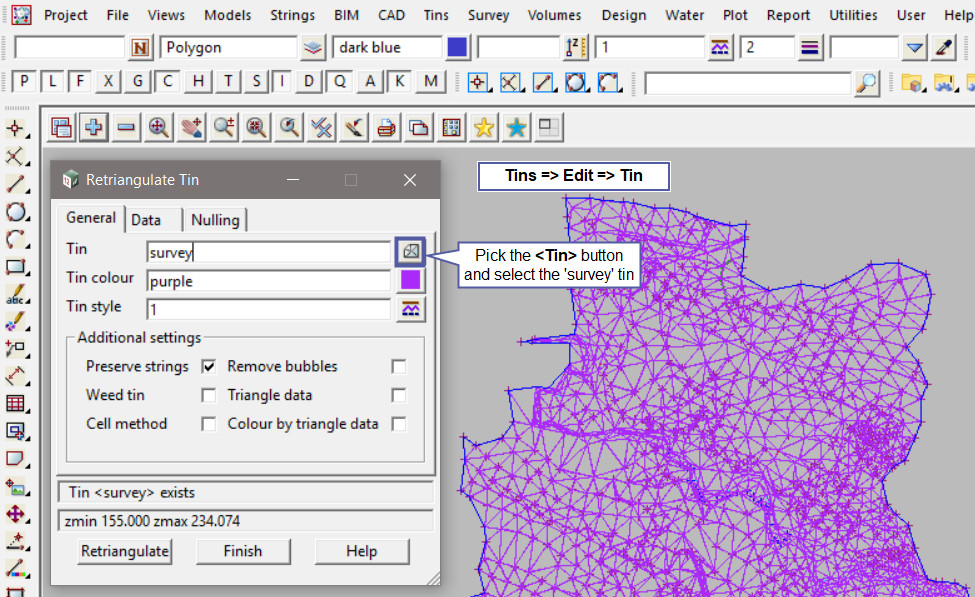
To save the newly created boundary string to the ‘survey’ tin for any re-calculations, open the Retriangulate Tin panel, Use: Tins => Edit => Tin
Pick the ‘survey’ tin from the drop down list, and its details will be loaded into the panel.
Select the Nulling Tab, and pick the <Null Polygon> button, then pick and accept on the boundary string.
The Null Polygon option allows a polygon string to be selected and any triangle whose centroid is outside the null polygon will be automatically nulled.
NOTE: If you do not save the new boundary string with the tin function, then any time the tin is retriangulated, any nulling that was done with the nulling options will be lost.

Hit the <Retriangulate> button to ensure that the boundary string is loaded and saved with the tin for any future retriangulations.
Now all the nulling is completed to the selected boundary.
